Throw-Back Thursday: “Stamp on, Dear Steffi”

Eight years ago today I wrote and published a post honoring a dear stamping friend, Steffi Sidney-Splaver, who had passed away shortly before. As I’ve been perusing ancient articles during this website transition process, I came across that post again, and thought it worthy of sharing again. Read it here.

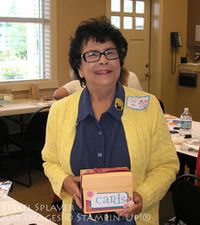
Steffi Splaver
Steffi Splaver

And our stamping group had also created the brochures distributed at Steffi’s Whidbey Island memorial service. I’d shared some of that design and assembly process here, as well.

For additional articles in which our stamping friend Steffi was mentioned, just type her first name into the search bar on this page.

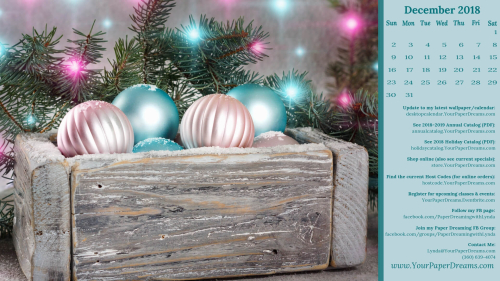
December 2018 Wallpaper/Calendar is ready to download!

 
2018 - 12 - December  - tinified
 
Yep! It's really here. December. And personally, I'm feeling pretty excited! Truth is, if you've been following me for a while you'll probably understand why it's been four years since I've had space in my life to participate in the festivities of the season. But although I'm still approaching this year's decorating season with a generous buffer of caution, I am at least thinking about putting up a tree this year, and even stringing some outside lights! It's been a long time since I've been able to even *contemplate* that kind of stuff, but I admit to feeling a bit hopeful that this – Just. Might. Be. The Year!
 
Oh! And would you be surprised to learn that the colors in this month's image are the colors I decorate with? I adore my fantasy sugarplum theme – on a white tree. Pure happiness! 🙂
My monthly desktop wallpaper background not only offers you a pretty seasonal picture to brighten your computer monitor, but also includes a handy monthly calendar and serves as a cheat sheet reference to websites you may want to know about and visit.  And it's even FREE to download and install, so please don't hesitate to share this page with your friends and family.
 
 
You'll probably want to consult your own computer operating system's installation instructions, but installing the background image on my Windows 10 system takes just 3 quick steps – and less than a minute. It's super-duper easy-peasy!
  1. I download and save the image to my computer - from the link just above that starts with "Click HERE". (NOT from the picture that appears at the top of this post!)  TIP:  To "download" the full-resolution image once it's open (from Google Drive where it's stored), I click on the downward-pointing arrow. THAT is what actually begins the download process to my computer.
  2. Once the file has been downloaded, named and saved to my computer's hard drive, I open it. 
  3. Then I right-click on the image and select "Set as" > "Set as Background"….. then right-click again and select "Set as" > "Set as Lock screen". And poof! That's all there is to it! (For convenience, I install this on both my desktop system as well as my laptop.)
And in case you may have an operating system OTHER than Windows 10, these tips may help with installation:
 
Finally, please keep in mind that the format of my monthly picture is designed for most modern-day 16:9 monitors (a common format for monitors and HD TV's since about 2009), oriented in landscape format. (1920 x 1080 pixels.) If you're working with an older monitor (one that is more square-ish in format), or your monitor is set up in portrait format, the picture will probably not work for you. Sorry 'bout that.

Snowflake Showcase – Last call

November's exclusive "Snowflake Showcase" has certainly been an amazing collection, hasn't it? So many beautiful snowflakes and versatile images – in both stamp sets and dies; I'm super-sad to see it coming to an end. But yep, today's its last day of availability; the curtain falls in just a few more hours.

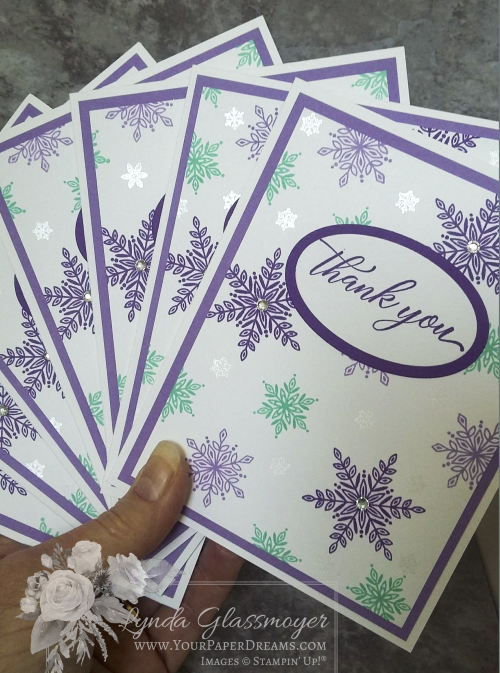
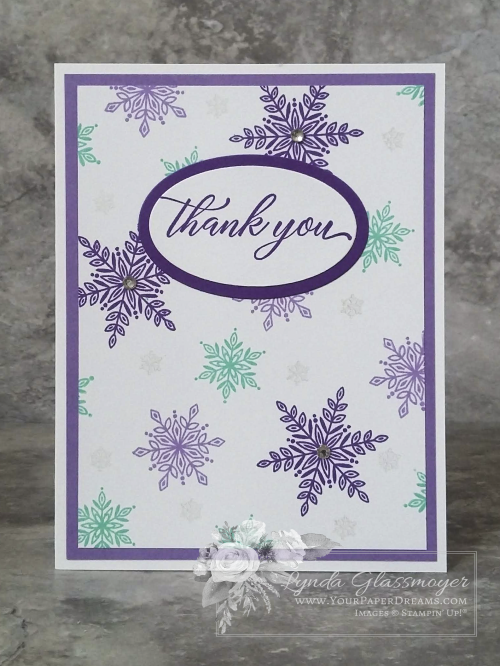
In the meantime however, I thought I'd share some of the thank you cards I've been sending out recently. Featuring… well, what else, lol?!? Not only some of my favorite winter-time images, but some of my very favorite winter colors, too!

20181125_113855

Besides the "Snow is Glistening"  and "Kindness & Compassion" stamp sets, these cards feature "Layering Ovals" dies; Highland Heather, Gorgeous Grape and Coastal Cabana inks; Frost White Shimmer Paint; Clear Rhinestone Jewels; and Highland Heather, Gorgeous Grape, and Whisper White cardstocks (WW in both regular and thick). And of course, the Stamparatus helped place that "Thank you" image exactly where I wanted it… nice and bright!

20181125_113125

There are still a few remaining hours to claim all or part of this collection for yourself. If you're still debating, let me help. The answer is "Yes!" – because snowflakes of this classic art style will never look dated, they can be used solo or in conjunction with other images on almost any winter project, and look fabulous in pretty much any color. (Well, maybe not so much Real Red or Cajun Craze, come to think of it….. but YOU know what I mean, lol!) 

See what's still available from the Snowflake Showcase here!

Black Friday (and beyond) Bonus Bags

So what's better than an Online Extravaganza that offers a chance to get almost any item from the 2018 – 2019 Annual Catalog at a 10% discount?

Well, how does an extra Black Friday (and beyond) Bonus Bag on top of that sound? Here's how that's gonna work:

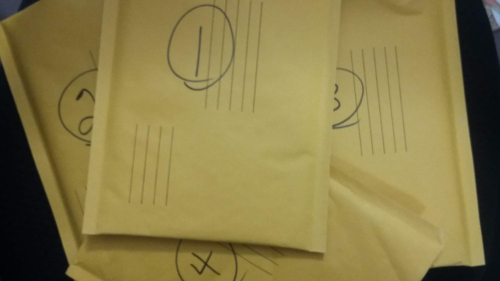
20181122_184431

See these envelopes? I actually have 10 of 'em. And they're each packed with various types of retired products. Stamp sets, cardstock, DSP, embossing folders, accessories, some left-over sample cards, etc.  That kind of stuff. But you don't know *which* envelope has *what* in it. And you *won't* know, until YOURS arrives in your mailbox!

How do you GET one of these envelopes, you might wonder? Well, during Stampin' Up!'s Online Extravaganza (Friday, Nov. 23 – Tues. Nov. 28), you'll be able to choose one of these envelopes for each $50 in product you order (through me, of course). This offer will continue throughout the Online Extravaganza dates until all 10 envelopes have been chosen, OR until Online Extravaganza ends, whichever occurs first.  Envelopes will be chosen in a first-come, first-served manner. Meaning that as qualifying $50+ orders come in, I will email you and ask you which numbered envelope(s) you'd like. The sooner you get back to me with the answer, the more likely you are to get the envelope(s) you requested. 

If all goes ok with my schedule, I expect to get the first round of these into the mail on Monday, with the final batch probably going out next Thursday. 

I'm super-excited to do this, and I hope you'll be just as excited to see what's in your "Black Friday (and beyond) Bonus Bag", too! 

But wait! Just in case you're wondering why they're called "Bonus Bags" when they're clearly NOT bags, but rather envelopes? Well, initially I wanted to actually offer literal "grab bags", and I thought "Black Friday (and beyond) Bonus Bags" would roll right off the tongue. But then I realized that the cost and hassle of packing and mailing ten 3D "bags" like that would be ridiculous. And basically prohibitive. So the "bags" are now envelopes. Or the envelopes are pretending to be bags.

DON"T MISS THESE TIPS!

Tips to maximize Online Extravaganza

And while I'm on the subject of Online Extravaganza again, have you seen the 3 tips I've published on my Facebook page recently to help you maximize this upcoming Online Extravaganza? Here are the 3 tips I've shared there:

  1. Save on the minimum s/h fee by combining your order with 1 or more local friends. Instead of each of you paying the full minimum (potentially 3 times over the course of the sale days), you can split that minimum fee among 2 or more people by submitting one order.
  2. Plan what you will order WHEN. Use the 3 date-specific categories found here (https://bit.ly/2zm8Vo5) to plan which dates you'll order WHAT.
  3. Will you (plus any local friend(s) that you might be combining orders with) be ordering a total of $150 or more of product during Online Extravaganza days? If so (or even if you THINK you might), ask me for your own custom Host Code BEFORE you place your very first order. Then, each time you submit an order during the first 4 days of the Extravaganza you'll just input that custom Host Code before you check out, and the ordering system will automatically connect the product amounts of all your orders together.  (COOL, huh?!?) Then when you're ready to submit your order for items from the 3rd category (Nov. 27-28), contact me directly and let *me* submit that final order for you, bringing your total product to at least $150, AND getting you Stampin' Rewards (aka free product) of at least $15 on TOP of it all! Lookie there! "Host" credit without even "hosting" anything!

But remember to get your $50 (or $100, or $150, whatever) orders in early during the Online Extravaganza – because not only are quantities of discounted items limited, but I've also ONLY got 10 surprise Bonus Bags (er, "envelopes") to send out! 

Now let the fun begin! Stock up on some of the basics and other items on your wish list + save 10% + grab a "grab bag disguised as an envelope"! 

2018 Online Extravaganza REVEALED!

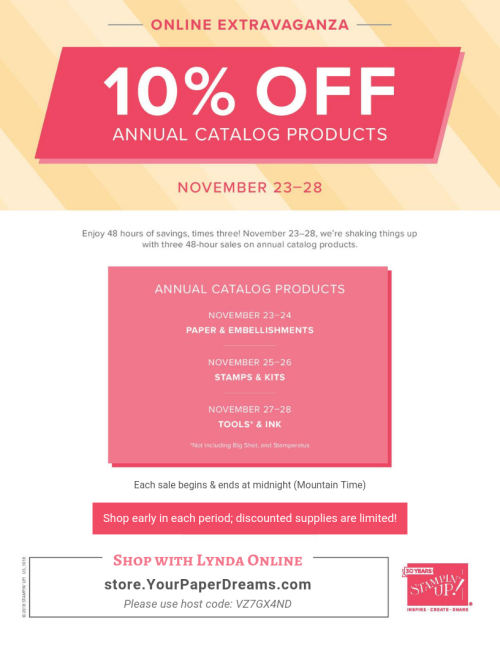
Online extravaganza personalizedI'm SO excited to finally be able to share the details of Stampin' Up!'s 2018 Online Extravaganza! 

Can you believe that over the course of 6 upcoming days (Nov. 23 – 28) almost everything in the Annual Catalog will take its turn at being offered at 10% off?!? How fun is THAT?!?

Ok, now yes, there IS a catch. Note the words in the previous sentence: "almost everything". And of course, I know that you'll naturally want to know what's excluded, right? So here ya go… the list that shows what will NOT be included in this sale. And yes, at first it does look like a long list, but when you consider how many individual items there actually are in the catalog, it's still a pretty modest percentage. Looks to me like it's primarily the pricier items (Big Shot & Stamparatus, for instance), items that generally move quickly and regularly anyway, a few items that might be in questionable supply already, host sets, and bundles.

But everything else? YEP! INCLUDED! 

So what should be your strategy here?

Well, I highly recommend that you begin by downloading this PDF flyer and studying it thoroughly. Note that each part of this sale will feature 2 categories of products – for 2 days. Timing will run from midnight to 11:50 pm (MOUNTAIN TIME) every 2 days, and best pickin's will most certainly be early in each 2-day period. That's because there is already a "safety limit" (my words) of items available at this 10%-off pricing, and when that limit has been reached, that will be *it* for the discount on that product. (Naturally, Stampin' Up! isn't too keen on potentially wiping out our entire inventory of products; you probably already *know* how we have enough challenge keeping supplies of hot stuff in stock anyway, lol!) But if the item shows in my Online Store at discount, then that means you're in luck!

So my recommendation? Grab your catalog and your wish list, and review what's still on your list. Then compare that to the "excluded" list, and to the categories below – to plan out your orders. And remember to shop EARLY in each time-frame!

November 23 – 24

  • Bags
  • Brads & Buttons
  • Cards & Envelopes
  • Cardstock
  • Designer Series Paper
  • Embossing material
  • Glitter
  • Ribbons
  • Twine
  • Specialty Paper
  • Tags
  • Washi Tape

November 25 – 26

  • Stamp sets
  • Project kits
  • Card kits
  • Kit refills
  • Memories & More
  • Punch box kits

November 27 – 28

  • Adhesives
  • Applicators
  • Cleaners
  • Cutting tools
  • Embossing folders
  • Framelits & Thinlits
  • Ink pads
  • Ink refills
  • Markers
  • Punches
  • Scoring tools
  • Stamp blocks & cases

Happy shopping!

PS: If you'd please apply my current host code as you check out [the current code is always available at the link up at the top of this or any page on my www.YourPaperDreams.com website ], I'd be most appreciative! Thanks so much! 🙂

Musings on a Sunday morning

  20181103_135405

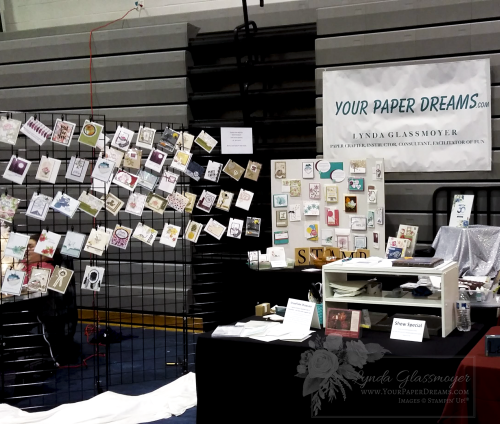
Yesterday was my 5th consecutive year hosting a booth at the Post Falls High School Craft Fair. And the first year that I really began to feel like a veteran there. You see, it's a little bit of a challenge to break into a new event such as this. I still remember breaking in to local booth events back on Whidbey Island (WA): at first a series of several single-day, small holiday-focused fairs, then the weekend-long Uniquely Whidbey Business Expo (before the event was sadly discontinued), and eventually the 4-day Island County Fair. Always feeling like the "new kid on the block" for the first several years… until eventually, you come to understand the "vibe", develop a following, and feel at ease. I guess this was that year for me. And it feels pretty cool.

While I've done several other holiday-ish events since moving here to North Idaho several years ago, this has turned out to be the only one I've participated in for these 5 consecutive years. Why? Well first off, it's technically within walking distance of my home. (Not while hauling 3 carloads of "stuff", but you know what I mean by "walking distance", lol.) And I think given it's practically in my backyard, it would feel pretty odd NOT to be represented there as a local crafter! So there's that little thing… 

But beyond that, this event is established and well-organized, with a good following and reputation. And believe me, I've been doing these gigs for enough decades to understand the critical importance of THOSE elements, too. 

As usual for this event, yesterday was SLAMMED first thing in the morning. Doors often open a few minutes ahead of schedule (which, granted, creates a bit of a challenge for those of us still tending to the final fussy details of set-up), but within only moments of the doors opening, the aisles are filled nearly to capacity and buzzing with excitement. This first wave of shoppers are serious. Almost all my financial transactions for the day occur during this first hour. It's exhilarating, and the time FLIES by! But I always feel a little bit wistful by the end of that hour that there's just not been quite enough of me to go around during the frenzy. Questions have come from all directions, and there's hardly been time to share the focus points I'd prepared, nor (especially) to actually relate to people on a human level as I'd like to. It's like "all hands on deck"… except I've only got two hands! And for that first hour, two are hardly enough.

And then the next couple of hours are a bit more relaxed and fun. There's still fairly strong interest from the crowd, and I get a chance to chat a bit more with guests, and showcase my planned featured products. Thankfully, the past couple of years I've had several people from the initial crowd drop back by during this timeframe, so I get a chance to reconnect a little more personally with them before the crowd thins to a trickle of casual strollers just past noon. (This is the point in an event of this type where we start chatting with our neighboring vendors, discovering their crafty talents and products, and sharing ideas to consider implementing in future years.)

This year I had chosen the magical Stamparatus for my demonstration product, and as I'd expected, it did indeed charm a whole LOTTA folk…. including those who at first weren't all that interested because they already owned a "M****" (which is a competing brand of stamp positioner, although retailing at a higher price for a more limited range of features). So it was really fun to show what THIS positioner could do… even though I kept it pretty basic and never even ventured into some of its fancier tricks.

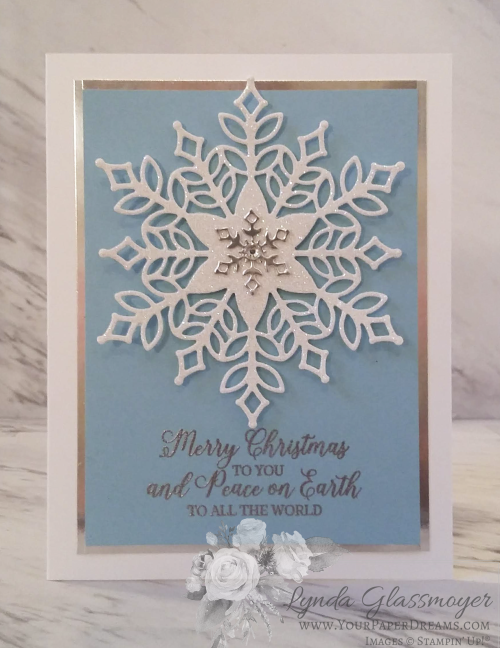
But the #1 attention-getter out of the entire day was far and away this card…
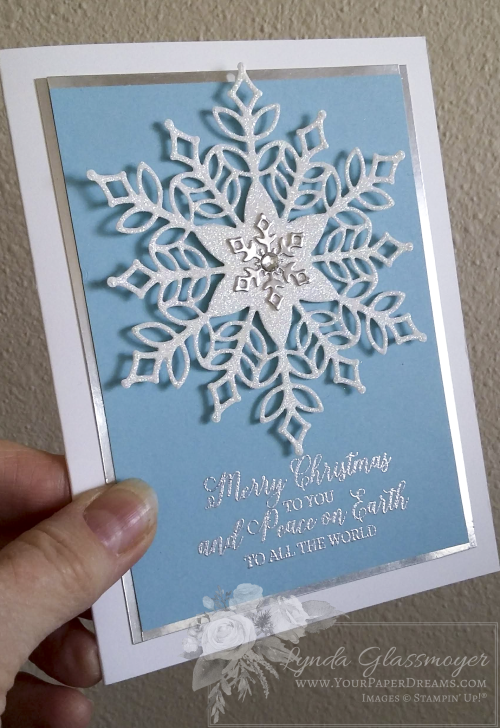
20181104_125100

…featuring elements of the Snowflake Showcase, of course. Photography doesn't do it justice, but it features such a beautiful die, simply partnered with classic blue and silver, and the pop and sparkle of glimmer paper. (BTW, this is one of the tutorials I'll send you by email around mid-November when you purchase *any* of the Snowflake Showcase products through me by then.)

Finally, I was blessed to have had my brother and my son (and even grandson) help with the muscle power of setup and take-down this year, so that went amazingly smoothly and left me far less physically exhausted than I usually am. I am SO grateful to all 3 of my guys for that!

Uh-Oh. Warning: approaching personal side jaunt for a couple of paragraphs…

Some of you may know that several months ago I decided it was high time to put some serious attention towards my health – which, due to other obligations in life, had kinda been relegated to the back burner in recent years. So the time had come that I was ready to not only shed some of the heft that had accumulated in places that I realized were particularly unhealthy, but to also make the types of changes that could address other facets of health as I plow into my "more senior" years as well. So after much studying, I headed towards low-carb, and specifically the ketogenic way of eating. Almost 3 months later, in spite of some minor bumps along the way, it's proven to be exactly what I needed. And the more I learn and observe how my body has responded, the more I grow convinced of that… and the more I yearn to learn even more. So I read, and listen to podcasts and YouTube interviews with amazing experts in the field – as often as I possibly can.   

This morning I was watching a recent video interview with Dr. Dominic D'Agostino, and as the interview was coming to a close, he was asked for his "#1 thing" that would make the biggest positive change on someone's health, and his answer evolved around relationships. "Get your relationships right", he advised. And schedule in "creative downtime" with people who matter to you. Further, he advised being passionate about something that can help or serve others.

BINGO!

That comment reminded me instantly about why I've been with Stampin' Up! for this many years! I, like so many other long-time demonstrators, came into Stampin' Up! because of the products. Because of the fun, creative outlet. But we've stayed because of the people. The tribes we've built while we've been doing this. And I *particularly* count among my "peeps" – my team members and customers. People I interact with on a daily, weekly or monthly basis. People who sit around the stamp table with me, or those who WOULD still be sitting around the stamp table with me if I hadn't moved away from them – or they away from me. People who show up to class in a rotten mood and leave with a smile on their faces. People who follow me on the web, and comment or "like" whatever I share, even when their own lives are busy and they don't need to. And those team members from across the country who participate in our online events and activities – and generously share ideas with the rest of us. These are people I've come to know personally at least at some level, and they've woven themselves into the fabric of my life… and I'd like to think it's mutual.

So back to my craft fair booth of yesterday…

Yesterday I heard several stories that, interestingly, I hadn't heard before. Stories told in different words, but with the same basic theme. From ladies who lamented that they'd sold or given away the stamp supplies they'd collected and used sometime in the past. Because NOW they were recognizing that that part of their lives had really been about more than stamps, ink and paper – it was about friendships they'd developed along the way. And now that they'd separated themselves from that activity (and those people), they realized they were seriously missing that part of their lives.

And I totally understand that.

So while I can't help them regain those exact same connections, I'd love to help them create new ones. So of course I invited them to join us at OUR monthly classes, and I hope they will.

If you're reading this and you were one who shared a similar story with me yesterday, please DO come hang with us on the 4th Tuesday of most every month (except December, which will be on the 11th). We'd love to welcome you back. Come sit around the stampin' table again and become part of our stampin' tribe!
Snowflake Showcase

Snowflake virtual swap card - w my wm
Do you love snowflakes at Christmastime as much as I do?

Sweet, sparkling snowflakes evoke the nostalgia of a “white Christmas” – even when the reality of snow manages to complicate certain elements and transportation logistics of our modern-day lives. (Like even GETTING to Grandma’s house in time for Christmas dinner, for instance. And especially if there might be mountains involved between oneself and one’s destination.) Nevertheless, we love the concept of the silent and pristine white blanket all around… and the beautiful patterns snowflakes make, whether individually or en masse.

So, if you’re a snowflake lover like I am, I’ll bet you’ll be thrilled with what Stampin’ Up! has created for us this month!

“Snowflake Showcase” is an exclusive set of 5 products designed to appeal specifically to those of us who count ourselves among snowflake-admirers. These 5 items will be available for the month of November only – and only while supplies last. No, they’re not in any catalog, but will be available through the online store as long as inventories hold out. (Or until November 30th, whichever occurs first.)

This gorgeous collection consists of 2 stamp sets, a set of dies, and a couple of accessory items. No bundled pricing this time around… which means that you can pick and choose your favorites – as long as they’re still available. And if one item runs out, there won’t be concerns about having to 86 an entire bundle just because that item might have been part of it.

For those of you young-uns who might be reading this, waaaayyyy back when I used to wait tables in a restaurant, the term “86” meant to delete a menu item because we’d run out of it. It wasn’t uncommon on a busy dinner shift to hear a cook holler out from the kitchen, “86 the bakers!” Which meant we servers were not to take any more orders for baked potatoes because we’d just run out of them.

Now, according to Google, that term isn’t used much anymore these days – not even in restaurants. Frankly, I don’t know if that’s true or not (kinda makes me wonder what they holler out *nowadays* when they run out of baked potatoes, lol), but I’ve continued to use the term, and I’ve heard it used a number of times outside of restaurant-speak over the years, as well.

(This piece of restaurant nostalgia brought to you by Denny’s, cir. early 1970’s.)

Ok, so back to the Snowflake Showcase…

Here are the 5 fun products that are part of this exclusive opportunity. Note that the die set includes shapes that coordinate with each of the stamp sets, and that amazing set of dies includes 20 of ’em!

And hang onto your stocking caps, ‘cuz you won’t want to miss the white velveteen sheets, either!

Now, I’ve got something else in store for you, too! About mid-November, I’ll be sending out a special email to everyone who has purchased even one item from this collection (through me, of course), and this email will be filled with Snowflake Showcase project ideas – including the step-by-step tutorials for each one of ’em!

So THERE is a very good idea for ordering your Snowflake Showcase products early in the month. But here’s another…

Remember I said that they’d only be available “while supplies last”? Well, we already know these are going to be popular! Which means the odds of one or more of the items running out of supply is likely. So the earlier in the month you order yours, the greater the likelihood you’ll get your hands on the items your heart is set on. (AND the longer you’ll have to use your new goodies this winter season, too!)

So in case you haven’t noticed, I don’t recommend waiting very long to get your favorites from the Snowflake Showcase.  In fact, you can do it right now at store.YourPaperDreams.com!

And then keep an eye out for your special email filled with project ideas – arriving around the middle of November!

Blended Seasons – Limited Time Availability

1
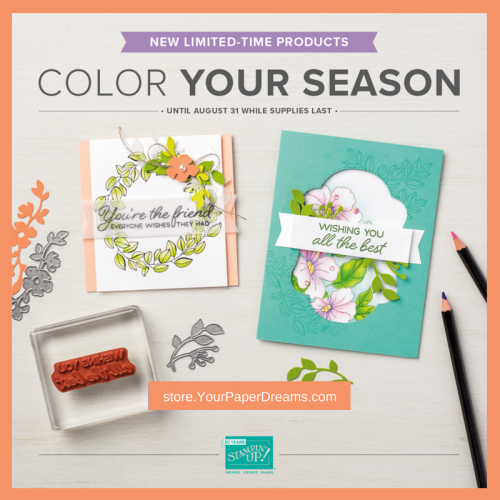
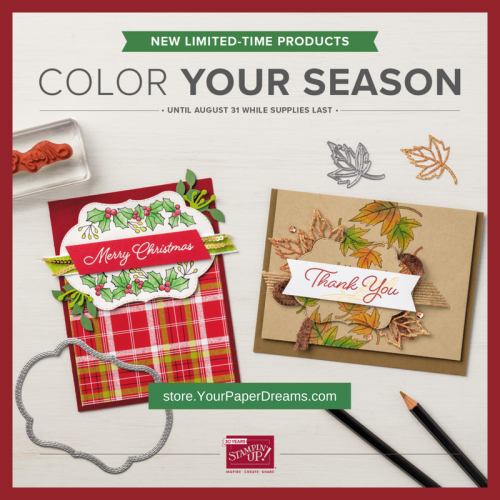
Don't you just love stamp sets with seasonal longevity? And what if such a set also had a matching die set that included a beautiful, unique element that Stampin' Up! has never offered before? And what if you could add 10 new, fresh colors to your watercolor pencils collection? 

Well, that's exactly what August's special limited-edition offer includes!

Introducing the "Color Your Season" collection…… available only during August 2018, and only while supplies last!


2

 There are 3 elements to this offering (an exclusive 2-volume stamp set, an exclusive die set, and a set of watercolor pencils in 10 fresh colors). You may choose to get 1, 2 or all 3. The best way to see everything that you can get, and all the details you'll need, is by downloading this 2-page flyer.

Now, you won't want to wait very long to order these because the stamps and dies will only be available during this month of August, and ONLY while supplies last! (And if you've been around Stampin' Up! for very long you KNOW what those 3 little words "while supplies last" can mean, don't you?!?)

While the watercolor pencils make a lovely addition to your 12 stamps and 10 dies, they will eventually appear in a future catalog and you can get them at that time if you MUST wait. (But why not get them now, while you can take advantage of August "Bonus Days", and use them with these stamps and others you may already own?!?)

Oh! And might you be wondering if you can get a discount if you order BOTH the stamps and the dies as a bundle? But, of course you can!  🙂

20180803_180001

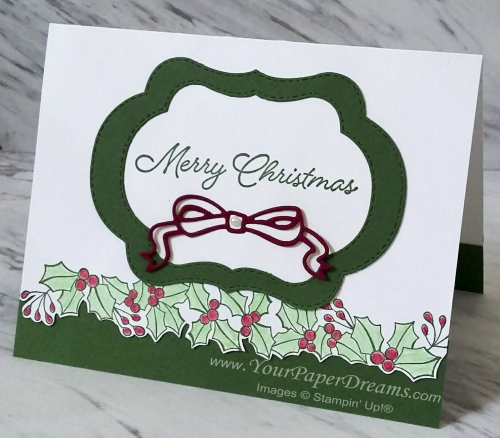
In the meantime, I'll leave you with my very first Christmas card of 2018……  one of the cards from my July card class. It features a couple of each of the 3 products from this collection: stamps, dies, and watercolor pencils.  And did you notice that all 3 of the frame dies have stitching on both inner and outer edges?!? Be still my heart! Even if you used only just *those* frame dies, you'd still get lots and lots of use out of them when combined with other dies and stamps you may already own!

Remember that the earlier in the month you grab your "Color Your Season" products, the more likely you'll be to GET them before they're sold out. Be careful to not wait too long and risk disappointment.

  "BONUS DAYS" reminder!

With every $50 product order you place in August,
you'll get a coupon for $5 off your September order. No limit!
So if your product total is getting close to $50, $100, or $150, etc., then you might want to bump it up.
Also, don't forget that orders of $150 or more (that aren't part of a hosted event) always qualify for Stampin' Rewards, too…
meaning at least $15 in additional free products in your box!

August Wallpaper/Calendar is ready to download

2018 - 8 - August - tinified
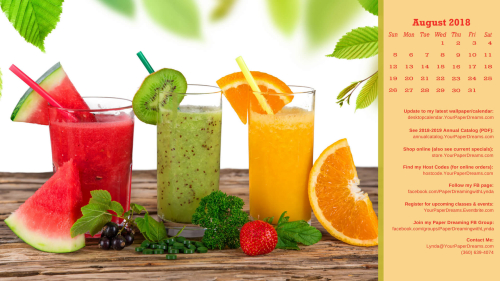
As I'm preparing this month's calendar, the thermometer on my balcony is reporting 100-degrees, and a dry, smokey wind is blowing in from the southwest. At 14% humidity, these refreshing beverages look like just the thing to soothe a scratchy throat.
 
My monthly desktop wallpaper background not only offers you a pretty seasonal picture to brighten your computer monitor, but also includes a handy monthly calendar and serves as a cheat sheet reference to websites you may want to know about and visit.  And it's even FREE to download and install, so please don't hesitate to share this page with your friends and family.
 
 
You'll probably want to consult your own computer operating system's installation instructions, but installing the background image on my Windows 10 system takes just 3 quick steps – and less than a minute. It's super-duper easy-peasy!
  1. I download and save the image to my computer - from the link just above that starts with "Click HERE". (NOT from the picture that appears at the top of this post!)  TIP:  To "download" the full-resolution image once it's open (from Google Drive where it's stored), I click on the downward-pointing arrow. THAT is what actually begins the download process to my computer.
  2. Once the file has been downloaded, named and saved to my computer's hard drive, I open it. 
  3. Then I right-click on the image and select "Set as" > "Set as Background"….. then right-click again and select "Set as" > "Set as Lock screen". And poof! That's all there is to it! (For convenience, I install this on both my desktop system as well as my laptop.)
And in case you may have an operating system OTHER than Windows 10, these tips may help with installation:
 
Finally, please keep in mind that the format of my monthly picture is designed for most modern-day 16:9 monitors (a common format for monitors and HD TV's since about 2009), oriented in landscape format. (1920 x 1080 pixels.) If you're working with an older monitor (one that is more square-ish in format), or your monitor is set up in portrait format, the picture will probably not work for you. Sorry 'bout that.

Playing with inlays

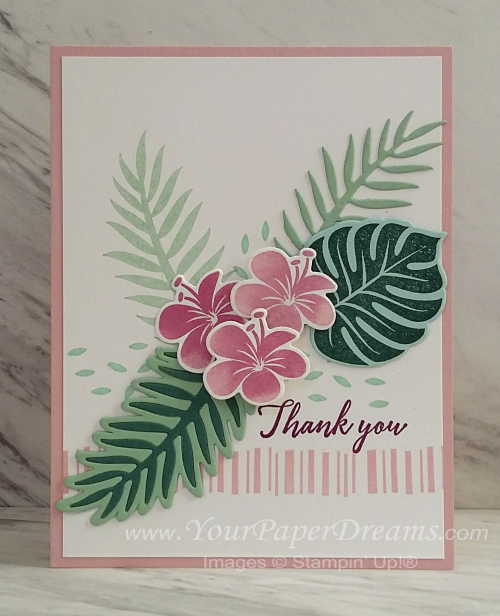
I've been having a lot of fun recently with various forms of paper inlays. That is, embedding one paper image (usually cut with a die) into another piece of paper or cardstock so that the two (or more) elements work together as a unit. There are a number of forms of this technique, but today I'd like to share where multiple colors can be used within a single die-cut image to offer up variations of color.

20180723_072547

The card just above was my first attempt at this, and yes, if you're thinking these dies were recently retired, you would be correct. But these images are a perfect size to practice inlay if you're new to this technique because they're mostly large enough to handle reasonably easily. And I do recommend that if this is your first attempt, try to find an image with pieces large enough to handle. Don't make this harder on yourself than it needs to be, 'cuz it's supposed to be fun!

On this next card, I used this inlay technique on the lower left leaf to get the two shades of green…

20180723_072726

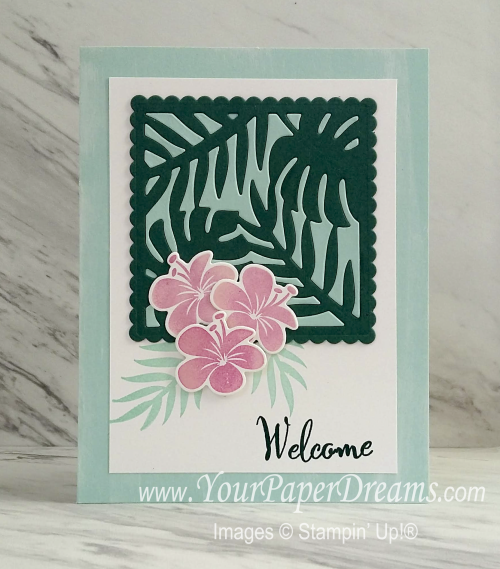
And on this next example, I'll walk though the steps and tips for doing the two-toned inlay on the square element at the top…

Tropical Chic

The colors of cardstock I have used on this square section are Pool Party and Tranquil Tide, and the dies are from the "Tropical Chic" bundle. I started by cutting out the same die shape from a scrap of each of those colors, and basically followed the same procedure with each one.

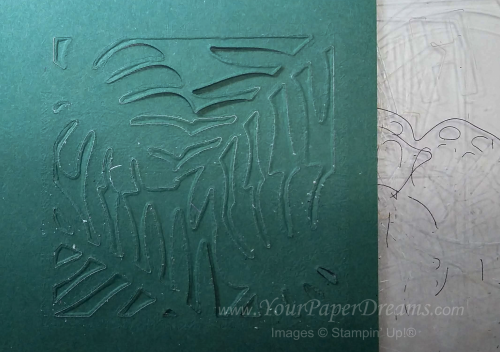
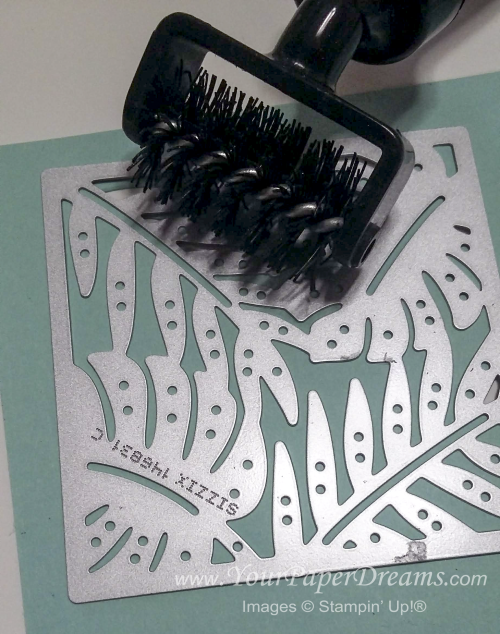
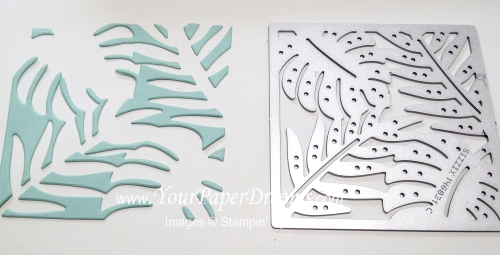
First, I set up my usual die-cutting sandwich stack and ran the stack through the Big Shot. But then when it came out of the machine, I didn't rip into the stack in my normal way; instead, I removed the entire stack from the machine and flipped the whole thing upside-down. Now I carefully removed layer by layer until I revealed the underside of the newly die-cut cardstock.

20180723_113437

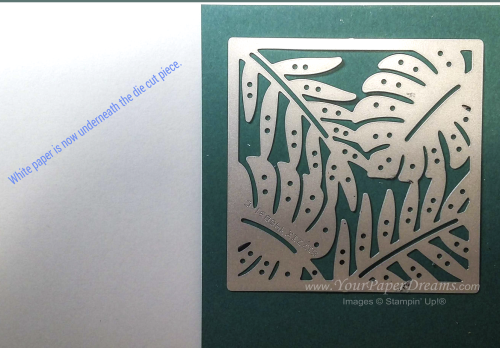
Next, I laid a sheet of contrasting paper (white, in this case) over what remained of the stack and held it in place tightly while I flipped the remainder of the stack back over, and laid it onto my table. So now I could carefully remove the cutting pad (which was once again on top), and ended up with this:

20180723_113540

(Note that going forward I'll be illustrating the process with the contrasting color of cardstock. But I did exactly the same process to each of the two colors I worked with, which ultimately gave me two completed squares – to make two cards.)

Next, using my die brush along with a wooden skewer VERY carefully, I poked out the cut pieces and let them fall into place onto the white paper. Yeah, I did have to make a few adjustments because this step never works exactly perfectly, but the point of this was to try to keep all the little pieces in relative order so I could work with them easily later. These will eventually become pieces in a miniature jig-saw puzzle!

20180722_160642

20180722_161243

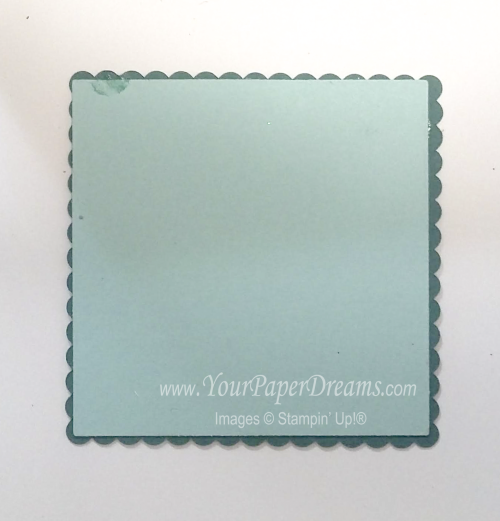
Each time I have made one of these embedded examples I have found it helpful to adhere a "base" layer of cardstock underneath the main layer. This ensures the die cut images with all the holes in it doesn't stretch out of shape, and it also prevents drawing attention to any imperfections where one piece might not match up perfectly with another. For this latter reason, I usually make the base layer from the same color of cardstock as the pieces which will eventually be inlaid.

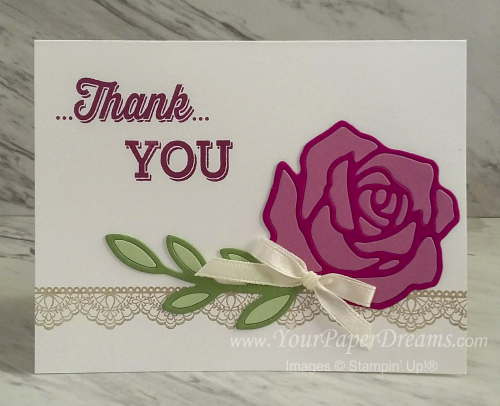
For the 2 examples shown at the top of this article, I die-cut just the outer shape of the image when a die was available, and traced and cut out a base when there was no die of that shape. (That rose does not have a solid shape, so it required tracing and cutting by hand.) Then I carefully glued the detailed shape onto its base. For my third card, I used a couple of square dies to trim up the final image, as well as to create a base layer for underneath. Here's the bottom view of the base layer…. just a little smaller than the finished piece, as you can see:

20180722_162712

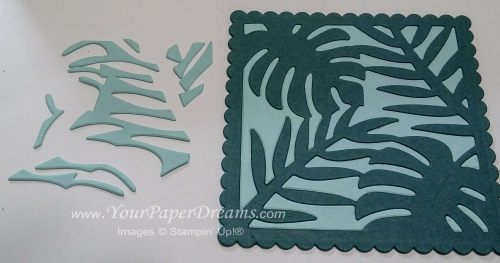
Now with all the preliminary steps complete, it's time for the fun part….. to start adhering and embedding all the little pieces into their proper spaces. Begin with the piece right-side-up, and insert a teeny-weeny bit of glue onto the base layer in a few open spaces. (Tip:  I like to use a half-and-half mixture of Fine Tip Glue and Multipurpose Liquid Glue, dispensed from a Fine-Tip Glue Pen. I shake this up before using it, but then tap the bottom of the bottle on the table to reduce numbers of potential bubbles. This mixture maintains a little more "body" as it's dispensed, and doesn't take as long to dry as pure Fine Tip Glue does because it's not as liquid.)

Don't put glue in too many places at once; you don't want it drying up on you as you're still inserting pieces into place. A little experience will tell you how far ahead you can work with the glue. And don't forget that when I refer to a "teeny-weeny bit of glue", that's EXACTLY what I mean. ONLY enough glue to anchor the punched-out piece, and NO MORE!

This next picture shows pieces that have already been adhered in place along the left and lower areas. Can you see why it's important to keep the unplaced pieces in relative order for purposes of preserving one's sanity? 

20180722_162015

Most of the time I find I can pick up these pieces with my fingers (and fingernails), but ultimately there are will be a few pieces that are just too small for that. So I have found that if I quickly lick the tip of my pinky finger, touch it lightly to my other hand, and then touch it to the itsy-bitsy little piece, that little challenge piece will usually adhere to my pinky just long enough to set it right down in its appropriate place.  Whew!

And don't forget that if you need reading glasses for close-up work, WEAR THEM! And have adequate working light, and go stare across the street when you're done. It doesn't take my eyes very long to remind me that this kind of minute task isn't very friendly to the eyes.  Ah, but the finished result is certainly worth it!