2015 – 2016 Annual Catalog goes live today

Annual15_Cover

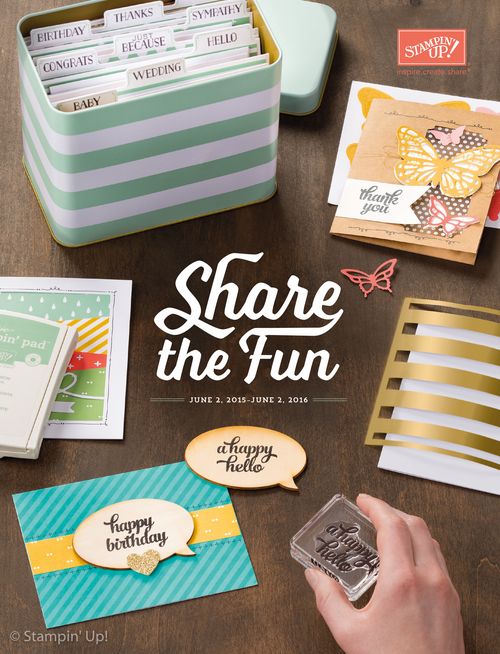
Well, we've waited a long time, but it's finally official! The 2015 – 2016 Annual Catalog is available to order from today! And along WITH this brand-new catalog, you can also order from the outgoing Annual Catalog (inventory that's left, that is), as well as the outgoing Occasions Catalog. TODAY only, however…… because beginning tomorrow, June 3rd, only the New Catalog products will be available.

So today's the sweet spot: 3 Catalogs' worth of projects to choose from, OLD prices (beat the price-increases), and OLD host plan (somewhat more generous at lower sales total levels). 

A few quick tips if you're ordering today (June 2nd): 

  • If you're looking for something that's not carrying over to the new catalog it won't show in the online store just by browsing. Instead, you'll need to perform a "search" to find it in the database. That's because the online store has already been set up with categories that are pertinent only to the new catalog going forward. So search by a single word at a time until you find what you're looking for. (For instance, I located the entire group of MDS digital downloads by performing a search on the word "digital" this morning.) If you know the product code of your desired product, that will certainly be the quickest route. 
  • Originally scheduled to expire on May 31st, all MDS elements were given a short reprieve, so they'll still be available for purchase through today only. (Still at 30% off.) But they must be downloaded and saved to your computer by June 9th. That is the "revised" last date of support for MDS…… meaning the download manager system, MyDigitalStudio.net, software support, YouTube and Pinterest, etc. will not be available after the 9th. DON'T lose your digital downloads! Make certain to have them all downloaded and saved to your computer by the 9th, and make sure your MDS software is updated, too, if you will continue using it. (For another option, read here.)
  • The online ordering system will go down for maintenance tonight at midnight (Mountain Time). If you are in the Pacific Time zone (or later), be sure to take YOUR time zone into consideration. For example, if you're in Pacific Time Zone, it'll be 11 pm when the system goes down. Be sure to have your order completed and submitted before then.

Thanks for another great Stampin' Up! year, and I look forward to the adventures and fresh, new changes this upcoming year will bring!  

MDS – a last-minute update

So today is May 31st.

The day that MDS (and all its related elements) was *supposed* to sail away into the sunset. Well, not sail away as in "quit working", but the last day for the software and digital downloads to be available for purchase or download, and the last day to upload completed projects for printing or to get support for your software.

MDS to MyMemories transition

But we MDS fans have been handed a tiny bit of a reprieve: the "last day" for availability has been extended to June 2nd (note that's only a whole whopping 2 days, lol), and support will be available until June 9th.

Hopefully you're all "set" and ready for the transition, but if not, you've still got 2 more days to purchase or update your software…. and purchase, download and save your digital images. And don't forget that everything's available for 30% off as it's closing out! Here's the list of included elements if you'd still like to grab something.

You can read more nitty-gritty details in this lengthy newsletter I sent to MDS fans a couple months ago.

MDS & Digital Project Life

In the meantime, I've since learned (through personal experience) a couple of other tips I'd like to pass along regarding using Digital Project Life by Stampin' Up! – with MDS. If there's ANY chance that that's something you might ever like to do someday, I urge you to do these things right now:

  • Purchase and download the Simply Life photo templates. While not "official" Project Life page templates, they're very similar and I'm finding they work just fine. (And OH SO MUCH EASIER than messing around with Photoshop Elements to try to create a page!) Also at 30% off right now, you can get your Simply Life photo templates very inexpensively right here.
  • Then go here to purchase any of the Project Life by Stampin' Up! digital card sets you might like to have. May I recommend the beautiful and versatile black & white "Love Story" set???  Wedding theme or not, you'll find plenty of uses for it, I'm sure!
  • And THEN download your digital cards in "other" format! The reason for doing that is that your Simply Life layout templates are set up to accept "photos" in their photo boxes. But if you download the digital cards the usual way for Windows or Mac, they will install as "embellishments"….. and you won't be able to just click and drag them into your photo boxes. But instead, when you download them with the "other" option, you can create a folder on your hard drive wherever you wish, and store the images there exactly as if they were photos; then to use them you'll just navigate to that "photo" folder (from within MDS), and treat the images as any ol' photo by clicking and dragging them into place on your page. Slick as a whistle! Now, since it doesn't cost you any more than a couple of minutes, I *also* recommend you download them for Windows or Mac, too…. just because you're probably used to that, and the "stamp" images will still work as usual. But by also choosing to download as "other" you can click & drag to place your "cards" and make your Project Life scrappin' go lickety-split!
  • And finally, to continue scrapping with Digital Project Life, I think that going forward, the future Stampin' Up! card sets will be available in digital format at ProjectLife.com. (Becky Higgins' site.)

Moving on from MDS

MDS to MyMemories transition
And when the time comes that you're ready to move on from MDS for whatever reason, remember that MyMemories is offering a transition special for THEIR software, which supposedly is very similar. I have no personal experience with MyMemories because I'm opting to stay with MDS at least for a while longer, but you can read all about the MyMemories transition offer here.

So here's to digital designing for some time to come! I STILL believe there's a market for simple digital design, and think MDS had everything going for it and was without a doubt the EASIEST and BEST system for digital scrapping and design out there….. except it was just a touch ahead of the marketplace. Sadly, the public hadn't quite caught up to it yet. Darn.

New Work

New Work

This is an example of a post. You can add content, images, video and more to posts. You can also link textbold text and italicize text.

Lorem ipsum dolor sit amet, qui ex civibus qualisque adversarium, ad sea iusto scripta adipiscing. Nobis interesset est ad. Ex odio laoreet antiopam. Per id reque verear veritus. Eu animal dolorum vel. Ius te vero sonet consectetuer, eam vide nihil referrentur eu.

Magna appareat vel ex, et nec modo lorem. Duo at velit corpora dissentias, ad nobis invenire reformidans. Dolor aliquid vituperatoribus et vim, possit virtute mei at. Affert ornatus nam ea, ea fabulas detraxit mei. Saepe dictas admodum in vix.

Example Heading 1

Example Heading 2

Example Heading 3

Example Heading 4

Example Heading 5
Example Heading 6

 
Case probo mei et, diam veniam pro no. Vel te stet rationibus voluptatibus. Dictas fastidii definiebas at vim, numquam temporibus eos id. Pri no incorrupte consequuntur, cu pri vivendo tacimates urbanitas. Liber accusamus no pri, rebum gubergren id eum.

  • Example list item 1
  • Example list item 2
  • Example list item 3
  • Example list item 4

Eam omnium iuvaret at. Ut reprimique neglegentur consequuntur eum. Qui ad tantas scripta impedit. Ut nostro comprehensam vel. Ad veri veniam inimicus ius, eum oratio mollis no porro.

This is an example of a blockquote. Lorem ipsum dolor sit amet, qui ex civibus qualisque adversarium, ad sea iusto scripta adipiscing.

Magna appareat vel ex, et nec modo lorem. Duo at velit corpora dissentias, ad nobis invenire reformidans. Dolor aliquid vituperatoribus et vim, possit virtute mei at. Affert ornatus nam ea, ea fabulas detraxit mei. Saepe dictas admodum in vix.

Welcome to Occasions and Sale-a-Bration 2015!

They're here! They're here! Not only does the Occasions Catalog (which I sometimes call the Spring Catalog) launch today, but so does Sale-a-Bration!

2015-OccasionsCatalogSo far, the reviews for the Occasions Catalog have been amazing, and from a personal standpoint I am SO ready to think spring, even as we are in the height of winter around here. So the moment I laid eyes on the cover of this year's catalog my heart melted. (If you're a flower-lover like I am, I'll bet yours will too.)

And the Sale-a-Bration (SAB) offerings are STUNNING this year! 2015-SABcatalogsGorgeous stamp sets, a couple of DSP (Designer Series Paper) collections (including a unique tone-on-tone design just screaming for some fun color-application techniques), a Project Life kit, and even free (yes, FREE!) Stampin' Blendabilities Markers! Here's a refresher about how Sale-a-Bration works:

  • Customers – You can't buy 'em; you can only get these exclusive SAB items for FREE. Choose one SAB item for FREE with every $50 regular product you order
  • Party or Class hosts – Get $25 BONUS host dollars when your event reaches $250 in sales
  • New Demonstrators – Join Stampin' Up! during Sale-a-Bration and choose a project kit from the Occasions Catalog for FREE, or choose any 2 SAB items for FREE
  • ALL demonstrators – Get all the perks that customers and hosts get, PLUS earn additional credit for ANY free merchandise of your choice by selling and sharing during SAB!

This is gonna be one FUN spring!

My regular customers on Whidbey Island were able to pick up their complimentary catalogs in Freeland this past weekend, and Post Falls area ladies will get theirs at Card Class on Thursday. If you don't already have a demonstrator with whom you work and purchase, I will be happy to provide you a complimentary set (2015 Occasions Catalog & SAB brochure) – for just the cost of mailing, should mailing be necessary. (Please contact me to inquire about a couple of options.) In the meantime you'll probably want to check 'em all out via their PDF's by clicking on the images above.

So let's STAMP! I'm booking hands-on Card Classes and Introductory Parties now; contact me to reserve your play date soon. But if you just can't wait for playtime, of course you can order right now at: store.YourPaperDreams.com 

Christmas Cards by YOU!

Some of my favorite moments of the holiday season are opening handmade cards from my stamping friends.  I got some beautiful ones this year, and would like to share them here. A couple today, and some others in subsequent posts…..

PC290310 copy

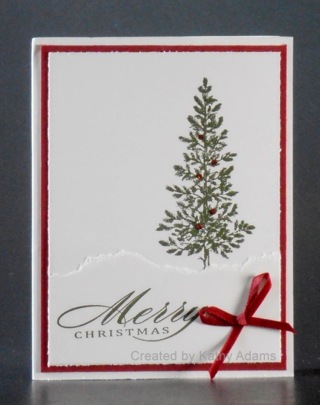
First up, this totally elegant and simply-stated tree from Kathy Adams. Done in traditional red and green, I ADORE the torn white layer at the base of the tree, suggesting a snow drift. Not so obvious in the photo, are several carefully-placed dots of red glitter adorning the tree, too. I have always believed the key to a simple and elegant card is balance, and Kathy has nailed that. BEAUTIFUL, Kathy!

PC290311 copy

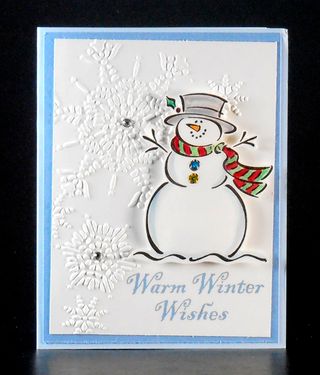
I was still sliding Frosty from his envelope when I felt a big warm grin overtaking my face! Although Frosty's been gone from the Stampin' Up! line-up for several years now, he was a faithful icon for many, many years. (Back in the day, every time a new catalog came out we'd always rush to see if Frosty had survived the cut to get to hang around and play for another year. He even eventually earned the nick-name "Frosty, the Teflon Snowman", lol.) I remember showing all kinds of projects with him at Club and at Stamp Camps: basic cards, 3-D flip cards, glass Christmas tree ornaments….. But as often as I used him I never grew tired of him, and to this day he still brings on that great big grin whenever he shows up. So it was pure delight to see him reappear in my mail this year. Sharon Clark, my longtime dear friend and upline (yes, you can blame HER for this amazing nearly-19 year journey as a Stampin' Up! demonstrator….) was the creator of this charming card.  Thank you for the nostalgia, Sharon!

Merry Christmas

Wishing all my Stampin' Up! family (Customers, Downlines, Uplines, Sidelines & company employees) a very Merry Christmas! Thank you for being such an enormous blessing in my life!

Christmas 2014

Year End Clearance – up to 80% off

Flyer_2014_year_end_clearance
Wow! You must have been "very good", because just in time for Christmas, Stampin' Up! has dropped another little gift into your stocking! 80% off of select retired products, including a number of favorites from Christmases past and present! Check it out and see if there's something here you may have missed. At first glance through, I immediately spotted 3 items that people have asked me about recently! But as usual, supplies are limited to what's on hand, so better shop early for best selection.

Preferred Customer Club: Please grab the current ordering code (tab at top of page) before heading off to shop. Thanks!

PS: You can click the image to see it larger. It's easier to read the fine print that way. Oh, and some of the missing fine print includes: Limited supplies (we already talked about that), all closeout sales are final, and you're welcome to include regular (current) products on your order, too!


Lynda’s Black Friday celebration

IMG_20141128_142939
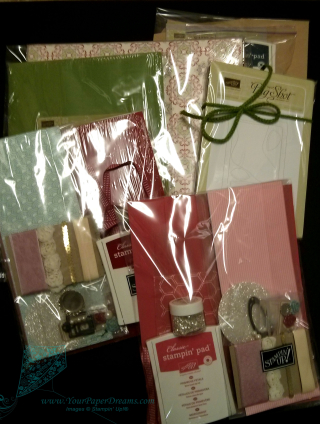
Overnight last night, I sent out to my mailing list (newsletter.YourPaperDreams.com) a special bit of fun I've got in store for Black Friday…. for all my customers who've chosen $50 or more in product (through me, of course) during Stampin' Up!'s Online Extravaganza this week. I've made up 10 Grab Bags (min $10 in value, but most are much more), and I've numbered them 1 – 10. At the end of today (Black Friday), I will assign them to the people who've placed the first cumulative orders of $50 or more from me so far this week! (Beginning Monday, Nov. 24.) And actually, you qualify for a gift with EVERY $50 you've ordered (CUMULATIVELY)….. until my 10 Grab bags are gone. 

This offer will run until midnight (MT) tonight (11-28-2014)….. unless all 10 Grab bags get claimed first! So if you'd like to participate, there's still time!

Just a fun little extra way to say THANK YOU for supporting my business.  🙂

And the race is ON!

Papercrafters Extravaganza 2014 copy
The race for the DISCOUNTS, that is!

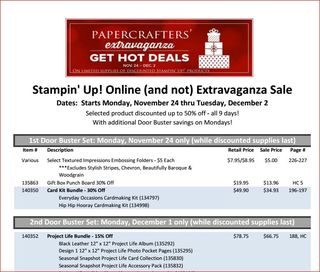
Stampin' Up!'s super sales Extravaganza combining Black Friday, Small Business Saturday and Cyber Monday into one 9-day stretch of product discounts, is off and running. It launched last night at midnight with the first of two "Door Buster" Mondays….. deals on specific products that will be available at special pricing for those days only.

But that's not all!

During the entire 9-day run (Nov. 24 – Dec. 2) you'll find discounts from 20% to 50% on a whole bunch of other products…… but only while supplies last.

Extravaganza 2014
Click the picture to view and download the rest of the list. And then grab YOUR share of the savings early. Before they're all gone.

As usual when shopping online with me, if your product order comes to $150 or more you'll qualify for Stampin' Rewards (pretty much the same concept as Host Benefits).The ordering system will guide you through selecting your free merchandise if you qualify.

But if your product total will be less than $150, please use the ordering code you'll find here. (You can insert and apply the code when reviewing your cart contents, BEFORE moving on to the checkout process.)

Oh! And if you're not already a member of my Paper Dreamers Preferred Customer Club, see what it's all about – HERE.

Many Merry Stars Kit – My favorite Stampin’ Up! Kit to date!

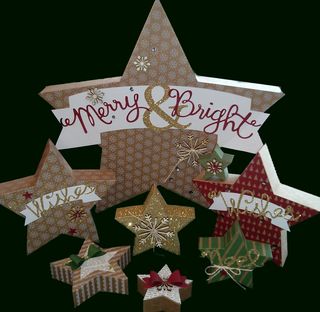
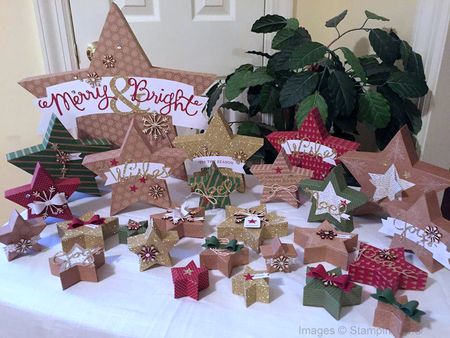
Well, I think the title of this post just about covers it. I love, love, LOVE Stampin' Up!'s Many Merry Stars Kit! So festive and sparkly…. if I wasn't already freaking out about how quickly this whole holiday season is bearing down (and directing my attention in other hectic directions) I think I'd probably already have a pretty display of these stars set up. Somewhere around here, lol. (Although I have no mantle upon which to display them, no furniture surfaces, and no place for a wreath or banner, either.)

IMG_20141025_105902 copy

Instead, I've been toting my stars out to booths and classes to show 'em off, and I'm finding that YOU really like 'em too! This kit includes the suppplies (and embellishments) to create *26* 3-dimensional stars! (This picture only shows a sampling of 8 of 'em.)

Now if YOU had this Many Merry Stars Kit, here are some of the things YOU might do with your stars once you've got 'em assembled:

  • Tuck them into a garland of greenery with tiny white lights for your mantle. Rockin' Romance!
  • Group them into sets of 3 or 5 and set them around your house to carry the theme from room to room. Simple & sweet elegance!
  • Hang the tiniest ones on your tree, and maybe even use a star die from the coordinating Stars Framelits Dies to add a sweet picture to commemorate a special memory from the year. Definitely "Awwwww…"-worthy!
  • Carefully cut and construct a pivoting "trap door" on the star shape that will ultimately become the back-side of the finished box (again with your coordinating Stars Framelits Dies,a piece of coordinating cardstock and a brad), so you can insert some tiny treats. Genius!
  • Stack coordinating stars of graduated sizes to make groupings for your holiday centerpiece. Simple & sweet eye-candy!
  • Suspend several from a banner. Stunning!
  • Using your Stars Framelits dies, cut a hole in the front of some smallish stars and insert a larger "window sheet" star shape on the inside. Put something pretty inside (before final assembly), or insert small white lights so they hang like a banner and glow from within. (Be very careful about potential overheating when putting lights inside paper boxes, of course. I don't recommend leaving them unattended or letting them remain lit for very long.) Creative!
  • Glue completed stars onto a sturdy, flat wreath shape. Stack them in a pleasing arrangement to completely cover the frame (smaller stars on top of larger), and glue them together where they overlap. Hang on a prominent door or wall (out of the weather). Absolutely breath-taking!

Many Merry Messages copy
Your kit will come with all the basics to make your 26 stars, although I recommend you also have a bone folder handy, as well as the Tombow Multipurpose Liquid Glue. Gather all your "stuff", and find a place to work where you can spread out a bit.

Here are a few tips I discovered while assembling my stars……

  • I highly encourage reading ALL the instructions included with your kit before beginning assembly. I know, that sounds boring and all, but there really are some helpful tips in there, and you probably don't want to ruin any of your stars by doing the trial-and-error method.
  • One of the tips you'll read about in the instructions is to start by assembling some medium-sized stars before moving on to the large or teeny-weeny ones. I totally agree that that's a good plan.
  • Punch out and group all the supplies for each star together. This will ensure you match and attach the right tops & bottoms with the right side pieces.
  • If you will be stamping images on any of yours, do it now. (Oh yeah, you'll probably want an ink pad and whatever stamps you choose for that.  I'll offer some additional product suggestions at the end of this.) Make sure the ink is totally dry before beginning assembly.
  • Take your time when assembling your stars, so you match the corners and points as precisely as you can. The kit pieces are all die-cut and scored accurately, but it's up to you to match up the points and corners.
  • Each side piece already has an adhesive strip on it to attach to its matching star shape. be sure to remove ALL protective coverings at the star points – where the adhesive sections overlap each other. If you leave a protective covering on one surface and only remove the tab on the other piece, the areas where they overlap will certainly not stick! Also, once you've adhered two surfaces together, it's important to burnish those areas real well with a bone folder or similar tool. You won't be able to reach all areas, of course, but doing that everywhere you CAN reach is helpful.
  • Some people (including me) have found that over time (perhaps aided by changes in temperature and humidity) the included adhesive may lose some of its grip. That seems to be more likely to occur with the smaller stars because they have much smaller gripping surface to begin with.  So…. I found it helpful to add and extra layer of stick-insurance by applying small dots of Tombow Multipurpose Liquid Glue (on top of the native adhesive) as I assembled each star.
  • If, in spite of your best efforts, you discover a day or two (or a week) later that certain areas of the sides have begun separating from their adjacent star pieces, here's how to perform some quick "fix-it" surgery.  Take a long, skinny scrap of cardstock…. say, about 1/4" – 1/2" wide and 3" – 4" long. Put a small amount of that now-famous glue on one end and insert it into the offending gap. Squeeze the parts together as you pull the strip back out, and hold pressure on it for a minute or so until the glue grabs. Then place a rubber band around the area to hold it together while it finishes drying, and you shouldn't have any more problems there!
  • Use that same glue to adhere your embellishments, including the stickers. I found that the big words "Merry & Bright" were particularly susceptible to coming loose with changes in temperature & humidity. So were I doing it again, I would just add small dots of glue on the back side of the words as I was attaching it in the first place, rather than "repairing" sections of it over the course of a couple weeks as different areas came loose.

So if you pay a little bit extra attention to gluing parts together at assembly time you'll probably spend less in "repair" time later on.  Just a word of advice from someone who did it the other way around the first time, lol.  🙂

Here's a video that Stampin' Up! put together that is helpful viewing, too.  (If you're reading this from an email feed, you may have to come to my website – www.YourPaperDreams.com -to see the video.)


Coordinating products you might like