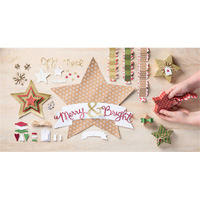
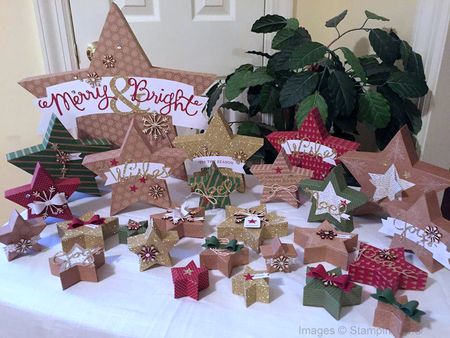
Well, I think the title of this post just about covers it. I love, love, LOVE Stampin' Up!'s Many Merry Stars Kit! So festive and sparkly…. if I wasn't already freaking out about how quickly this whole holiday season is bearing down (and directing my attention in other hectic directions) I think I'd probably already have a pretty display of these stars set up. Somewhere around here, lol. (Although I have no mantle upon which to display them, no furniture surfaces, and no place for a wreath or banner, either.)
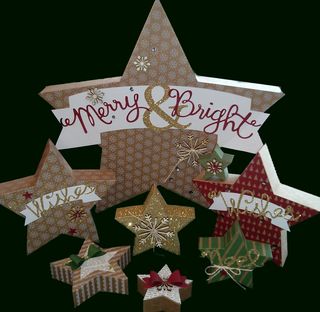
Instead, I've been toting my stars out to booths and classes to show 'em off, and I'm finding that YOU really like 'em too! This kit includes the suppplies (and embellishments) to create *26* 3-dimensional stars! (This picture only shows a sampling of 8 of 'em.)
Now if YOU had this Many Merry Stars Kit, here are some of the things YOU might do with your stars once you've got 'em assembled:
- Tuck them into a garland of greenery with tiny white lights for your mantle. Rockin' Romance!
- Group them into sets of 3 or 5 and set them around your house to carry the theme from room to room. Simple & sweet elegance!
- Hang the tiniest ones on your tree, and maybe even use a star die from the coordinating Stars Framelits Dies to add a sweet picture to commemorate a special memory from the year. Definitely "Awwwww…"-worthy!
- Carefully cut and construct a pivoting "trap door" on the star shape that will ultimately become the back-side of the finished box (again with your coordinating Stars Framelits Dies,a piece of coordinating cardstock and a brad), so you can insert some tiny treats. Genius!
- Stack coordinating stars of graduated sizes to make groupings for your holiday centerpiece. Simple & sweet eye-candy!
- Suspend several from a banner. Stunning!
- Using your Stars Framelits dies, cut a hole in the front of some smallish stars and insert a larger "window sheet" star shape on the inside. Put something pretty inside (before final assembly), or insert small white lights so they hang like a banner and glow from within. (Be very careful about potential overheating when putting lights inside paper boxes, of course. I don't recommend leaving them unattended or letting them remain lit for very long.) Creative!
- Glue completed stars onto a sturdy, flat wreath shape. Stack them in a pleasing arrangement to completely cover the frame (smaller stars on top of larger), and glue them together where they overlap. Hang on a prominent door or wall (out of the weather). Absolutely breath-taking!
Your kit will come with all the basics to make your 26 stars, although I recommend you also have a bone folder handy, as well as the Tombow Multipurpose Liquid Glue. Gather all your "stuff", and find a place to work where you can spread out a bit.
Here are a few tips I discovered while assembling my stars……
- I highly encourage reading ALL the instructions included with your kit before beginning assembly. I know, that sounds boring and all, but there really are some helpful tips in there, and you probably don't want to ruin any of your stars by doing the trial-and-error method.
- One of the tips you'll read about in the instructions is to start by assembling some medium-sized stars before moving on to the large or teeny-weeny ones. I totally agree that that's a good plan.
- Punch out and group all the supplies for each star together. This will ensure you match and attach the right tops & bottoms with the right side pieces.
- If you will be stamping images on any of yours, do it now. (Oh yeah, you'll probably want an ink pad and whatever stamps you choose for that. I'll offer some additional product suggestions at the end of this.) Make sure the ink is totally dry before beginning assembly.
- Take your time when assembling your stars, so you match the corners and points as precisely as you can. The kit pieces are all die-cut and scored accurately, but it's up to you to match up the points and corners.
- Each side piece already has an adhesive strip on it to attach to its matching star shape. be sure to remove ALL protective coverings at the star points – where the adhesive sections overlap each other. If you leave a protective covering on one surface and only remove the tab on the other piece, the areas where they overlap will certainly not stick! Also, once you've adhered two surfaces together, it's important to burnish those areas real well with a bone folder or similar tool. You won't be able to reach all areas, of course, but doing that everywhere you CAN reach is helpful.
- Some people (including me) have found that over time (perhaps aided by changes in temperature and humidity) the included adhesive may lose some of its grip. That seems to be more likely to occur with the smaller stars because they have much smaller gripping surface to begin with. So…. I found it helpful to add and extra layer of stick-insurance by applying small dots of Tombow Multipurpose Liquid Glue (on top of the native adhesive) as I assembled each star.
- If, in spite of your best efforts, you discover a day or two (or a week) later that certain areas of the sides have begun separating from their adjacent star pieces, here's how to perform some quick "fix-it" surgery. Take a long, skinny scrap of cardstock…. say, about 1/4" – 1/2" wide and 3" – 4" long. Put a small amount of that now-famous glue on one end and insert it into the offending gap. Squeeze the parts together as you pull the strip back out, and hold pressure on it for a minute or so until the glue grabs. Then place a rubber band around the area to hold it together while it finishes drying, and you shouldn't have any more problems there!
- Use that same glue to adhere your embellishments, including the stickers. I found that the big words "Merry & Bright" were particularly susceptible to coming loose with changes in temperature & humidity. So were I doing it again, I would just add small dots of glue on the back side of the words as I was attaching it in the first place, rather than "repairing" sections of it over the course of a couple weeks as different areas came loose.
So if you pay a little bit extra attention to gluing parts together at assembly time you'll probably spend less in "repair" time later on. Just a word of advice from someone who did it the other way around the first time, lol. 🙂
Here's a video that Stampin' Up! put together that is helpful viewing, too. (If you're reading this from an email feed, you may have to come to my website – www.YourPaperDreams.com -to see the video.)
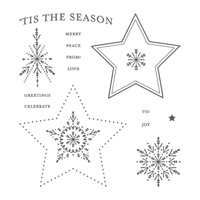
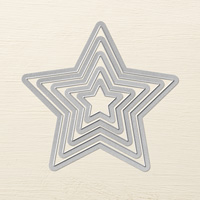
Coordinating products you might like

