Make Metallic-Looking Accessories for Cards

Make Metallic-Looking Accessories for Cards

Want to create a luxurious, high-end look on a budget? Try making your own metallic-looking accessories from cardstock and a few other items you probably already have in your papercrafting stash! Keep reading to learn how I made these stunning letters – actually based on ordinary cardstock.

General Construction of this Card

Gold Letters: Metallic-Looking Accessories
Card design by Lynda Glassmoyer; Images © 1990-2023 Stampin' Up!®

Now, before we get to the specific “how to” of making your own metallic-looking accessories, I need to share a bit of background information. You see, the Designer Series Paper shown on this card came from the 12″ x 12″ collection called “Dainty Flowers”. It’s really lovely paper, front AND back, and it’s even been available for nearly 2 months for free with a $50 Sale-a-Bration order. But just as I got this card put together, inventories of that DSP ran out. And sadly, it’s no longer available. 😢 
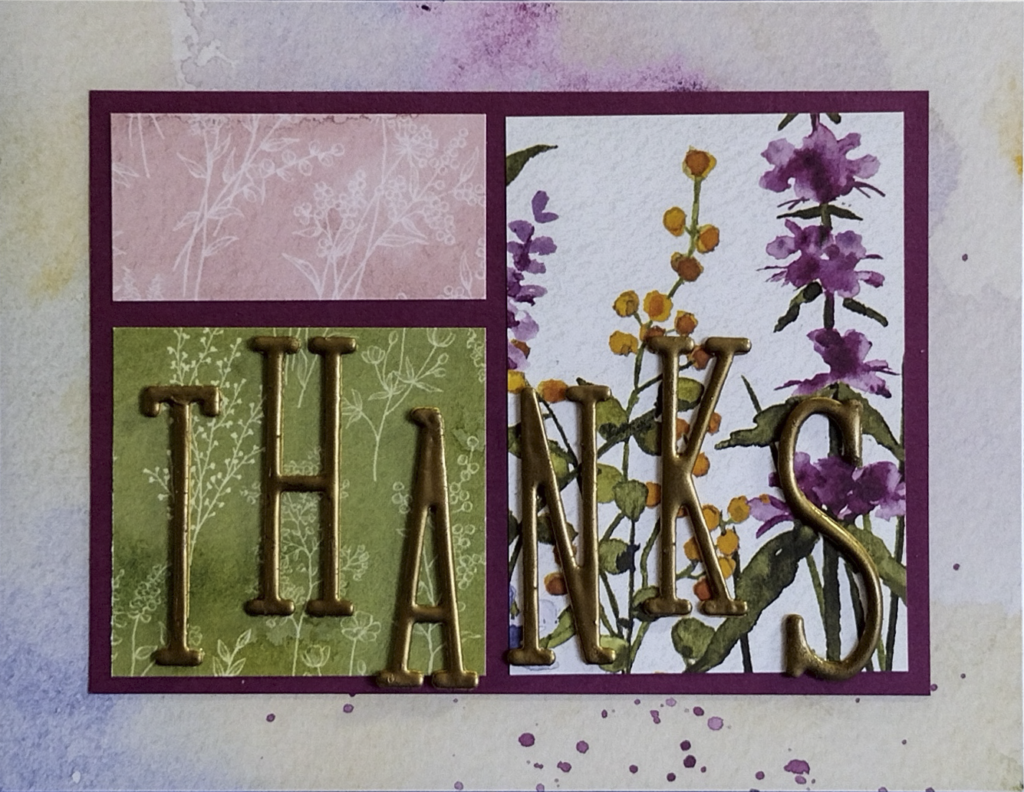
But of course you can use any cardstock or DSP of your choice, should you want to make a card similar to this one.

The layout template, including all cutting sizes, was included in my online card classes of last week. And it will eventually reappear in an upcoming compilation of such templates, so hang tight & keep checking back if you’re interested in that.

How to Make your Metallic-Looking Accessories

Metallic-Looking Accessories - Close-up of letters
Design by Lynda Glassmoyer; Images © 1990-2023 Stampin' Up!®

Would you be surprised to learn that the base for the gold letters shown on this card is just simply cardstock? Indeed, to begin this look, I used the Alphabet a la Mode dies to die-cut 3 each of the letters I needed. (I used Crushed Curry cardstock, but the color really doesn’t matter because it barely shows). Then I stacked up the layers to create 3-dimensional letters, carefully applying my favorite adhesive (Tombow Mono Multi Liquid Glue) between each layer. 

Once the glue on the letters was dry, I used a Versamark Pad (upside down) to pat onto one half of a letter. Then I applied Gold Embossing Powder and heated it with my Heat Tool to melt the powder. When the letter had cooled sufficiently to handle, I repeated the process on the opposite end of the letter. It actually took about 3 layers of this same process to get the fairly smooth metallic-look that I was aiming for, and I repeated that for each letter. (This process is indeed a bit time-consuming, so put on some nice music while you’re working.)

Once I had all my letters assembled, I simply glued each one into place on my card, using the same glue as mentioned above (which we affectionately refer to as “Green Glue“).

Other Ideas for Metallic-Looking Accessories

In addition to letters such as these, of course you could think in terms of any other cardstock shapes that you could punch or die-cut and then stack up for dimension. How about numbers for a special birthday or anniversary card? Or a small leaf or flower? A heart? Or a frame shape? Just let your imagination be your guide and have lots of fun with this idea!

And of course, we’d LOVE it if you shared your card showcasing your own metallic-looking accessories on my Facebook Page!

Need something other than these items? Check out my online store here, and remember that if you can get your order submitted before the end of Feb. 28th, 2023 (Mountain Time), you can qualify for free Sale-a-Bration goodies, too!


Throw-Back Thursday: “Stamp on, Dear Steffi”

Eight years ago today I wrote and published a post honoring a dear stamping friend, Steffi Sidney-Splaver, who had passed away shortly before. As I’ve been perusing ancient articles during this website transition process, I came across that post again, and thought it worthy of sharing again. Read it here.

Steffi Splaver
Steffi Splaver

And our stamping group had also created the brochures distributed at Steffi’s Whidbey Island memorial service. I’d shared some of that design and assembly process here, as well.

For additional articles in which our stamping friend Steffi was mentioned, just type her first name into the search bar on this page.

Color Your Season – Part 6

20180817_151535
Squeaking in with my 6th sample of the Color Your Season bundle – available for only a few more hours today!

For this card, I chose a monochromatic theme featuring Pool Party and Bermuda Bay. And of course, it features the Blended Seasons bundle (double-volume stamp set + coordinating dies) that has been available this month of August only. While I've used several elements from the bundle, I think the stars of the layout are the 2 stitched-edged dies used as layers in the center area. Don't you just love how these dies cut stitched details on both the inside and outside of the shape? Given that there are 3 sizes of these shapes in the bundle, it's just about worth adding this die set to your collection JUST because of its versatility!

Ok, here are some of the significant details of how this came together:

The base layer is simply a typical folded half-sheet of Bermuda Bay cardstock. The next layer up (Pool Party) features some texture created with the leaf die (from the die set) and the embossing mats. And then all that is splattered with Bermuda Bay ink from an aqua painter. Finally, I added some Bermuda Bay to the edges, using direct-to-paper.

Next up, a few die-cut leaves (Pool Party cardstock + Silver Foil paper), followed by a layer of Bermuda Bay cardstock die-cut with one of the stitched shapes in the bundle.

The top layer (whisper white) is smaller size of the same stitched shape, stamped with a 3rd-generation application of Bermuda Bay ink with the falling leaves stamp from the stamp set – and then carefully blended out with a blender pen. Then over top of that, I stamped the "Thank You" sentiment (also from that same stamp set) with the aid of the Stamparatus so that I could stamp it several times for enhanced color depth. 

The bow is from a piece of retired Bermuda Bay ribbon I still have lying around.

If you haven't YET grabbed your "Color Your Season" bundle (and/or the Watercolor Pencils that are included in this special limited-edition offer), there are still a few hours this month left to do so! AND you could easily qualify for a $5 coupon to redeem towards your order NEXT month! Don't kick yourself for missing out on this fabulous, versatile bundle! Get yours here.

"BONUS DAYS" reminder!
 
With every $50 product order you place in August,
you'll get a coupon for $5 off your September order. No limit!
So if your product total is getting close to $50, $100, or $150, etc., then you might want to bump it up.
Also, don't forget that orders of $150 or more (that aren't part of a hosted event) always qualify for Stampin' Rewards, too…
meaning at least $15 in additional free products in your box!


Hey, Lynda! Where’s the March wallpaper/calendar?

Just a quick note to let you know I have designed the wallpaper/calendar image for March, and wrote a good, long explanation all about it, and then as I was all done tweaking and proofing it, the system burped and an entire morning's worth of work all went "bye-bye". Grrr!!!! And unfortunately right now I don't have time to re-write the whole thing from scratch, but will do so as soon as I'm able. I apologize for this delay!

24-Hour Stamp Sale – Today ONLY!

Store.YourPaperDreams.com
Today's the perfect opportunity to fill in some of the missing pieces in your stamp collection, because ALL of the stamp sets shown here (and their French counterparts, in most cases) are available for 20% off.

But it's just TODAY.

Today only.

As in, Monday, Nov. 20, 2017, until midnight Mountain Time. (11 pm Pacific; 2 am Eastern)

So don't dilly-dally. Jump right on over to my online store (store.YourPaperDreams.com) and snag the deals on the stamps you've had your eyes on. But don't forget to explore the OTHER items being offered at special discounts (ranging from 10% – 50%) – from now thru this upcoming Sunday (Nov. 26), too!

To get my current host code please click the link at the tippy-top of this page. Then just copy the code, paste or type it into your order (while viewing your cart), and click "apply". 


Come celebrate WCMD (World Card-Making Day) with us!

Social Media - 4th Annual WCMD retreat
Fewer than 48 hours left before we launch our 4th Annual World Card-Making Day Virtual Retreat, and if you're a member of the Paper Dreamers Team (of Stampin' Up! demonstrators), or a customer or friend of a Paper Dreamers team member, you're invited to join us! Here's the quick and dirty of what it's all about:

Q: So WHAT is this, exactly?

A: Our 4th annual online celebration of World Card-Making Day, which technically is the first Saturday of October, but we extend the fun over 48 hours – from 4 pm on Friday to 4 pm on Sunday (Pacific Time, that is). The idea is to spend at least some of that 48 hours making cards (in any style or medium you like; we're not picky), while sharing in the social fun, periodic theme challenges/prompts, and prizes. And each year we attempt to beat the prior year's total number of cards made by the group members (which last year was 481!) 

Q: I don't think I live near you; where is this being held? 

A: It's held in a short-term, private Facebook Group, so you can participate from wherever you happen to be, as long as you have internet access. Even in your pajamas! If you are a Paper Dreamers team member, or the customer or friend of a team member, you're welcome to join us! Remember, this is a short-term group just for this weekend's activities, and will be dissolved shortly after the conclusion of the event. Click here to join the group and come play with us!

Q: What if I don't have 48 hours to set aside to make cards?

A: Few of us do. And yeah, we have lives, too. While there'll be new postings put up every hour (or so) during the event (um, except for while we're getting our beauty rest, lol), you are free to pop in and out as your schedule permits. But IF you can be with us for the beginning and ending of the event, you'll probably be glad. 😉

Q: Is there a fee or cost to participate? Long-term obligation due to joining this FB group? Are you collecting info about me to market to me later?

A: NOPE! NOPE! And "not really". (Other than you MIGHT MAYBE get an invitation to participate again next year, but that's not even a for-sure thing.) 

Q: Do I have to use only Stampin' Up!® supplies on my cards? 

A: NOPE! Not for this event. While many of us WILL use primarily Stampin' Up! supplies because that is what we own, you're free to make cards with any other media you wish! (And personally, I'd LOVE to see a variety of crafty concepts!)

Q: What if I still have questions about how this works?

A: If you're a Paper Dreamers team member, or customer or friend of a member, just join the FB group and follow along. We try to make it easy, and I know you'll figure it out!

Designing with Bits & Pieces – Part 2

20160918_110821[1]-wwm 20160918_111918[1]-wwm

Today I have another card design – that was a result of my recent session of designing with leftover bits & pieces of stuff.

20160925_180229[2]
The two yellow arrows show the "bits & pieces" I started out with: the cake pedestal, and the first layer of cake (upon which the "birthday wishes" sentiment had already been stamped).

Both of these pieces had already been stamped and fussy-cut, so I started by slapping 'em onto a folded card base of thick Whisper White cardstock. Thankfully, the "Build a Birthday" stamp set is still current, and therefore still in my collection, so grabbing that was an easy decision….. and then I headed to my ink pads to decide on other colors that would coordinate.

Both cake layers #2 and #3 were stamped onto Whisper White and then cut out with scissors, and then the top layer was trimmed from a scrap of Designer Series Paper I had located elsewhere. All were ultimately adhered to the card base, but before I laid down the top cake layer I stamped the flags directly onto the card base.

20160918_105814[1]

So was it "finished"?  Well, at first I thought so….. but on second thought, maybe not.

It just wasn't "speaking" to me.

So I added 3 rhinestones, and that touch of bling did help a *little* bit. But it still called out for more; it seemed to me like the cake was just hanging around - for no particular reason.  And looked almost as if it might fall right off the page. So I finally decided it needed a frame, and after cutting a simple mask and sponging around its edges, I set my tools down.

There!

NOW it was done!

20160925_180229[1]


From the “You learn something new every day” files…

FUTZYSo the other day I'm explaining to a group of ladies at card class about how to do this rather futzy project, and they all start twittering about my use of the word "futzy". Seems no one's ever heard that word before. And they want to know where I'd heard it.

Well, truth is, I have no idea. I just know it's been part of my vocabulary for as long as I can remember. It's a word. It has meaning. And it pops out of my mouth when it's the most appropriate adjective for the circumstances.

I grew up in the Midwest (except for several years in Spain), but have been on the West Coast since my middle teens. If any of that's meaningful, then that's probably where I learned the word.

So the ladies tried to educate me. "Fussy", they corrected. Well, yeah, I guess that could be a synonym for "futzy"…. yet it's not exactly the same. Doesn't go to the exact point; doesn't have the same punch. There's "fussy cutting", which we papercrafters all know about, but this project was a bit "futzy". Definitely NOT the same thing!

Curious, I went to Google for a definition. To prove that "futzy" is a real word. 'Cuz Google knows everything. And guess what? Even Google couldn't turn up a definition! But it did find references where the word in question had been used in various writings. Most, in the correct context even. (Compilation of more or less correct usages can be found here, and it's fairly easy to surmise the definition from its context.)

Next, I looked up "futz", 'cuz I figured it was related. As in, I futzed (v.) around a bit while designing (v.) the card in question, and therefore (per my reasoning), the design (n.) is a bit "futzy" (adj.).  And what I discovered is that if you're looking for a cool way to play your "z" in Scrabble, then laying out "f-u-t-z" is perfectly legit. I also learned some real interesting background about the origins of the word. But I won't recite them here 'cuz they make me blush and this is a G-rated blog.  

But I guess I'll have to keep digging to uncover why there's an adjective out there with obvious meaning and usage, yet apparently no definition.

Merry Christmas 2015

Christmas Greetings 2015
So yeah, I know. I've been MIA again. Many of you know I've had lots of family stuff going on recently that's been occupying big chunks of my time. BUT I just wanted to pop in here and wish all my stampin' friends a very Merry Christmas. And to my loyal customers…. a special word of thanks for supporting me and my business throughout this past year and expecially these past several months! I appreciate you and look forward to an awesome 2016!

Transitioning – MyDigitalStudio (MDS) to My Memories Suite (MMS)

Screenshot - MDS to MMS transition graphic
Well, I did it. Started the process of transitioning from MDS (MyDigitalStudio) to MMS (My Memories Suite).

I hadn't planned to undertake this quite this soon after the demise of MDS, but back in January I upgraded my computer from Windows 7 to 8.1 (which basically meant starting over with a clean computer and having to reinstall EVERYTHING), and then just a couple weeks ago I suffered an error that necessitated resetting my computer…. meaning I lost and have had to reinstall all my applications software for the *2nd* time this year. I never HAD gotten all my hundreds of MDS digital downloads reinstalled after the operating system upgrade of 5 months ago, and then after losing my apps again recently (including MDS, of course), I officially threw up my hands and decided it was time to make the transition. So far I've only installed Version 5 of MMS (which is being offered for free to current MDS users for a limited time), and I've begun the process of installing and merging my digital downloads.

My Memories Suite is also offering their newest version (Version 6, published last fall) at half-price (only $19.99) for MDS users, and I expect to take advantage of that reasonably soon, too. Version 6 will bring me closer to the features I was accustomed to in MDS, which I'm realizing more and more truly WAS the best program out there for non-professional digital designers. Sigh….

So today I wanted to share a few tips I've learned along the way for making the transition.

  1. You'll need MDS installed on your system…. although it doesn't need to be the most recently updated version.
  2. Locate the license key for your MDS. From within the program, go to: HELP > ABOUT MDS > SUPPORT. Write it down so you'll have it handy if/when asked. 
  3. You'll need a basic working knowledge of how to get around your computer – i.e., how to dig around in your computers files, how to copy and paste, and move files and folders from one place to another. If you don't have the confidence to do those types of things yourself, borrow someone who does.
  4. If you had digital downloads already installed for MDS, you'll need to know or learn how to find them and relocate them for use with My Memories Suite.
  5. If you had purchased and downloaded ("saved") digital downloads, but had NOT yet installed them for MDS, you'll need to know where they are on your system.

Once you're ok with all that, you can begin the transition. Up first, you'll probably want to install My Memories Suite – Version 5. As an MDS user, you can get it for FREE here. That same page includes information and instructions regarding migrating your current MDS content (aka "digital downloads") and your projects. Be sure to read everything on that page (scroll down; there's a LOT of info there) so you'll have an idea how this will all work.

I found that the migrating instructions and screen shots did not match exactly what happened with my computer (perhaps because I have 8.1?), but I had enough background and experience to figure it out. But that's where you'll want to bring in someone with computer experience and confidence if YOU feel uneasy following the steps they've laid out.

Their instructions only cover what to do if you already have your digital downloads installed for MDS. In my case, because of my computer set-backs this year I do NOT have all my downloads installed anymore. So while obviously I COULD install them to MDS and THEN migrate them to MMS, I figured that would just add an extra step. So I was pleased to figure out how to install them directly for use with MMS….. and that's what I'd like to share here.  (Note: I have a Windows machine, so these tips are for Windows.)

  • Begin the install process as usual, but when it asks for the application folder where you'd like the digital resources installed, "Browse" upwards in folder hierarchy (3 steps up on my computer, but yours might be different) until you find "Program Files (x86)" or "Program Files" (whichever one pertains to your current My Memories Suite program).
  • Choose the appropriate option (you may have to double-click), and then double-click "My Memories Suite".
  • Confirm that the file name at the bottom of the window now looks similar to this: "c:Program Files (x86)My Memories Suite". If so, go ahead and "select" to confirm.
  • On the subsequent screen, select (highlight) "c:Program Files (x86)My Memories Suite" from the list and click NEXT to begin the install.
  • Click FINISH when the installation is complete.

Once installed, continue following the migrating content instructions . But THEN, once your "Punches" and/or "Stamps" folders have been renamed and merged accordingly, your old Punches and/or Stamp folders may still remain in the MMS Components folder list. As long as the files appear correctly within the "Shapes" and "Imprints" folders you can go ahead and delete the extraneous Punches and/or Stamps folders from the Components folder of MMS. (But leave them alone in the Components folder of MDS!)

I haven't worked with MMS all that much yet, but I am pleased that there it a great similarity with MDS. It's got the same overall screen layout, and most of the same functions. So except for having to learn new icons and a few new terms ("Shapes" vs "Punches", and "Imprints vs Stamps"), and practice ignoring the somewhat distracting colors on the screen, I think the transition will be fairly benign once I forge forward. It's certainly a step backwards from what I've been used to with MDS, but not as far back as I was worried it might be!