Paper Pumpkin Mash-up

YourPaperDreams_Paper_Pumpkin_June_2017[a]
There are lots of reasons crafters enjoy Stampin' Up!'s Paper Pumpkin program: it delivers a crafting surprise to your mailbox every month, introduces products that sometimes go on to show up in the regular line later, offers color combinations you might never have tried, and so many more. Personally, I particularly appreciate getting a new stamp set every month that often compliments others I already own. And these projects are perfect examples of that.

Both the gift bag and the "Hooray" card came from this month's Paper Pumpkin kit. I was immediately captivated by the bright, fun colors in this kit, and sat down to assemble every element immediately. (June's kit included enough supplies for 4 gift bags, tags & tissues + 6 coordinating cards with envelopes….. and as usual, sufficient extra elements to use on future projects, too.)

I knew right away who would be the first recipient of one of my bag/card combos, but the occasion called for a little bit different sentiment on the tag than those that came with the kit. So a quick exploration of my stamp sets turned up "So excited to see you!" – from "Marquee Messages". 

Visit http://paperpumpkin.yourpaperdreams.com/ and click on "How it works" to learn more about Paper Pumpkin. And if you decide you'd like to try a subscription (either month-to-month or prepaid), please select my name – Lynda Glassmoyer (Post Falls, ID) – if the system asks for the name of a Stampin' Up! demonstrator. (Thank you kindly for choosing me.)

I can't say as I've ever really been captivated by the color Emerald Envy; it reminds me of Glorious Green, from oh, SO many years ago….. which only saw daylight at my place around Christmastime. But when this kit paired Emerald Envy with Melon Mambo for this charming watermelon, well, ok, I had to admit I liked it. In fact I liked it so well I had to keep using it, even after all the elements of this Paper Pumpkin kit had been assembled!

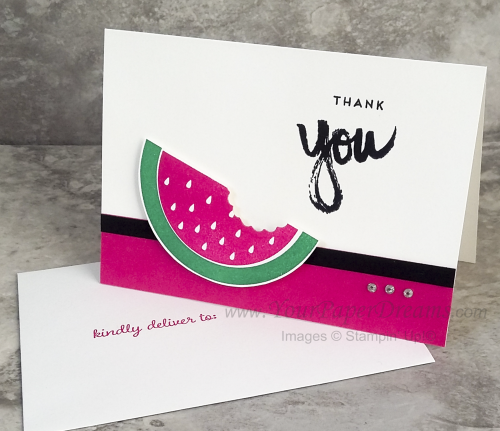
Watermelon thank you

So here's the next thing I made a pile of….. using not only the same colors and watermelon stamp from June's kit, but a sentiment from April's Paper Pumpkin kit, along with a "wreath" die from Santa's Sleigh Thinlits. (The die proved perfect for taking a "bite" out of the watermelon!) And having taken a queue from last year's "Pop of Pink" Designer Series Paper (retired), I've come to really love pairing Melon Mambo with Basic Black. Talk about making a statement! So a strip of each color anchors the bottom of the card, and the watermelon and sentiment elements are then balanced with a set of 3 small rhinestones. A very basic card with a big helping of sass, don'tcha think?

Oh, and did you know that if you're already a subscriber to Paper Pumpkin you can get a refill for the consumable elements of the kit? (While supplies last, that is.)  As of today, the refill for June's kit is still available in my online store here – for only $8 US.

June’s desktop background & calendar is ready to download

Strawberries! I love 'em! And that's what comes to mind when I think of June. I planted a crate-ful a couple weeks ago on my balcony and I've even harvested a half-dozen already….. although they're very itsy-bitsy. I know that many people advise picking off the flowers the first year in favor of larger berries the 2nd year, but given that I can't keep mine alive over the winter, that seems self-defeating. So I'll just fertilize liberally (organically), and take whatever I can get. This month's background/calendar is a tribute to my favorite seasonal berries.

2017 - 6 - June - tinified

My monthly desktop wallpaper background not only offers you a pretty seasonal picture for your computer monitor, but also includes a handy monthly calendar and serves as a cheat sheet to websites you'll  frequently want to know about and visit. 

Click here to download your FREE background & calendar.

You'll probably want to consult your own computer operating system's installation instructions, but installing the background image on my Windows 10 system takes just 3 quick steps – and  less than a minute. It's super-duper easy-peasy!

  1. I download and save the image to my computer – from the link just above that starts with "Click HERE". (NOT from the picture that appears at the top!)  TIP:  To "download" the full-resolution image once it's open (from Google Drive where it's stored), I click on the downward-pointing arrow. THAT is what actually begins the download process to my computer.
  2. Once the file has been downloaded, named and saved to my computer's hard drive, I open it. 
  3. Then I right-click on the image and select "Set as", then "Set as Background". And poof! That's all there is to it! (For convenience, I install this on both my desktop system as well as my laptop.)

And in case you may have an operating system OTHER than Windows 10, these tips may help with installation:

Finally, please keep in mind that the format of my monthly picture is designed for most modern-day 16:9 monitors (common format for monitors and HD TV's since about 2009), oriented in landscape format. If you're working with an older monitor (one that is more square-ish in format), or your monitor is set up in portrait format, the picture will probably not work for you. Sorry 'bout that.

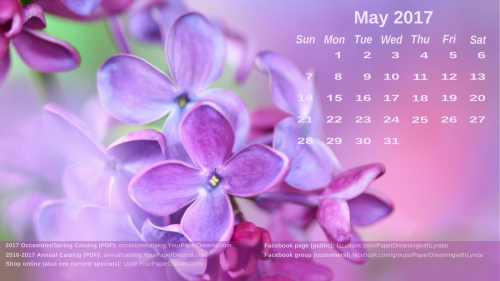
May’s monitor background/calendar is ready to download

Hey! It's May! And it's even sunny! (Well, at least at the moment I'm writing this, anyway.) After a mighty chilly and wet and gloomy April around here (which followed a cold and gloomy March), I'm certainly looking forward to May. And really hoping that that ol' saying "April showers bring May flowers" will prove the wait was worth it. I'm SO ready for flowers! Including lilacs!


2017 - 5 - May - tinified

My monthly desktop wallpaper background not only offers you a pretty seasonal picture for your computer monitor, but also includes a handy monthly calendar and serves as a cheat sheet to websites you'll  frequently want to know about and visit. 

Click here to download your FREE background & calendar.

You'll probably want to consult your own computer operating system's installation instructions, but installing the background image on my Windows 10 system takes just 3 quick steps – and  less than a minute. It's super-duper easy-peasy!

  1. I download and save the image to my computer – from the link just above that starts with "Click HERE". (NOT from the picture that appears at the top!)  TIP:  To "download" the full-resolution image once it's open (from Google Drive where it's stored), I click on the downward-pointing arrow. THAT is what actually begins the download process to my computer.
  2. Once the file has been downloaded, named and saved to my computer's hard drive, I open it. 
  3. Then I right-click on the image and select "Set as", then "Set as Background". And poof! That's all there is to it! (For convenience, I install this on both my desktop system as well as my laptop.)

And in case you may have an operating system OTHER than Windows 10, these tips may help with installation:

Finally, please keep in mind that the format of my monthly picture is designed for most modern-day 16:9 monitors (common format for monitors and HD TV's since about 2009), oriented in landscape format. If you're working with an older monitor (one that is more square-ish in format), or your monitor is set up in portrait format, the picture will probably not work for you. Sorry.

April 2017 desktop calendar is ready to download

Well, the entire month of March flew by in a blink, and I can't believe it's April already. April 1st, as a matter of fact. And April Fools Day, too.

So in honor of all that (and because I figure I might not be the only one craving COLOR in my life after weeks and weeks of gray around here), I present this month's desktop calendar!

2017 - 4 - April - tinified

My monthly desktop wallpaper background not only offers you a pretty seasonal picture for your computer monitor, but also includes a handy monthly calendar and serves as a cheat sheet to websites you'll  frequently want to know about and visit. 

Click here to download your FREE background & calendar.

You'll probably want to consult your own computer operating system's installation instructions, but installing the background image on my Windows 10 system takes just 3 quick steps – and  less than a minute. It's super-duper easy-peasy!

  1. I download and save the image to my computer – from the link just above that starts with "Click HERE". (NOT from the picture that appears at the top!)  TIP:  To "download" the full-resolution image once it's open (from Google Drive where it's stored), I click on the downward-pointing arrow. THAT is what actually begins the download process to my computer.
  2. Once the file has been downloaded, named and saved to my computer's hard drive, I open it. 
  3. Then I right-click on the image and select "Set as", then "Set as Background". And poof! That's all there is to it! (For convenience, I install this on both my desktop system as well as my laptop.)

And in case you may have an operating system OTHER than Windows 10, these tips may help with installation:

Finally, please keep in mind that the format of my monthly picture is designed for most modern-day 16:9 monitors (common format for monitors and HD TV's since about 2009), oriented in landscape format. If you're working with an older monitor (one that is more square-ish in format), or your monitor is set up in portrait format, the picture will probably not work for you. Sorry.

March 2017 desktop calendar is ready to download

2017 - 3 - March - tinified

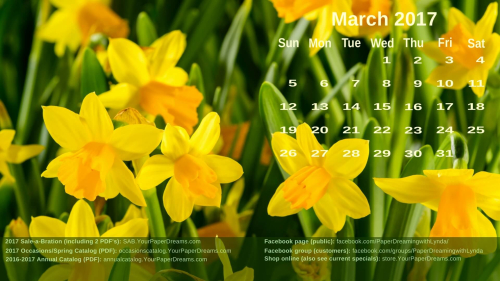
Happy March! Raise your hand if you're as ready for something bright as I am?!?  Having just lived through the dreariest winter of the 5 I've experienced here in North Idaho so far, I have often felt recently like I was still living in the Puget Sound!  Certainly hoping for a little more "bright" around here NEXT winter!

So to offset the ongoing drab landscape and gray skies, I present….. daffodils! And really, is there ANYTHING any brighter than a patch full of their cheery faces?!? Depending on where you live, I suppose March might technically be a touch early for daffodils, but I know *I* sure need to see some hope that spring might eventually show up….. and perhaps you do, too.

My complimentary monthly desktop backgrounds not only offer you a pretty seasonal picture for your computer monitor, but they also include a handy monthly calendar and serve as a cheat sheet to websites you'll frequently want to know about and visit.

Click HERE to download your FREE background. 

You'll probably want to consult your own computer operating system's installation instructions, but installing the background image on my Windows 10 system – takes just 3 quick steps – and  less than a minute. It's super-duper easy-peasy!

  1. I download and save the image to my computer – from the link just above that starts with "Click HERE". (NOT from the picture that appears at the top!)  TIP:  To "download" the image once it's open (from Google Drive where it's stored), be sure to click on the downward-pointing arrow. THAT is what actually begins the download process.
  2. Once the file has been downloaded and named and saved to my computer's hard drive, I open it. 
  3. Then I right-click on the image and select "Set as", then "Set as Background". And poof! That's all there is to it!

So yes, at the risk of repeating myself, this point is particularly important: Be sure you click the "download" link to get your full-resolution background image. Please do NOT attempt to install the picture that appears at the top of this article because it is low-resolution and will not yield good results.

And in case you may have an operating system OTHER than Windows 10, these tips may help with installation:

Finally, please keep in mind that the format of my monthly picture is designed for most modern-day 16:9 monitors (common format for monitors and HD TV's since about 2009), oriented in landscape format. If you're working with an older monitor (one that is more square-ish in format), or your monitor is set up in portrait format, the picture will probably not work for you. Sorry 'bout that.

My first Stampin’ Up! sampler

Spring sampler 2017_1

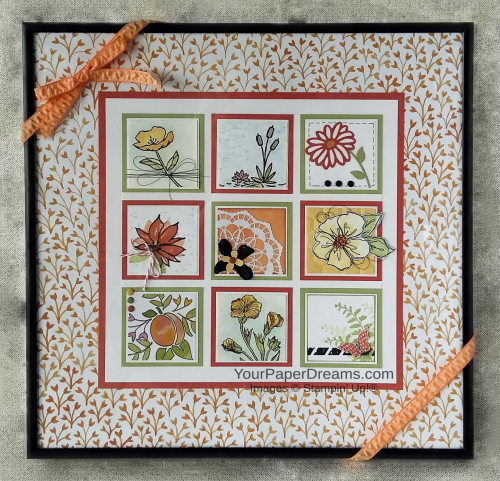
Well it finally happened. My first 12" x 12" framed sampler. 

Not that I haven't adored all the gorgeous themed samples I've seen through the years; I guess I was just a little intimidated. But I finally bit the bullet last week, put together a color palette inspired by Fruit Stand DSP, and dug in. I hit a creativity roadblock after the first 7 squares, so I lost a bit of time 'cuz of that, but at least I got the project finished on the same day I started it.

Ironically, I think the hardest thing about this was getting a half-way decent picture, lol! It's been raining, cloudy and dark around here for days, and since I shoot under natural light…. well, there just hasn't been any. So I ultimately decided to just run with what I had, and maybe someday, should we ever see the sun again, I'll try for a better shot then!

Here's what my thinking went like when planning this:

  • Size - well, I already had the 12 x 12 frame, which I'd purchased a number of months ago. So that was a no-brainer.
  • Color Palette – primarily inspired by the Fruit Stand DSP collection (Tangerine Tango, Peekaboo Peach, Pear Pizzazz, Whisper White), and I substituted So Saffron for Daffodil Delight, then added Soft Sky (for some of the backgrounds) & Basic Black for punch. (Every square has both white and black in it.) I even used 2 pieces of the DSP itself.
  • Theme – flowers & nature
  • Dimension – I knew I wanted "some", but had to keep it modest because this would be displayed behind glass. (You can go all kinds of crazy with dimension if you're using a shadow box, though….. and I'm anxious to do one of those one of these days, too.)
  • Techniques – I also wanted to showcase a variety of techniques, as well, so I was deliberate about doing something different with each square as I developed it.

Each decorated square is 1-7/8" square (Whisper White CS or watercolor paper), which is then mounted on a 2" square of Whisper White, and then mounted on either a Pear Pizzazz or Tangerine Tango 2-1/4" square. I first laid out the pattern for the largest layers, then stamped the 9 decorated squares, mounted each to its white backing, and then spent quite a bit of time experimenting with overall arrangements before anchoring them down to their colored backgrounds.

Can't wait to do my next one!

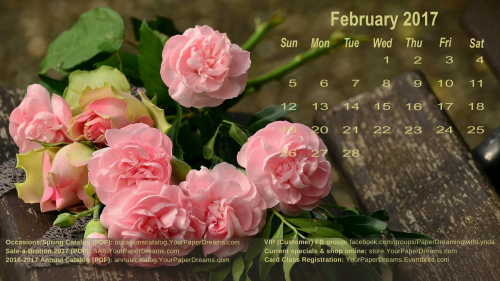
February 2017 Desktop Background & Calendar are ready to download


2017 - 2 - February - tinified
Oh my gosh! Where has the first month of the brand-new year GONE already?!? I woke up this morning wondering how in the world can it possibly be February?!? Feels a little scary and unsettling, actually.

But somehow it's happened, and perhaps by having just installed a bright, fresh background & calendar on my monitors I'll eventually adjust. And in case you're feeling kinda the same way, may I present to you – "February" – already! 

My monthly desktop backgrounds not only offer you a pretty seasonal picture for your computer monitor, but they also include a handy monthly calendar and serve as a cheat sheet to websites you'll frequently want to know about and visit.

Download your FREE background here.

You'll probably want to consult your own computer operating system's installation instructions, but here's how I install my background image on my Windows 10 system – in 3 quick steps that take less than a minute. It's super-duper easy-peasy!

  1. I download and save the image to my computer – from the link just above that starts with the word "Download…". (NOT from the picture that appears at the top!)  TIP:  To "download" the image once it's open (from Google Drive where it's stored), be sure to click on the downward-pointing arrow. THAT is what begins the download process.
  2. Once the file has been downloaded and saved to my computer's hard drive, I open it. 
  3. Then right-click and select "Set as", then "Set as Background". 

So yes, while this is repeating myself, this point is particularly important: Be sure you click the "download" link to get your full-resolution background image. Please do NOT attempt to install the picture that appears at the top because it's a low-resolution image intended only for viewing within this article.


And in case you may have an operating system OTHER than Windows 10, these tips may help with installation:

Finally, please keep in mind that the format of my monthly picture is designed for most modern-day 16:9 monitors (common format for monitors and HD TV's since about 2009), oriented in landscape format. If you're working with an older monitor (one that is more square-ish in format), or your monitor is set up in portrait format, the picture will probably not work for you.

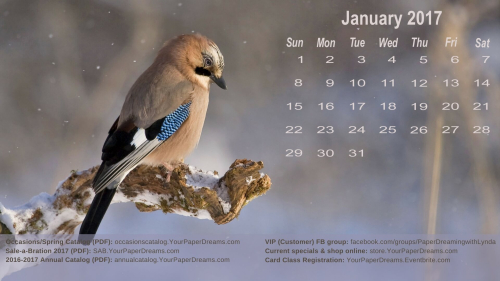
January 2017 Desktop Background & Calendar are ready!

2017 - January desktop calendar - tinified
Happy New Year!

Time to turn the page on not only the month, but the year, too. Here's my complimentary January desktop calendar to start things off…

My monthly desktop backgrounds not only offer you a pretty seasonal picture for your computer monitor, but they also include a handy monthly calendar and serve as a cheat sheet to websites you'll  frequently want to know about and visit.

Download your FREE background here.

You'll probably want to consult your own computer operating system's instructions for installation, but here's how I install my background image on my Windows 10 system. It's easy-peasy!

  1. Download and save the image to my computer – from the link above.
  2. Open the image on my computer.
  3. Right click and select "Set as", then "Set as Background".

Important: Be sure you click the "download" link to get your full-resolution background image. Do NOT try to install the image that appears above because its resolution is not adequate.

(Also, please note that the URL addresses referencing the Occasions/Spring catalog and SAB 2017 will not be live until sometime on January 4th.)


1-2-2017 – Edited to add:

If your computer operating system is other than Windows 10, you might find these articles helpful in installing these monthly calendar backgrounds:

And please keep in mind that the format of the picture is designed for most modern-day 16:9 monitors (common format for monitors and HD TV's since about 2009). If you're working with an older monitor (or one that is more square-ish in format), the picture will not fit.


 Also…..

Post Falls & CDA area card class customers: please note that registration for January card classes will not be opening today, as would normally be expected. While I'm optimistic about getting January's class schedules and our new venues set up fairly soon, plans are not firm quite yet. Please check back to our usual registration site later this week, and I'll keep y'all informed of the status of things via email in the meantime!

Here's to a fabulous 2017!

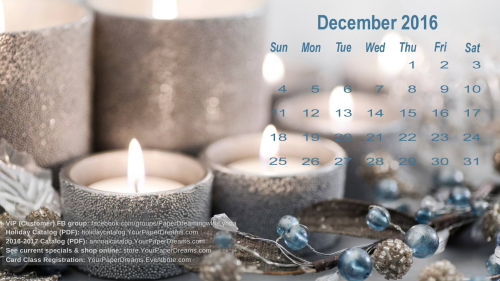
December 2016 Desktop Calendar is ready

2016 December desktop calendar - tiny
December 2016's desktop background is ready!

My monthly desktop backgrounds not only offer you a pretty seasonal picture for your computer monitor, but they also include a handy monthly calendar and serve as a cheat sheet to websites you'll frequently want to know about and visit.

Download your FREE seasonal background here. (NOTE: Please do NOT attempt to install the image shown above because its resolution is too low to make a satisfactory monitor background.)

You'll probably want to consult your own computer operating system's instructions for installation, but here's how I install my background image onto my own Windows 10 system. It's SUPER easy!

  1. Download and save the image to the computer – from the "download" link above.
  2. Open & view the image on the computer.
  3. Right-click the image and select 'Set as", then "Set as background".

Done!  Enjoy!

Please note these images were designed to fit many modern computer monitors and laptops, but of course I cannot guarantee they'll fit yours, and they'll probably not work on mobile devices, either.  

Check back next month for January's background & calendar!

Thanksgiving, Black Friday & Online Extravaganza

Black Friday Fun

Happy Day-after-Thanksgiving!

And Black Friday, too!

SCROLL DOWN TO SKIP TO THE BLACK FRIDAY FUN if you don't want to read about my Thanksgiving!

My son and I did a Thanksgiving-dinner-to-go  to take over to my folks' apartment yesterday. There were only going to be 4 of us (son's wife and kiddos had gone out of town to be with her family for a change this year, but he works for the postal service and it's holiday time, so he couldn't go with 'em), so I'd figured how complicated could this be, right? But oh my gosh - the logistics - another whole story! I don't know whatever made me think that would be "easier" than just going out to dinner somewhere, but in spite of the work, I'm glad we did it. 

First off, my folks' apartment's cooking equipment basically amounts to a single-plate-size microwave. Well, there's also a 2-slice toaster and a cute miniature oven about the size of my grandkids' play kitchen. Not sure it would even accommodate a regular muffin tin, and since it's never been turned on in the entire year+ that they've lived there, I wasn't real comfortable with the idea of "testing it out" on Thanksgiving Day….. given that their smoke detector has already proven a bit on the sensitive side and the place was running on skeleton staff. So we opted for a "carry in" dinner instead.

So let's set the scene: Think of fixing a Thanksgiving dinner in a one-butt kitchen with m-a-y-be two square feet of counter space (that is, assuming no dirty dishes are occupying any of that precious space). Ok, so that's where it really began. Oh, by the way, that's the description of *my* place, lol. Given the circumstances, I'd thought it would be smart to bake the pumpkin pie, prepare the stuffing, and cook the sweet potatoes here at home. THEN go over to my son's place because they have a real-size oven over there – which could actually accommodate a turkey. (Thank goodness he was willing to handle that part of the meal!) 

I'd purchased a Thanksgiving Dinner kit from the local grocery store, and picking that up on Wednesday went without a hitch, so I thought we were on a roll. (Uh, no pun intended; sorry.)

The purchased dinner included a fully-cooked turkey (just heat and eat….. yeah, right), and a number of side dishes – all ready to warm up in the microwave. Oh, and a pumpkin pie just the perfect size for 4. (Mind you, this meal was marketed as 10 – 12 servings, but why pick over details, eh?)  Well, Mom likes "homemade" stuffing (her recipe, which, granted, IS delicious), and homemade pumpkin pie and some type of secondary pie …. and the candied sweet potatoes I fix….. so sure, I'll do those too. 

So I prepared all those things, packed them up (stuffing and sweet potatoes at perfect "sit down and eat 'em right now" temperature), and headed over to my son's to heat up the rest of the stuff. Oh, but wait! Apparently "heating" the bird takes as long as roasting one from scratch, so there was going to be an unexpected delay in the timeline. Ok. A quick phone call over to the folks and we can be flexible. And besides, when was the last time I got a chance to have an actual conversation with my son – solo?!?

But how do we keep everything else warm in the meantime? And the "just heat in the microwave" instructions for everything else would mean that cycling everything through would lead to the first dishes being cold again by the time the last were ready. Ok, so I took the stove-top/oven route vs microwave. So everything could go in based on when we wanted it to come out. Green bean casserole that was included in the dinner package got set aside due to an ingredient that would create an allergy situation. Thankfully, replacement ingredients were located on site, and required casserole got recreated from scratch.  Turkey got carved and arranged on a platter (and "test-tasted" along the way, of course). Sides came out of the oven at appropriate time, and overall everything was going great. UNTIL we realized we had an entire kitchen full of Thanksgiving dishes all hot and ready to serve – that (YIKES!) needed to be packed and transported over to the next town. And there were no handy empty boxes on site, of course, thanks to a recent recycle run in an effort to clean out the garage! 

So we were exactly 1 hour late in arriving at our destination. And then all 4 of us began scurrying around in the approximately 16 or so square feet of space that encompasses Mom and Dad's cooking/serving/eating area (trying really hard not to knock each other over and add an emergency-room trip to the agenda), and eventually got all the food unpacked (although it was by now no longer at serving temperature), and reloaded it all into the pretty serving dishes that Mom had set out. Ultimately we decided to load our plates and reheat (ala "leftovers" style) one-plate-at-a-time in the microwave. 

A little shy of "tradition", but dinner proved delicious and it was a lovely time together.

And then it was time to do the dishes. Uh-oh. Another detail I'd largely overlooked…. although I HAD remembered to bring extra dish towels. But comparing Mom & Dad's itty-bitty sink (that's just perfect for a couple coffee cups, 2 cereal bowls and 2 spoons) against the mountain of dirty dishes we'd just created with this endeavor….. AND given that everyone except Mom was by now sweating profusely because of the built-up heat in the place), Son and I looked at each other and immediately knew we needed to pack the dishes out and wash them elsewhere. So we stacked 'em up, packed 'em out and carried 'em home. Back to his place where we "kind of" sorted stuff and portioned out the leftovers that we hadn't left for Mom & Dad, and divided the dishes to be done. And then I brought my share home in a mammoth tote bag – and set it down. Put the food away and literally fell into bed, knowing I'd be in a better frame of mind to face the dishes this morning.

All told, it was fun. And I'm glad we did it. But our "oh, it's only 4 of us and we'll even buy a dinner-to-go kit to keep it simple" without a doubt turned into the most complex Thanksgiving dinner that I've ever experienced! There was certainly enough food for 4, though. A wonderfully moist turkey that could have easily served 8 or more, 3 pies, 2 kinds of stuffing, 3 kinds of cranberries, 2 green bean casseroles (although we scrapped and didn't serve the original one), mashed potatoes & gravy, candied sweet potatoes, a dozen rolls (of which we used only 2), pumpkin bread, and 4 different beverages to choose from – all made for PLENTY of food!

Would I do it again? Well, at this point I honestly can't say. The food prep turned out to be the easy part, actually. But the transporting, serving and cleaning-up kinks kind of overshadowed the rest in my mind. But give me another year to think on it. Once I go tackle those dirty, dried-on dishes!

BLACK FRIDAY FUN

So yeah, there really IS a Stampin' Up! connection to this post! It's not only Black Friday, but Stampin' Up's Online Extravaganza continues through this upcoming Monday (the 28th), when it concludes with another 24-hour Flash Sale!

You can see the items on the Extravaganza here, and the stamp sets that have been available all month for 25% off here

But if THAT's not enough, here's the rundown of what *I'm* offering for my Black Friday and November customers:
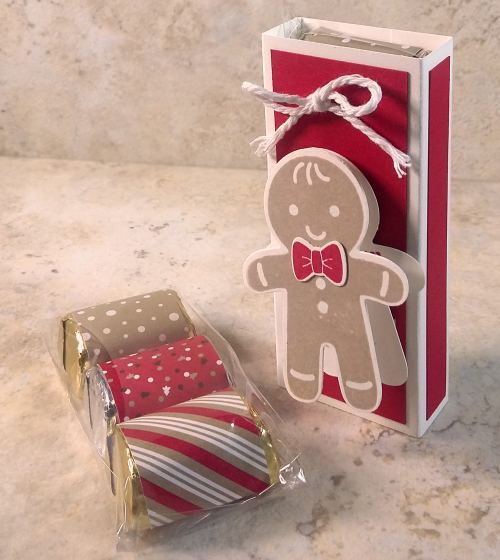
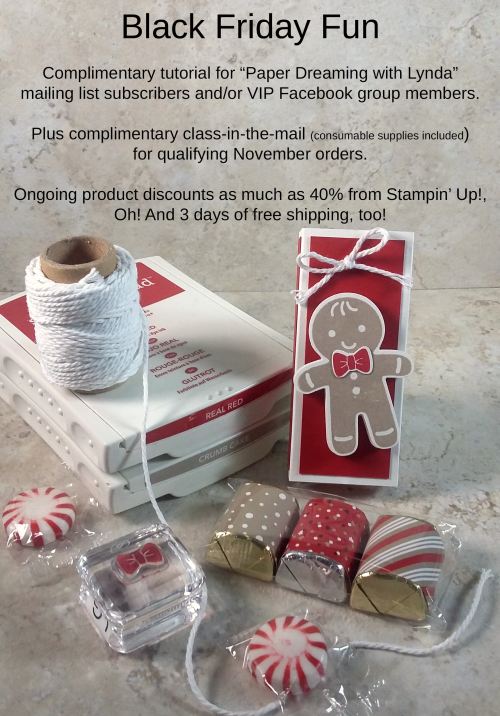
Cookie Cutter Christmas

  1. I will be sending the tutorial for this stocking stuffer project to everyone on my mailing list and/or my customer VIP Facebook group. Look for that complimentary tutorial before day's end.
  2. Everyone who has a total of $50 – $74.99 or more in product orders through me Nov. 1 – Nov. 28 will get a "Class-in-the-mail" for this project (consumable materials packet only; does not include the stamps, punch, ink pads or other basic tools) – to make 2 of these stocking stuffer gifts.
  3. Everyone who has a total of $75 – $99.99 or more in product orders through me Nov. 1 – Nov. 28 will get a "Class-in-the-mail" for this project (consumable materials packet only; does not include the stamps, punch, ink pads or other basic tools) – to make 4 of these stocking stuffer gifts.
  4. Everyone who has a total of $100 or more in product  orders through me Nov. 1 – Nov. 28 will get a "Class-in-the-mail" for this project (consumable materials packet only; does not include the stamps, punch, ink pads or other basic tools) – to make 8 of these stocking stuffer gifts!
  5. All orders of $75 or more placed Nov. 25 – 27 will qualify for FREE SHIPPING (within the US, of course), but you MUST contact me by phone or email so I can place your order for you if you want the Free Shipping option. (In other words, do not place your order for this at my online store if you want to use your Free Shipping option!) Sorry, but I cannot make exceptions.