Download your February 2020 Wallpaper/Calendar

Download your February 2020 Wallpaper/Calendar
February 2020 wallpaper/calendar
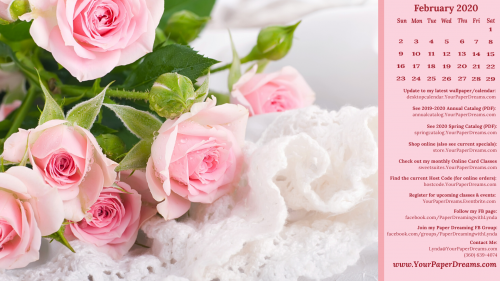
Your February 2020 Wallpaper/Calendar is ready!

Good news! Your February 2020 Wallpaper/Calendar is ready to bring some cheerful color to your monitor. And along with that, maybe even some hope in your heart that spring might actually arrive eventually! For me? I just wanna see something other than gray skies. Apparently our area just claimed second-place for the gloomiest January on record. Now, of all the records one wants to break… right?!? So I’m starving for some color (of which pink is one of my faves), and some flowers, and I sure wouldn’t mind seeing some blue one of these days, either… provided it was up in the sky! What about YOU?

My monthly desktop wallpaper & calendar offers you a pretty seasonal picture to brighten your computer monitor. But that’s not all. It also includes a handy monthly calendar and serves as a cheat-sheet reference to PDF’s and websites you may want to know about and access.  And it’s even FREE to download, so please don’t hesitate to share this page with your friends and family.

How to download & install your February 2020 wallpaper/calendar

Note: You’ll probably want to consult your own computer operating system’s installation instructions, but installing the background image on my Windows 10 system takes just 3 quick steps – and less than a minute. It’s super-duper easy-peasy! 

Here’s how you can (probably) do it, too.

    1. Start by left-clicking right here and the full-resolution image should open in a new tab. Then right click on the image and save it to your hard drive.
    2. Once the file has been downloaded, named and saved, click on your saved image to open it. 
    3. Once open, right-click on the image and select “Set as” > “Set as Background”….. then right-click again and select “Set as” > “Set as Lock screen”. And poof! That’s all there is to it! (For convenience, I recommend you install this on both your desktop system and your laptop. Assuming you still have both these days, of course!)

Tips for other operating systems:

And in case you may have an operating system OTHER than Windows 10, you may find these installation tips helpful:

  1. Windows 10, 8.1 or 7: http://www.digitalcitizen.life/how-customize-desktop-background-windows 
  2. Apple Mac: http://www.wikihow.com/Change-the-Desktop-Background-on-an-Apple-Macintosh-Computer 

Finally, please keep in mind that the format of my monthly picture is designed for most modern-day 16:9 monitors (a common format for monitors and HD TV’s since about 2009), oriented in landscape format. (Typically 1920 x 1080 pixels.) If you’re working with an older monitor (and/or one that is more square-ish in format), or your monitor is set up in portrait format or some other variation, the picture may not work for you.

Shucks! And I’m real sorry about that!

Download your January 2020 Wallpaper/Calendar

Download your January 2020 Wallpaper/Calendar
Your January 2020 Wallpaper/Calendar is ready!

So here we are on the very first day of January in North Idaho. I picked out this picture a month ago and have saved it ‘specially for today’s wallpaper. And wouldn’t you know… today my thermometer topped out at 47-degrees, and that, combined with a reappearance of some sunshine, worked to erase nearly all traces of the winter wonderland we had just a day and a half ago! Oh well, I’m sure the snow will return in due time. And in the meantime why not download and set up your January 2020 Wallpaper/Calendar! We can always pretend!

Happy New Year!

My monthly desktop wallpaper & calendar offers you a pretty seasonal picture to brighten your computer monitor. But that’s not all. It also includes a handy monthly calendar and serves as a cheat-sheet reference to PDF’s and websites you may want to know about and access.  And it’s even FREE to download, so please don’t hesitate to share this page with your friends and family.

How to download & install your January 2020 wallpaper/calendar

Note: You’ll probably want to consult your own computer operating system’s installation instructions, but installing the background image on my Windows 10 system takes just 3 quick steps – and less than a minute. It’s super-duper easy-peasy! 

Here’s how you can (probably) do it, too.

    1. Start by left-clicking right here and the full-resolution image should open in a new tab. Then right click on the image and save it to your hard drive.
    2. Once the file has been downloaded, named and saved, click on your saved image to open it. 
    3. Once open, right-click on the image and select “Set as” > “Set as Background”….. then right-click again and select “Set as” > “Set as Lock screen”. And poof! That’s all there is to it! (For convenience, I recommend you install this on both your desktop system and your laptop. Assuming you still have both these days, of course!)

Tips for other operating systems:

And in case you may have an operating system OTHER than Windows 10, you may find these installation tips helpful:

  1. Windows 10, 8.1 or 7: http://www.digitalcitizen.life/how-customize-desktop-background-windows 
  2. Apple Mac: http://www.wikihow.com/Change-the-Desktop-Background-on-an-Apple-Macintosh-Computer 

Finally, please keep in mind that the format of my monthly picture is designed for most modern-day 16:9 monitors (a common format for monitors and HD TV’s since about 2009), oriented in landscape format. (Typically 1920 x 1080 pixels.) If you’re working with an older monitor (and/or one that is more square-ish in format), or your monitor is set up in portrait format or some other variation, the picture may not work for you.

Shucks! And I’m real sorry about that!

Download your December 2019 Wallpaper/Calendar

Download your December 2019 Wallpaper/Calendar
December 2019 Wallpaper/Calendar is ready!

Sitting here shivering as I’m writing this, I was particularly attracted to the warm and glowing tones of these festive packages. While I’m nowhere near ready to admit just how close Christmas is already, in my mind’s eye I picture buzzing households full of decorations, beautifully-wrapped packages, crackling fireplaces, excited children and my favorite aroma, ginger cookies baking. It’s time to download your December 2019 Wallpaper/Calendar. Merry Christmas!

My monthly desktop wallpaper & calendar offers you a pretty seasonal picture to brighten your computer monitor. But that’s not all. It also includes a handy monthly calendar and serves as a cheat-sheet reference to PDF’s and websites you may want to know about and access.  And it’s even FREE to download, so please don’t hesitate to share this page with your friends and family.

How to download & install your December 2019 wallpaper/calendar

Note: You’ll probably want to consult your own computer operating system’s installation instructions, but installing the background image on my Windows 10 system takes just 3 quick steps – and less than a minute. It’s super-duper easy-peasy! 

Here’s how you can (probably) do it, too.

    1. Start by left-clicking right here and the full-resolution image should open in a new tab. Then right click on the image and save it to your hard drive.
    2. Once the file has been downloaded, named and saved, click on your saved image to open it. 
    3. Once open, right-click on the image and select “Set as” > “Set as Background”….. then right-click again and select “Set as” > “Set as Lock screen”. And poof! That’s all there is to it! (For convenience, I recommend you install this on both your desktop system and your laptop. Assuming you still have both these days, of course!)

Tips for other operating systems:

And in case you may have an operating system OTHER than Windows 10, you may find these installation tips helpful:

  1. Windows 10, 8.1 or 7: http://www.digitalcitizen.life/how-customize-desktop-background-windows 
  2. Apple Mac: http://www.wikihow.com/Change-the-Desktop-Background-on-an-Apple-Macintosh-Computer 

Finally, please keep in mind that the format of my monthly picture is designed for most modern-day 16:9 monitors (a common format for monitors and HD TV’s since about 2009), oriented in landscape format. (Typically 1920 x 1080 pixels.) If you’re working with an older monitor (and/or one that is more square-ish in format), or your monitor is set up in portrait format or some other variation, the picture may not work for you.

Shucks! And I’m real sorry about that!

Report your counts for World Card-Sending Week

Report your totals for World Card-Sending Week
Click image to report your number of total cards sent this week.

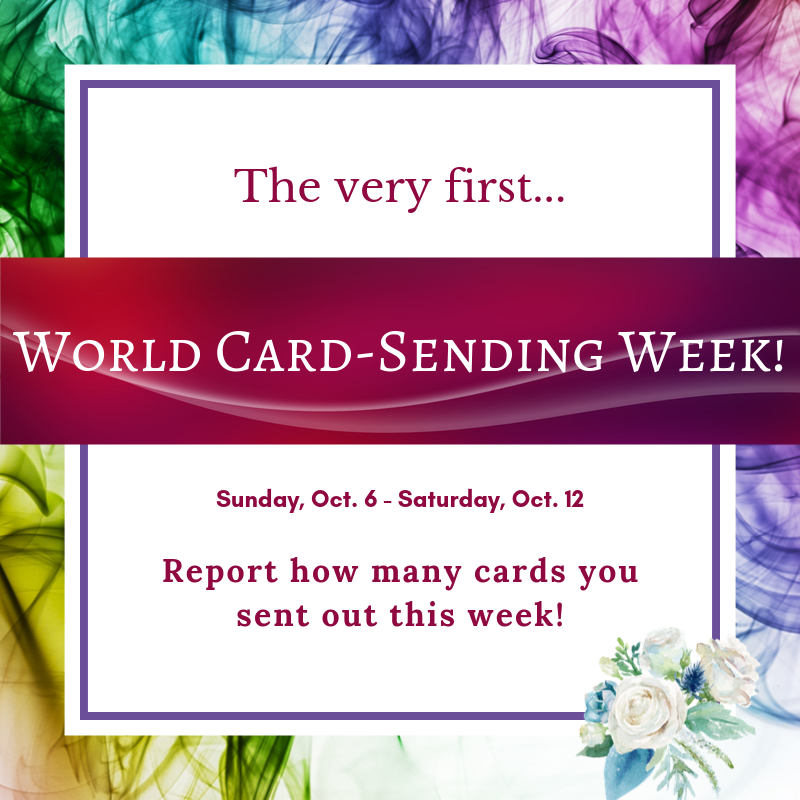
So last weekend my online friends and I marked World Card-Making Day with our 6th Annual WCMD Virtual Retreat. 48 hours of online card-making fun, including theme challenges, learning new layout ideas, and getting to know each other a little more. And then THIS week has been the brand-new concept (that I sure hope will become an annual event), “World Card-Sending Week”! Sponsored by Stampin’ Up!®, WCSW has been all about encouragement to SEND all those newly-made cards and let someone know you’re thinking of them!

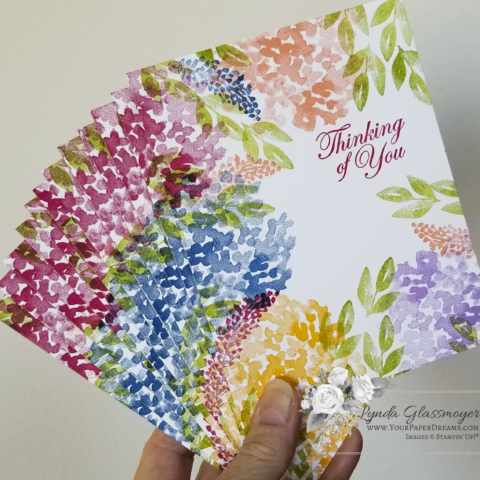
World Card-Sending Week cards

And participation in World Card-Sending Week is not only open to demonstrators, but to all of our card-sending friends, as well. (Of course!) So here’s how YOU can play along and add YOUR cards-sent tally to the global count, which has a goal of hitting 50,000 cards sent between Oct. 6 and Oct. 12!

Here's how to play with us!

If you’re already a card-maker you probably already have a pile of cards somewhere that you haven’t gotten around to sending to anyone yet. So grab that pile of cards and address them to friends, family, or anyone else who’s been on your mind. Enclose a little personal note if you’re inspired to do so, and send them on their way. 

But don’t forget to record a tally of each card you’ve sent this week, and then report your total number of cards on this form right here! 

I  will accept your totals up thru Tuesday, Oct. 15 (this upcoming week), and then I’ll combine your totals with my own, and report the entire amount to Stampin’ Up!, where the *worldwide* count will be tallied and maintained. Wouldn’t it be fun if our Paper Dreaming peeps could report 100 or more cards as a group? And in the meantime, I’ll update how we’re doing towards that 100-cards goal. Keep your eye on my Facebook page for those updates over the next several days.

But let’s be careful to help keep the worldwide totals accurate, and not accidentally double-report the same cards. That means that each card sent must ultimately only be reported to Stampin’ Up! ONE time. 

So if you’re a current demonstrator, you should report your card count directly through Stampin’ Up!’s reporting system. (Link found in the Oct. 8 updates.)

If you’re NOT a demonstrator, but are a friend, family member, customer or follower of mine, you can report your cards on my custom tally form… as long as you don’t report those same cards elsewhere, too. I will ensure that your total will be included in the Paper Dreamers group total that I will report directly to Stampin’ Up! on Oct. 16 (next week).

"World Card-Sending Week" - in review

  • Oct. 6 – Oct. 12 – Send as many cards as you can during World Card-Sending Week. 
  • Oct. 12 – Oct. 15 – Report the number of cards you sent
    • Demonstrators – report your counts directly via Stampin’ Up!’s system (by Oct. 16)
    • All others (friends, customers, followers, family, etc.) – report either through me or another demonstrator who is actively participating in this campaign, and who will ensure that your count will be included in the total he or she reports to Stampin’ Up! by Oct. 16.

A real big thank-you to everyone who participated in our WCMD Virtual Retreat last weekend and/or will be sending cards during World Card-Sending Week, too! Do you think the total numbers of cards will have enough impact to make the USPS wonder what just happened?!?

SEND your cards, then REPORT your numbers for World Card-Sending Week!

December 2018 Wallpaper/Calendar is ready to download!

 
2018 - 12 - December  - tinified
 
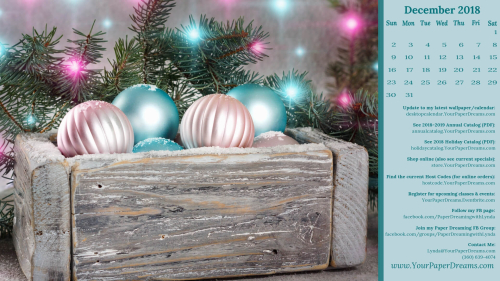
Yep! It's really here. December. And personally, I'm feeling pretty excited! Truth is, if you've been following me for a while you'll probably understand why it's been four years since I've had space in my life to participate in the festivities of the season. But although I'm still approaching this year's decorating season with a generous buffer of caution, I am at least thinking about putting up a tree this year, and even stringing some outside lights! It's been a long time since I've been able to even *contemplate* that kind of stuff, but I admit to feeling a bit hopeful that this – Just. Might. Be. The Year!
 
Oh! And would you be surprised to learn that the colors in this month's image are the colors I decorate with? I adore my fantasy sugarplum theme – on a white tree. Pure happiness! 🙂
My monthly desktop wallpaper background not only offers you a pretty seasonal picture to brighten your computer monitor, but also includes a handy monthly calendar and serves as a cheat sheet reference to websites you may want to know about and visit.  And it's even FREE to download and install, so please don't hesitate to share this page with your friends and family.
 
 
You'll probably want to consult your own computer operating system's installation instructions, but installing the background image on my Windows 10 system takes just 3 quick steps – and less than a minute. It's super-duper easy-peasy!
  1. I download and save the image to my computer - from the link just above that starts with "Click HERE". (NOT from the picture that appears at the top of this post!)  TIP:  To "download" the full-resolution image once it's open (from Google Drive where it's stored), I click on the downward-pointing arrow. THAT is what actually begins the download process to my computer.
  2. Once the file has been downloaded, named and saved to my computer's hard drive, I open it. 
  3. Then I right-click on the image and select "Set as" > "Set as Background"….. then right-click again and select "Set as" > "Set as Lock screen". And poof! That's all there is to it! (For convenience, I install this on both my desktop system as well as my laptop.)
And in case you may have an operating system OTHER than Windows 10, these tips may help with installation:
 
Finally, please keep in mind that the format of my monthly picture is designed for most modern-day 16:9 monitors (a common format for monitors and HD TV's since about 2009), oriented in landscape format. (1920 x 1080 pixels.) If you're working with an older monitor (one that is more square-ish in format), or your monitor is set up in portrait format, the picture will probably not work for you. Sorry 'bout that.

August Wallpaper/Calendar is ready to download

2018 - 8 - August - tinified
As I'm preparing this month's calendar, the thermometer on my balcony is reporting 100-degrees, and a dry, smokey wind is blowing in from the southwest. At 14% humidity, these refreshing beverages look like just the thing to soothe a scratchy throat.
 
My monthly desktop wallpaper background not only offers you a pretty seasonal picture to brighten your computer monitor, but also includes a handy monthly calendar and serves as a cheat sheet reference to websites you may want to know about and visit.  And it's even FREE to download and install, so please don't hesitate to share this page with your friends and family.
 
 
You'll probably want to consult your own computer operating system's installation instructions, but installing the background image on my Windows 10 system takes just 3 quick steps – and less than a minute. It's super-duper easy-peasy!
  1. I download and save the image to my computer - from the link just above that starts with "Click HERE". (NOT from the picture that appears at the top of this post!)  TIP:  To "download" the full-resolution image once it's open (from Google Drive where it's stored), I click on the downward-pointing arrow. THAT is what actually begins the download process to my computer.
  2. Once the file has been downloaded, named and saved to my computer's hard drive, I open it. 
  3. Then I right-click on the image and select "Set as" > "Set as Background"….. then right-click again and select "Set as" > "Set as Lock screen". And poof! That's all there is to it! (For convenience, I install this on both my desktop system as well as my laptop.)
And in case you may have an operating system OTHER than Windows 10, these tips may help with installation:
 
Finally, please keep in mind that the format of my monthly picture is designed for most modern-day 16:9 monitors (a common format for monitors and HD TV's since about 2009), oriented in landscape format. (1920 x 1080 pixels.) If you're working with an older monitor (one that is more square-ish in format), or your monitor is set up in portrait format, the picture will probably not work for you. Sorry 'bout that.

Playing with inlays

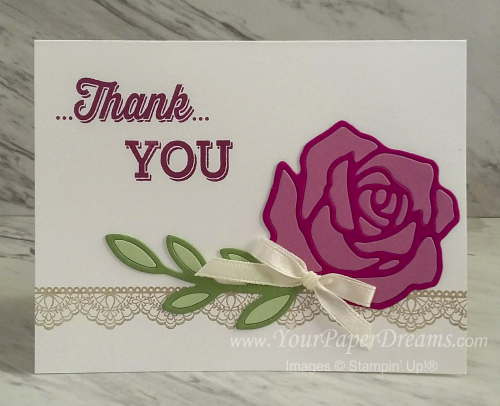
I've been having a lot of fun recently with various forms of paper inlays. That is, embedding one paper image (usually cut with a die) into another piece of paper or cardstock so that the two (or more) elements work together as a unit. There are a number of forms of this technique, but today I'd like to share where multiple colors can be used within a single die-cut image to offer up variations of color.
20180723_072547

The card just above was my first attempt at this, and yes, if you're thinking these dies were recently retired, you would be correct. But these images are a perfect size to practice inlay if you're new to this technique because they're mostly large enough to handle reasonably easily. And I do recommend that if this is your first attempt, try to find an image with pieces large enough to handle. Don't make this harder on yourself than it needs to be, 'cuz it's supposed to be fun!

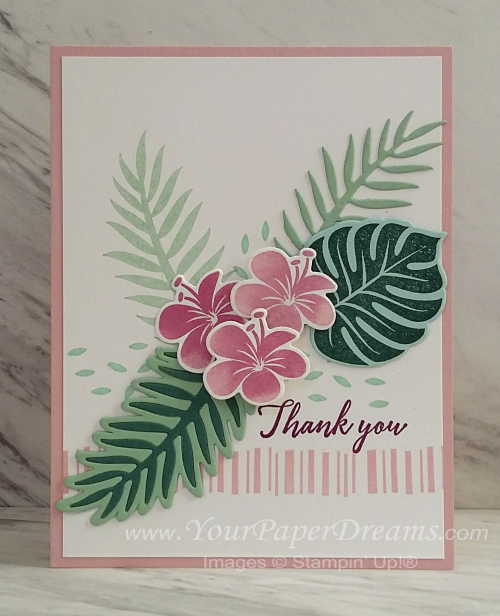
On this next card, I used this inlay technique on the lower left leaf to get the two shades of green…
20180723_072726

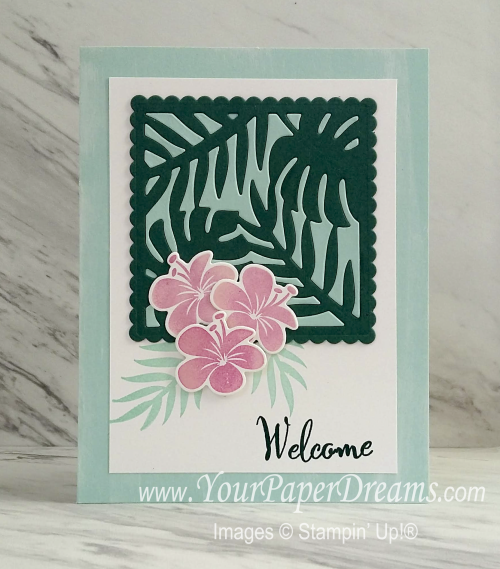
And on this next example, I'll walk though the steps and tips for doing the two-toned inlay on the square element at the top…
Tropical Chic

The colors of cardstock I have used on this square section are Pool Party and Tranquil Tide, and the dies are from the "Tropical Chic" bundle. I started by cutting out the same die shape from a scrap of each of those colors, and basically followed the same procedure with each one.

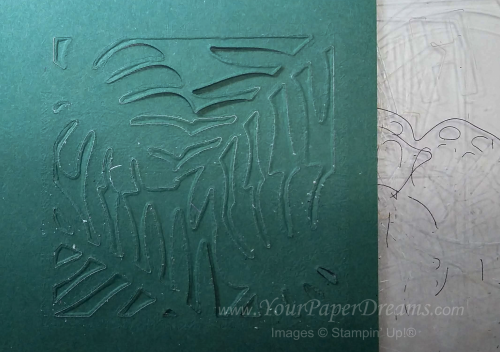
First, I set up my usual die-cutting sandwich stack and ran the stack through the Big Shot. But then when it came out of the machine, I didn't rip into the stack in my normal way; instead, I removed the entire stack from the machine and flipped the whole thing upside-down. Now I carefully removed layer by layer until I revealed the underside of the newly die-cut cardstock.
20180723_113437

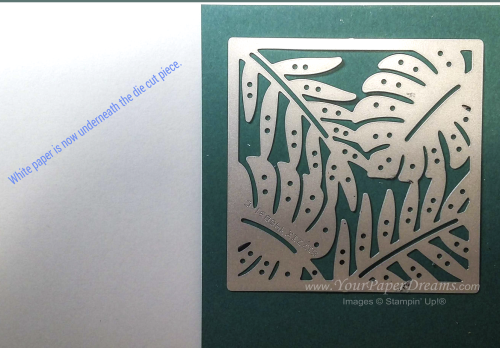
Next, I laid a sheet of contrasting paper (white, in this case) over what remained of the stack and held it in place tightly while I flipped the remainder of the stack back over, and laid it onto my table. So now I could carefully remove the cutting pad (which was once again on top), and ended up with this:
20180723_113540

(Note that going forward I'll be illustrating the process with the contrasting color of cardstock. But I did exactly the same process to each of the two colors I worked with, which ultimately gave me two completed squares – to make two cards.)

Next, using my die brush along with a wooden skewer VERY carefully, I poked out the cut pieces and let them fall into place onto the white paper. Yeah, I did have to make a few adjustments because this step never works exactly perfectly, but the point of this was to try to keep all the little pieces in relative order so I could work with them easily later. These will eventually become pieces in a miniature jig-saw puzzle!
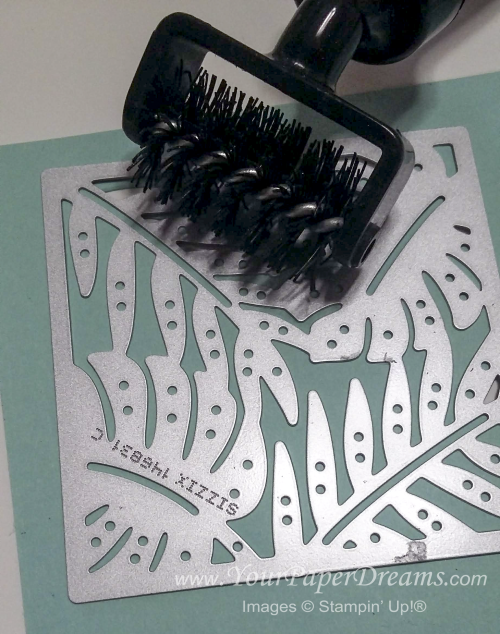
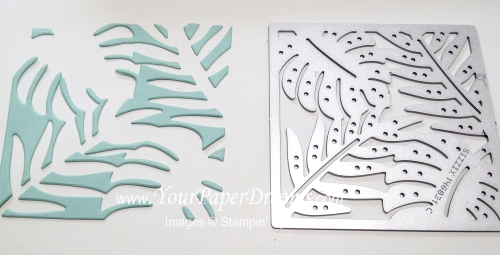
20180722_160642

20180722_161243

Each time I have made one of these embedded examples I have found it helpful to adhere a "base" layer of cardstock underneath the main layer. This ensures the die cut images with all the holes in it doesn't stretch out of shape, and it also prevents drawing attention to any imperfections where one piece might not match up perfectly with another. For this latter reason, I usually make the base layer from the same color of cardstock as the pieces which will eventually be inlaid.

For the 2 examples shown at the top of this article, I die-cut just the outer shape of the image when a die was available, and traced and cut out a base when there was no die of that shape. (That rose does not have a solid shape, so it required tracing and cutting by hand.) Then I carefully glued the detailed shape onto its base. For my third card, I used a couple of square dies to trim up the final image, as well as to create a base layer for underneath. Here's the bottom view of the base layer…. just a little smaller than the finished piece, as you can see:
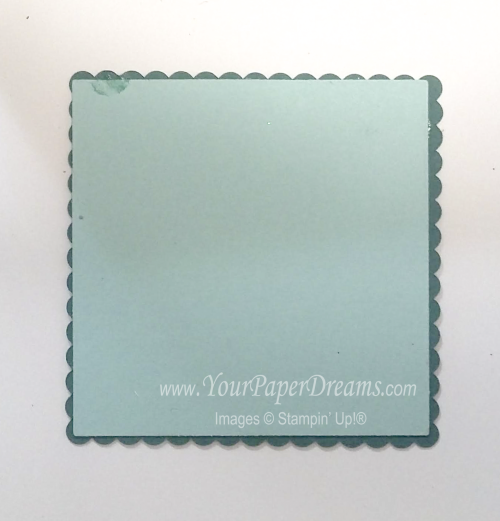
20180722_162712

Now with all the preliminary steps complete, it's time for the fun part….. to start adhering and embedding all the little pieces into their proper spaces. Begin with the piece right-side-up, and insert a teeny-weeny bit of glue onto the base layer in a few open spaces. (Tip:  I like to use a half-and-half mixture of Fine Tip Glue and Multipurpose Liquid Glue, dispensed from a Fine-Tip Glue Pen. I shake this up before using it, but then tap the bottom of the bottle on the table to reduce numbers of potential bubbles. This mixture maintains a little more "body" as it's dispensed, and doesn't take as long to dry as pure Fine Tip Glue does because it's not as liquid.)

Don't put glue in too many places at once; you don't want it drying up on you as you're still inserting pieces into place. A little experience will tell you how far ahead you can work with the glue. And don't forget that when I refer to a "teeny-weeny bit of glue", that's EXACTLY what I mean. ONLY enough glue to anchor the punched-out piece, and NO MORE!

This next picture shows pieces that have already been adhered in place along the left and lower areas. Can you see why it's important to keep the unplaced pieces in relative order for purposes of preserving one's sanity? 
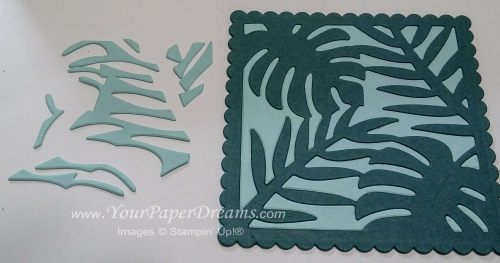
20180722_162015

Most of the time I find I can pick up these pieces with my fingers (and fingernails), but ultimately there are will be a few pieces that are just too small for that. So I have found that if I quickly lick the tip of my pinky finger, touch it lightly to my other hand, and then touch it to the itsy-bitsy little piece, that little challenge piece will usually adhere to my pinky just long enough to set it right down in its appropriate place.  Whew!

And don't forget that if you need reading glasses for close-up work, WEAR THEM! And have adequate working light, and go stare across the street when you're done. It doesn't take my eyes very long to remind me that this kind of minute task isn't very friendly to the eyes.  Ah, but the finished result is certainly worth it!