


Hey! Grab my handy, free app to direct you to all my links & things. Test it out!


I’ve promised it’s coming, and it’s almost here! Stampin’ Up!®’s 24-Hour Stamp Sale is set for Wednesday, October 23rd. That’s just day after tomorrow!
On that day, you’ll find just under 60 stamp sets from the 2019-2020 Annual Catalog available at 15% off!
Download a preliminary PDF listing (here) indicating which stamp sets are slated to be included in this very rare opportunity. And then on the 23rd, you’ll find them in my online store. (Please be aware that the specific sets and/or pricings are subject to change between now and then – due to Stampin’ Up!’s discretion.)
And oh, by the way, if you’ve been thinking about joining (or returning to) Stampin’ Up!, Wednesday would be an excellent time to do so because you could choose these stamps for your starter kit at their *discounted* prices! So you could pack even MORE value into your starter kit! (Click here to join (or re-join) Stampin’ Up!)
Be sure to mark your calendar for Wednesday, Oct. 23 (maybe even in RED- with stars all over it) – so you don’t miss out on this exciting 24-hour stamp sale!


So have you ever had to come up with a birthday card for three siblings (1 boy + 2 girls) celebrating their birthdays at the same party, yet their ages range from 9… down to not-quite-3?
Actually, these kids’ birthdays are scattered all throughout the calendar year, but not particularly at convenient “birthday party” times. So last weekend they were all honored at a joint fete at the local splash park – so they and their friends could usher in the beginning of summer.
So exactly what’s a card-maker to do for such an event? Gifts were discouraged, yet there would be an opportunity to donate some spending cash to a fund for an upcoming family theme park trip. But certainly, a handmade card was in order for an event as unique as this.
So I searched through my stamp collection, hoping for inspiration.
I contemplated basketball, princesses, and mermaids. I’m sure if I could draw I could have come up with something that incorporated all 3 of their signature themes, but the reason I’m a rubber stamper is precisely BECAUSE I cannot draw! And sure, I realized I could make each kid a separate customized card, but hey, they get their own separate cards for their “real” birthdays anyway. But THIS event was unique…. more like an “all-of-us” kinda party.
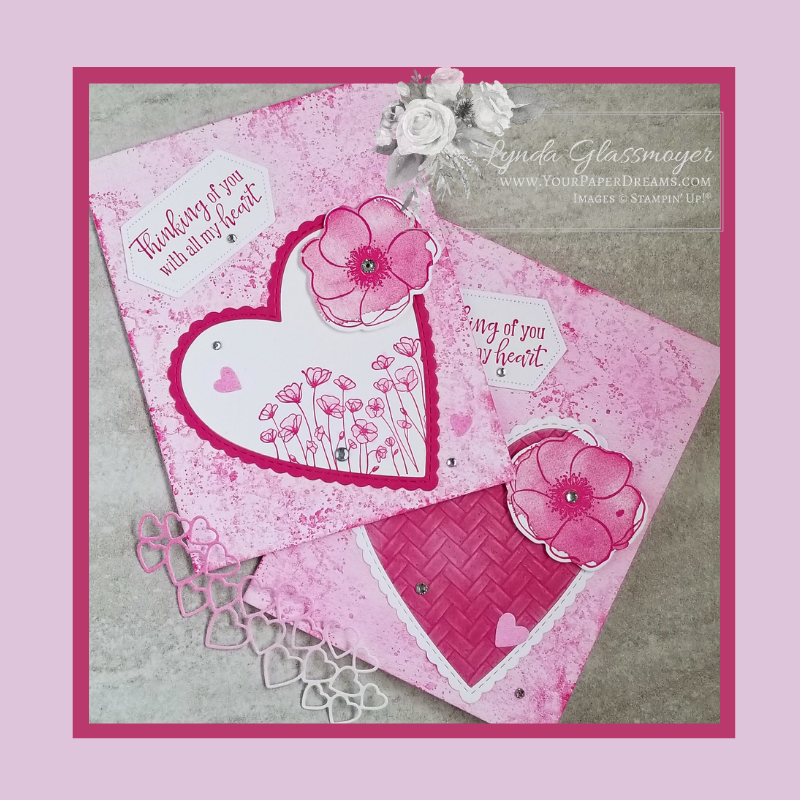
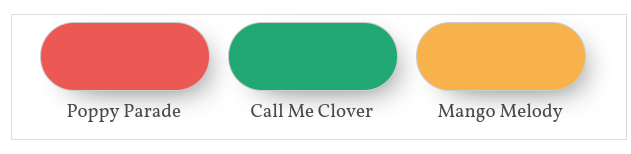
Ultimately I ended up turning to words and phrases to convey my message. Enter the stamp set “Itty Bitty Birthdays”, paired with some of Stampin’ Up!’s newer colors Poppy Parade, Call Me Clover, and Mango Melody, along with a good ol’ standby birthday balloon from the retired stamp set “Balloon Adventures”.
Itty Bitty Birthdays

|
If you’ve stamped with me for very long you’ve surely heard my philosophy of “You can’t ever have too many flowers, words, or alphabets in your stamp collection”. And once again, this philosophy ultimately resolved my dilemma. What really surprised me, however, was that I found all the sentiments I needed right there in a single stamp set: “Itty Bitty Birthdays”! I’d surely expected I would need to mix and match words from several stamp sets – but that wasn’t even necessary! For a stamp set that’s only been around for a few months, I’ve found myself reaching for it over and over again. I guess that confirms it was a valuable investment!
You can’t ever have too many flowers, words, or alphabets in your stamp collection.
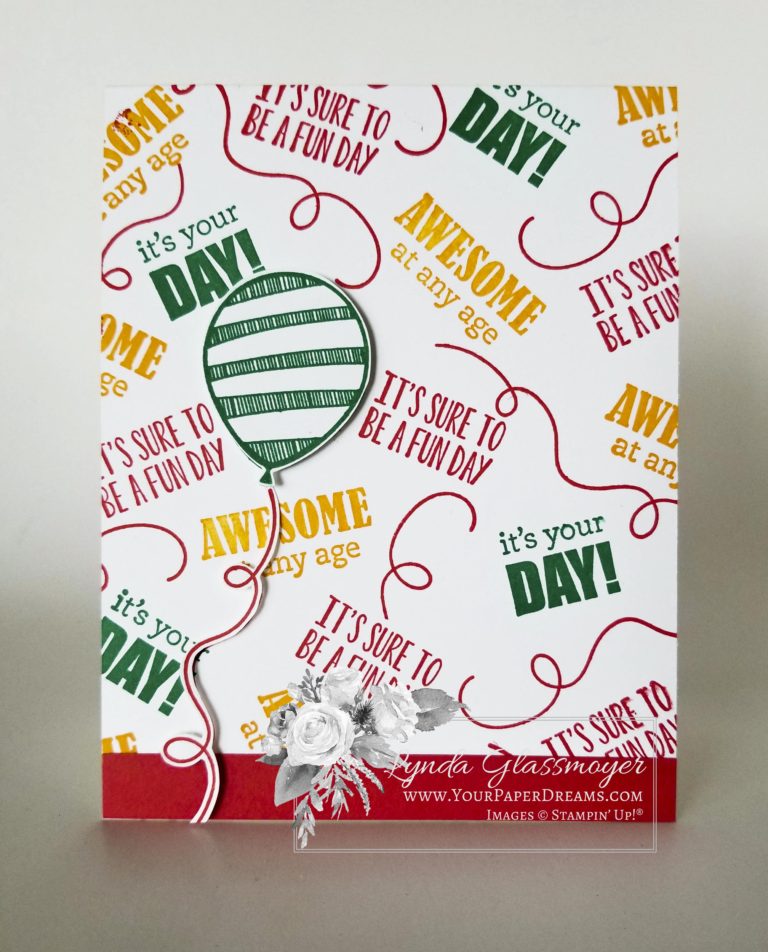
So next time you need to make a birthday card for three (or some other unusual, out-of-the-mainstream theme) and you’re stumped for inspiration, consider using words as main images!

Well, Happy New Year! And along with that, Happy New (Occasions/Spring) Catalog, and Sale-a-Bration 2019!
I'll be offering more about the Occasions/Spring Catalog and Stampin' Up!'s long-standing Sale-a-Bration tradition in the coming days, but today I wanted to share a bit about Stampin' Up!'s new "Cling" stamps, which you may have already noticed in this brand-new catalog.
Yes, we can once again put labels on our temporary-mount red rubber stamps AND expect them to stay in place on the acrylic blocks or Stamparatus! Something I know many of you have been awaiting for a long, long time!
So here's the basic low-down on some of the changes you'll notice in the Occasions/Spring Catalog…
Going forward, *new* stamp designs in red rubber will be known as "Cling" stamps, and the terms "Clear Mount" and "Clear" will be retired (I'm speaking of *new* designs, that is). As you look through the new Occasions catalog you'll notice that stamp designs will generally be available in either the new "Cling" style or "Photopolymer", as we've had for several years now. And with only a few exceptions, Stampin' Up! will be phasing out wood-mount sets… although ongoing sets will continue to be available in the current Annual Catalog until it is replaced this June.

But fear not, those of you classic stampers who favor traditional red rubber images! The red rubber and foam elements aren't going away; only the wood blocks and the concept of "permanent mount" are being retired. Why? Because only a small minority of modern-day stampers are opting to order wood-mounted stamp sets these days – due to the increasing cost of raw materials and the fact that they take more room to store. So these new "Cling" stamps will feature exactly the same red rubber (for the crisp detail you have come to expect and love), but the foam layer appears to me to be a little "whiter", and – most of all – ready to accept the corresponding label, which will actually CLING to your acrylic block (or Stamparatus) until you're ready to remove it! So all the best features of red rubber are being retained, PLUS we'll be able once again to attach the image labels to our stamps! (Hey, now it hasn't really been all THAT bad, has it; the "no-labels" practice of recent years just taught us all how to read backwards when selecting a stamp without its image label attached, lol. Good exercise for our aging brains, right?!?)
So here are some things you'll want to know about the care and feeding of your new cling stamps:


Now go pick your favorite designs from the Occasions Catalog, and order 'em up at: store.YourPaperDreams.com
November's exclusive "Snowflake Showcase" has certainly been an amazing collection, hasn't it? So many beautiful snowflakes and versatile images – in both stamp sets and dies; I'm super-sad to see it coming to an end. But yep, today's its last day of availability; the curtain falls in just a few more hours.
In the meantime however, I thought I'd share some of the thank you cards I've been sending out recently. Featuring… well, what else, lol?!? Not only some of my favorite winter-time images, but some of my very favorite winter colors, too!

Besides the "Snow is Glistening" and "Kindness & Compassion" stamp sets, these cards feature "Layering Ovals" dies; Highland Heather, Gorgeous Grape and Coastal Cabana inks; Frost White Shimmer Paint; Clear Rhinestone Jewels; and Highland Heather, Gorgeous Grape, and Whisper White cardstocks (WW in both regular and thick). And of course, the Stamparatus helped place that "Thank you" image exactly where I wanted it… nice and bright!

There are still a few remaining hours to claim all or part of this collection for yourself. If you're still debating, let me help. The answer is "Yes!" – because snowflakes of this classic art style will never look dated, they can be used solo or in conjunction with other images on almost any winter project, and look fabulous in pretty much any color. (Well, maybe not so much Real Red or Cajun Craze, come to think of it….. but YOU know what I mean, lol!)
See what's still available from the Snowflake Showcase here!

Wow! 30 Years! Thru thick and thin. Thru all the ups and downs of national economies, natural and man-caused disasters, and an exceptionally ill-timed UPS strike! And I'm both amazed and proud to have been part of the adventure for 3/4 of those years!
Many (most?) of you have already heard my story:
I was invited to a "stamp" party by my best friend – way back in January of 1996. As I had nothing else to do that night, and after all it was being hosted by my BEST friend, and yeah, I did use stamps up in the right-hand corner of all the envelopes I mailed out regularly (remember, this was back in the days when you hand-wrote checks to pay your bills and mailed them through the postal system), so I showed up, figuring I'd could buy some stamps from her party 'cuz I used 'em practically every day anyway!
Well, man-o-man was I ever in for a surprise! The party didn't turn out to be about POSTAGE stamps, it was about ART stamps! Decorative stamps, which, when combined with beautiful colors of ink, could turn plain white cardstock into an absolute work of art!
Back in those days the only person at such an event who ever touched the goodies was the demonstrator, so I never laid a finger on a stamp that night. But I left that party already knowing I was a rubber stamper. I was totally over the moon – without ever even having touched a stamp or ink pad. In fact, I was SO excited I confess to having immediately hunted down a "stamp" store in town so I could get my first "fix" before my Stampin' Up! order even arrived!
But 4 months later, I was a demonstrator. Getting a discount on everything I purchased through Stampin' Up!, so my retail stamp store infatuation faded real quick.
My plan was to purchase a personal party's worth of stamps each month for 6 months. (Back then a "qualifying party" to earn you free host product, was $100.) So I would purchase $100 worth of product (at discount) AND get free host goodies every month – for those 6 months – and then quit. Surely $600-worth of supplies would provide all the stampin' supplies I'd ever need in a lifetime, right?
Well, a funny thing happened on the way to my quitting date. I made the "mistake" of attending a Stampin' Up! Convention, and absolutely fell head over heels in love with the COMPANY! So instead of coming home and quitting, I came home and planned an open house. And the next 2+ decades of my life took an amazing, but unpredicted, turn.
Fast forward more than 22 years, and Stampin' Up! has touched the lives of almost everyone I know these days, in one form or another. I've moved to new states twice (which means I've "started" my business 3 times). And life has changed, too. When I first started out, my son (then about 12 years old) went with me to every party. He was my right-hand man, carried and set up my gear, spoke of the world's colors in Stampin' Up! lingo, knew the names of all the products, sorted and bagged orders for me, and even eventually learned how to submit orders for me. But eventually, he grew up. A busy high school schedule, college, then marriage, and now 3 kids. And most recently, my life has included several years of caring for aging parents, which has significantly impacted the time I've had available to attend to my stampin' business. So now I'm rebooting it yet AGAIN, lol.
Along the way, our forms of "demonstration" have evolved, too. I still do hands-on classes, which I love, and David still helps me set up for booth events when he can, but much of my daily work is now done over the internet. I have a team of demonstrators who live in several different states, so when we "meet", it's online. Who'd have envisioned THAT back in 1996?!?!
But here we are…. still creating art with stamps and ink, and still looking forward to the future. Do I dare wonder what even 10 years from NOW might look like?

So! Birthdays call for celebrations, don't they?!? And for Stampin' Up!'s 30th birthday, what would make more sense than a SALE on stamps?!? So that's exactly what they're doing – for 24 hours only – Tuesday, October 23rd. (Note, those are MOUNTAIN TIME hours!) So check your wishlists and help yourself – at store.YourPaperDreams.com


STAM•PA•RAT•US: Noun. 2017-2018 (and beyond); < rubber-stamper lingo; Latin stamp + apparatus> 1. a feature-packed device to assist rubber stampers with placing stamped images exactly where desired 2. a gizmo used to perfectly align up to 4 stamped images 3. a doo-dad which allows another attempt at stamping a fully-inked image if the first was unsuccessful 4. an amazing tool that all rubber stampers will want to own in order to make their stamping adventures more fun, easy, and oops-free. Synonym: "the most advanced stamp-positioner on the market"
Well, we've waited a whole lotta years, but it's finally (almost) here! Stampin' Up!'s feature-packed stamp positioner that blows all other similar devices currently on the market right out of the water! Why? Because once again, Stampin' Up! has created a tool designed FOR stampers BY stampers (LOTS of 'em, actually!)
So what's up with this gizmo with the funky name?
Well, I recommend downloading this PDF flyer for a quick overview…….

and then checking out this video to see the Stamparatus in action:
Soooooo…… now that you have an idea what this little gem can do, we'll assume that by now you know you need one of these puppies for your very own self. (I mean, who wouldn't? Right?) So listen-up while I share how to be among the very first to get your mitts on one of these coveted treasures….. (Yeah, yeah, it's a little bit complex, but I think we can all catch on eventually…)
Stampin' Up! recognizes that this is expected to be a hot, hot item, but wants at the same time to avoid the disappointment of a potentially protracted back-order situation, as these Stamparatuses [Stamparati?] can only be manufactured and stocked at a finite pace. Therefore, Stampin' Up! has designed a clever "reservation" system that will allow you to (sort of) preorder yours before it is even manufactured. There will be 3 limited preorder/reservation periods between now and when this tool appears in next summer's Annual Catalog, and you may order up to one device during each of the 3 periods – while supplies last. The limited preorder periods will run during the following dates, but only until the maximum number of available reservations has been reached. (In other words, those who preorder early in the period stand a better chance of successfully reserving a unit than those who wait until later).

As you see, the first reservation window opens this coming Thursday, Nov. 16th. At 2:00 pm, Mountain Time, to be exact. (Barring any hiccups like crashed websites and other technicalities, of course.)
To place your reservation you'll go to my online store and look for the "Reserve" link on the Stamparatus page. (You must already have an online customer account set up in order to proceed; if you don't already have an online account, I urge you to go ahead and set one up now to be ready.) Then follow the simple instructions shown in this tutorial. Note that you must have a credit card available in order to place your reservation, but you won't actually be charged until your Stamparatus comes in.
Then when the approximate shipping date nears (better put it on your 2018 calendar right away so you don't forget), be sure to keep an eagle-eye on your email inbox (including your junk box, too), as Stampin' Up! will notify you when your Stamparatus has been placed into your shopping cart. And at that point you'll go into your order, add more items to your cart if you wish, and then submit your order. Be very careful not to accidentally delete your Stamparatus from your cart because there will be NO way to add it back again!
So be ready to act quickly on Thursday to be among the very first lucky owners of a Stamparatus! I'd be VERY surprised if available reservations last until November 30th…. or even anywhere close to it!
Please note that the "sale" of this item will not actually take place until you close out and submit your order next February (or March or April, depending on which reservation period you used). Your "reservation" will NOT count as a sale, and as I understand things currently, I won't even be able to see that you've reserved one. (But you might wanna tell me anyway…..)
* * * * * * * * * * * * * * *
Ok, so yeah, that was a whole lotta words, so here's the Cliff Notes version:
Well, "Painted Harvest", from the 2017 Holiday Catalog might not only be MY new favorite stamp set, but it seems to have a pretty good track record among stamping enthusiasts in general, so far! Watch for some more ideas and tips for the "Painted Harvest" bundle as September's "Bundle of the Month".
First up, this card, which I made about a dozen of:

One of the things I particularly love about the Painted Harvest stamp set is that the 2-step images aren't designed to fit perfectly, so you don't have to stress about perfect alignment. As long as you get them "close", it'll all look fine when finished. That said, I do look to match up the centers of the flower elements as a guide. The centers aren't exactly round, but more oval (kind of), and I have found that if I key in on that unique shape and align that general shape from stamp to stamp, it all works ok.
This card features the flowers, fern-like leaves, acorn and speckles from the "Painted Harvest" stamp set, the tag die from the "Wood Crate Framelits" set, sentiment from "Teeny Tiny Wishes" stamp set, and linen thread and stamping sponges. (The ribbon and doily are now retired.)

Main colors (other than Whisper White, of course) include:

Interestingly, there is not one single, fail-safe "success rule" that applies to all 2-step stamp sets. While I usually put down the lightest color first (which usually uses the stamp with the least detail), and follow that with progressively more detailed images (and usually darker ink), every once in a while I'll come across a stamp set that seems to demand a break from that general pattern. The fern images on this set turned out to be one such instance. I found that when I was attempting to align the Garden Green detail stamp atop a Pear Pizzaz base, for some reason or other I couldn't get the images aligned to save my life. So I simply switched the stamping order, laying down the darker detail image first, and then it was a breeze putting the lighter shade over that. Go figure why that made *such* a difference in success to me, but it did!
And I stamped both elements of the acorn with the same color (Soft Suede), but the lower section was stamped off once, while the cap was stamped with full-strength ink.
 While this card didn't use it, there is also an adorable coordinating Leaf Punch, which you can bundle with this stamp set to save 10% on both!

Check back in a few days for more Painted Harvest ideas.
Click to shop:

|

|

|
I had a ton of fun chatting with so many friendly people at the Post Falls High School Craft Fair on Saturday! And was especially impressed to see how many Stampin' Up! demonstrators dropped by! I think by day's end there had been about 7 or 8 demonstrators who'd popped in and introduced themselves; now, if only I was good with faces and names to remember 'em all for *next* time, lol!
And the morning crowd was amazing; I remember looking up at one point and seeing the (quite wide) aisle completely filled with people in both directions. This was obviously not only a craft fair, but the day's social meeting point as well! 🙂
If you've attended one of my booth events over the years you know that I'm not one to just hang and wait for someone to show up. But rather, I generally keep myself busy stamping some kind of little give-away goodies. This year and last I chose gift tags for that item, and this year I particularly wanted something I could crank out quickly and not have to clean stamps along the way. So what's my favorite "quick stamp" technique? Something monochromatic! Not only can a single color of ink be a real wow, but it holds down supply costs and there's zero chance of sticking the stamp into the wrong ink pad! (Something that's always embarrassing to do in front of an audience.) I knew my working space would be limited, so the simpler, the better, I figured.
So here's the simple, monochromatic design I made and gave away 60-some 
of in 6 hours. (Actually, more like 4-1/2 hours, because the last hour and a half of the 6-hour show was basically dead.)
This tag began as a 2" x 4" piece of Whisper White cardstock. I chose Mossy Meadow for the ink color, and then there were just a few simple steps…..
IF I'd been able to find a "To / From" stamp I'd have either positioned that in the upper left-hand corner or on the back, but after searching in vain through my entire collection of current stamps I sadly concluded I must have sold or retired any such stamps that I once owned. Shoot. There are 3 such pairs of stamps in the current Holiday Catalog, and at least that many in the Annual Catalog, but doggone if I could find 'em when I was tearing through my stuff searching for 'em, lol! Oh well, we'll just call that "white space" – an important element of design, too.
Product List

|

|
|||

|

|

|
AND DON'T MISS THIS WEEK'S "WEEKLY DEALS" – available until discounted supplies are exhausted, or thru Monday, Nov. 16, whichever occurs first:

|

|

|

|

The main Annual Catalog & Idea Book. Click to view online.

Spring Mini Catalog & Idea Book. Latest releases. Click to view online!


