Playing with inlays

I've been having a lot of fun recently with various forms of paper inlays. That is, embedding one paper image (usually cut with a die) into another piece of paper or cardstock so that the two (or more) elements work together as a unit. There are a number of forms of this technique, but today I'd like to share where multiple colors can be used within a single die-cut image to offer up variations of color.

20180723_072547

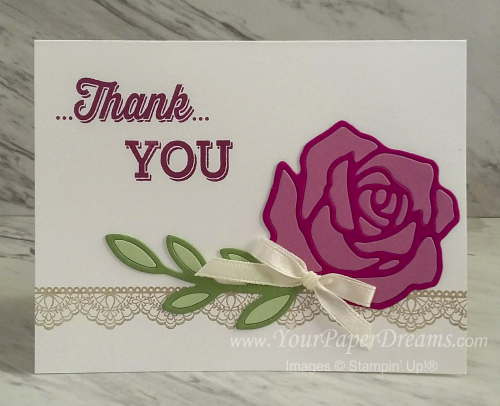
The card just above was my first attempt at this, and yes, if you're thinking these dies were recently retired, you would be correct. But these images are a perfect size to practice inlay if you're new to this technique because they're mostly large enough to handle reasonably easily. And I do recommend that if this is your first attempt, try to find an image with pieces large enough to handle. Don't make this harder on yourself than it needs to be, 'cuz it's supposed to be fun!

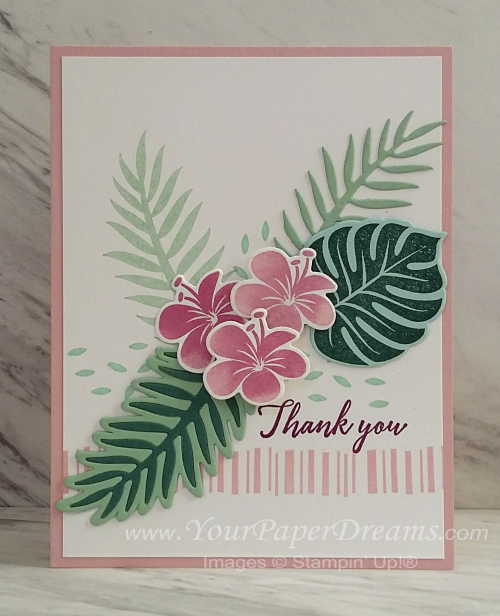
On this next card, I used this inlay technique on the lower left leaf to get the two shades of green…

20180723_072726

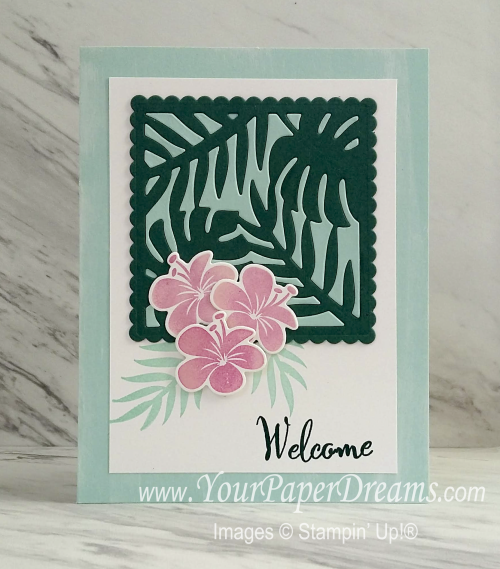
And on this next example, I'll walk though the steps and tips for doing the two-toned inlay on the square element at the top…

Tropical Chic

The colors of cardstock I have used on this square section are Pool Party and Tranquil Tide, and the dies are from the "Tropical Chic" bundle. I started by cutting out the same die shape from a scrap of each of those colors, and basically followed the same procedure with each one.

First, I set up my usual die-cutting sandwich stack and ran the stack through the Big Shot. But then when it came out of the machine, I didn't rip into the stack in my normal way; instead, I removed the entire stack from the machine and flipped the whole thing upside-down. Now I carefully removed layer by layer until I revealed the underside of the newly die-cut cardstock.

20180723_113437

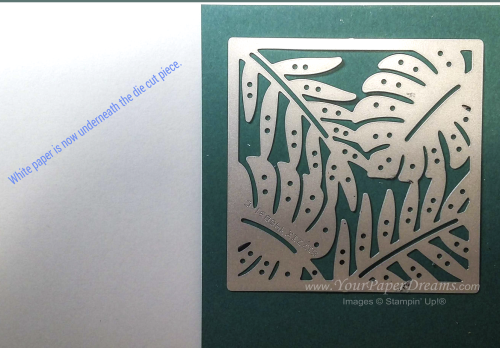
Next, I laid a sheet of contrasting paper (white, in this case) over what remained of the stack and held it in place tightly while I flipped the remainder of the stack back over, and laid it onto my table. So now I could carefully remove the cutting pad (which was once again on top), and ended up with this:

20180723_113540

(Note that going forward I'll be illustrating the process with the contrasting color of cardstock. But I did exactly the same process to each of the two colors I worked with, which ultimately gave me two completed squares – to make two cards.)

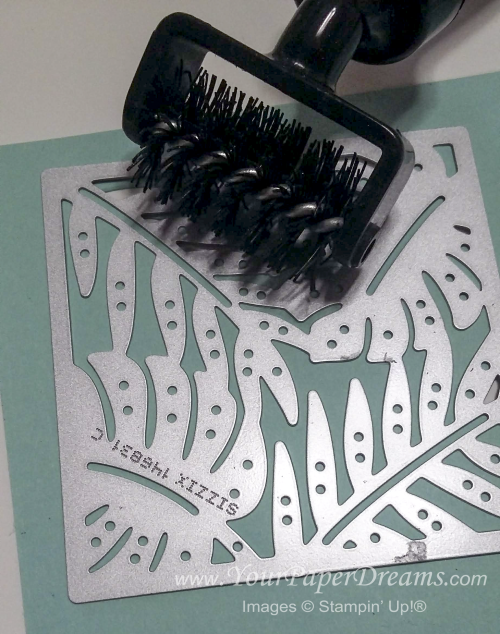
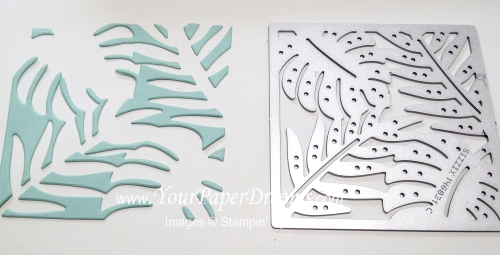
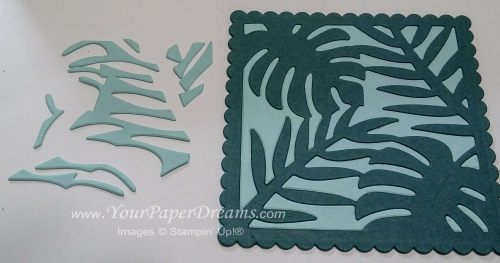
Next, using my die brush along with a wooden skewer VERY carefully, I poked out the cut pieces and let them fall into place onto the white paper. Yeah, I did have to make a few adjustments because this step never works exactly perfectly, but the point of this was to try to keep all the little pieces in relative order so I could work with them easily later. These will eventually become pieces in a miniature jig-saw puzzle!

20180722_160642

20180722_161243

Each time I have made one of these embedded examples I have found it helpful to adhere a "base" layer of cardstock underneath the main layer. This ensures the die cut images with all the holes in it doesn't stretch out of shape, and it also prevents drawing attention to any imperfections where one piece might not match up perfectly with another. For this latter reason, I usually make the base layer from the same color of cardstock as the pieces which will eventually be inlaid.

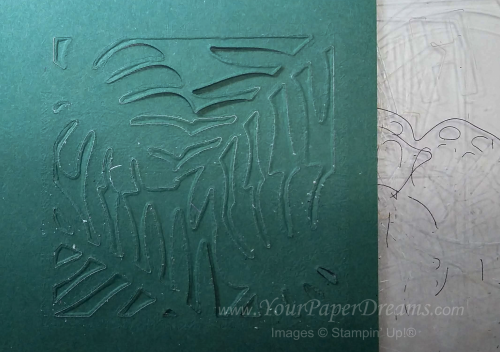
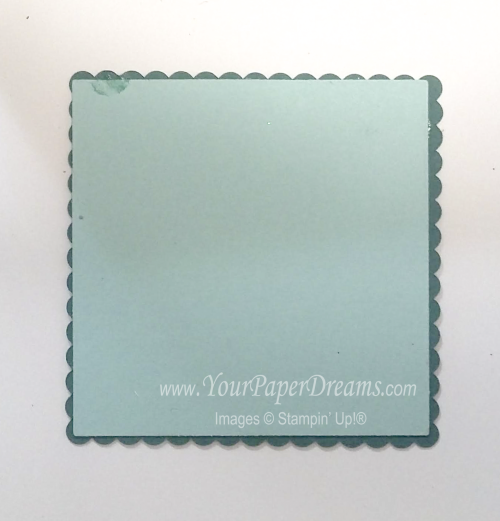
For the 2 examples shown at the top of this article, I die-cut just the outer shape of the image when a die was available, and traced and cut out a base when there was no die of that shape. (That rose does not have a solid shape, so it required tracing and cutting by hand.) Then I carefully glued the detailed shape onto its base. For my third card, I used a couple of square dies to trim up the final image, as well as to create a base layer for underneath. Here's the bottom view of the base layer…. just a little smaller than the finished piece, as you can see:

20180722_162712

Now with all the preliminary steps complete, it's time for the fun part….. to start adhering and embedding all the little pieces into their proper spaces. Begin with the piece right-side-up, and insert a teeny-weeny bit of glue onto the base layer in a few open spaces. (Tip:  I like to use a half-and-half mixture of Fine Tip Glue and Multipurpose Liquid Glue, dispensed from a Fine-Tip Glue Pen. I shake this up before using it, but then tap the bottom of the bottle on the table to reduce numbers of potential bubbles. This mixture maintains a little more "body" as it's dispensed, and doesn't take as long to dry as pure Fine Tip Glue does because it's not as liquid.)

Don't put glue in too many places at once; you don't want it drying up on you as you're still inserting pieces into place. A little experience will tell you how far ahead you can work with the glue. And don't forget that when I refer to a "teeny-weeny bit of glue", that's EXACTLY what I mean. ONLY enough glue to anchor the punched-out piece, and NO MORE!

This next picture shows pieces that have already been adhered in place along the left and lower areas. Can you see why it's important to keep the unplaced pieces in relative order for purposes of preserving one's sanity? 

20180722_162015

Most of the time I find I can pick up these pieces with my fingers (and fingernails), but ultimately there are will be a few pieces that are just too small for that. So I have found that if I quickly lick the tip of my pinky finger, touch it lightly to my other hand, and then touch it to the itsy-bitsy little piece, that little challenge piece will usually adhere to my pinky just long enough to set it right down in its appropriate place.  Whew!

And don't forget that if you need reading glasses for close-up work, WEAR THEM! And have adequate working light, and go stare across the street when you're done. It doesn't take my eyes very long to remind me that this kind of minute task isn't very friendly to the eyes.  Ah, but the finished result is certainly worth it!
Happy News card (w/ Good Friend)

003 I received some happy news recently that warranted a card, so I just had to dig out (and assemble, wouldn't you know?!?) this fun stamp set, "Good Friend".

The 3 colors I chose were Summer Sun, Old Olive and the just-recently-retired Pacific Point (which was just too perfect, so I couldn't help myself, lol.)

The letters in "news" were die cut on the Big Shot (Naturally Serif die), and attached with a 2-way glue pen.  Had to work very, very carefully to get the spacing so it'd fit!

Good-Friend

Now, if you check the images that come in this set, you'll see that I had to do a little "fussin'" with the "good friend" image.  At first I tried just inking up the word "good" with my marker.  But my marker is so juicy that it left areas of light and dark on the stamped image and I didn't care for that effect. So the next option was to mask it.

I began by covering the "…..friend" part of the image with a carefully-placed piece of transparent tape.  Then tapping very delicately, I inked up the stamp directly on the ink pad as usual.  But then here's the important part:  YA GOTTA REMOVE THE TAPE before stamping, lol!  (Does that sound like the voice of experience there?!?  Yes, it IS important to remove the tape or you get a great big smear instead of your carefully-planned custom image!)

Are you as charmed as I am with this darling birdie?  While he does fit on a card, just think how adorable he'd be on a scrapbook page or gift of some kind!  And he's got some companion birdies, too;"Cheep Talk" coordinates beautifully!  In fact, I used those images on the inside of this card.

Order up your own happy birdie sets here; just click and then select SHOP NOW.  For Good Friend, enter 113740 in the search box, and to find Cheep Talk (smaller coordinating images) it's 113204.

Video – Pop-up die “Cake”

  Pop_up_cake

Here's a great video that explains that new pop-up cake die (for the Big Shot, of course).  Full of lots of tips for success as you "build" your cake to pop from the center of your card!  What fun!

To view this video click on the video picture and then click on the next one you'll see, too.  And here's more information about this fun die!  Requires extended cutting pads (that's what they use in the video) – and you may also like the brand-new extended premium crease pad, too.

If you'd like to order any of these items online, click here, and then select the SHOP NOW button.  And then have tons of FUN with your pop-up cake!

Manhattan Flower Textured Impressions Die

Apr-04-2009-004  Here's another card from my recent Stamp-a-Stacks of Friday and Saturday.  This features the Manhattan Flower Textured Impressions Die (for the Big Shot) – used on a single layer of our vellum cardstock.  This die gives a BEAUTIFUL embossed image – so perfect for really elegant cards.  My sample, of course, was designed as a wedding card (or could also be used as a wedding invitation, of course), but class participants were able to choose their greeting of preference, so some of the cards became very special birthday or friendship cards. 

Do you see that blush of deeper pink right where the roses are?  To add that extra shading we sponged some areas of Regal Rose ink directly onto the Pink Pirouette cardstock layers – right behind where the vellum roses would be.

Apr-04-2009-006 

As I was designing my Stamp-a-Stack card I kind of got carried away with several variations, so here are a couple others I made at the same time.  I really think this birthday card on the right is my favorite of all of 'em, but I didn't have enough Pink Pirouette cardstock on hand for everyone to make one.  (Note to self:  I'm almost out of Baja Breeze, Pink Pirouette, and Kiwi Kiss cardstock.  Yikes!  Better get some ordered soon!  Apparently I LIKE those particular "In-Colors", lol.)


  Apr-04-2009-005 

And finally, this one actually looks better in real life than it does in this photo.  Somehow, the back layer of the card appears kind of green here, although it's actually Confetti White cardstock – so it's definitely NOT green, lol!  And I just realized that apparently the "Best Wishes" greeting kind of shows some wear from excessive handling, too.  Honest – it really *was* mounted straight at one time.  Oh well….. I'm too lazy to go shoot it over again, 'cuz my camera batteries are dead at the moment and I don't want to wait until they recharge before getting this posted.  But you get the idea, I'm sure.  <smile>

Click here for some more tips about that Manhattan Flower Textured Impressions Die.

Big Shot Matchbox Die

Remember this "teaser" from a few days ago? 

 Mar-27-2009-004

I promised I'd show you the whole project when the product became available.  Well, the Occasions Mini Catalog is finally in effect as of today, and you Big Shot lovers are gonna WIG OUT over this new Matchbox Die!  Check out what this awesome gem can make! 

Mar-27-2009-004-b 

See that darling little matchbox on the right?  Well many of you know I've been showing matchboxes for several years – but they always involve measuring and "math", and cutting and scoring and….

Well now most of that is GONE!  Just pass your cardstock or material of choice through the Big Shot machine with this new die, and out comes your cut and scored box – all ready to fold up and assemble!  And not only does this die make your box, but also the sleeve.  AND several fun tag shapes, too!  Here's a close-up (perfectly sized for 4 Hersheys Nuggets wrapped with 3" x 1" Designer Series Paper from the free Sale-a-Bration rewards):

Mar-27-2009-010 

See that clear sleeve?  WINDOW SHEETS ARE BACK!  And not only "back", but available in two weights of clear, and also now PRINTED!  Oh my gosh!  Be still my heart!

So seeing into a matchbox is obviously just the beginning; wait till you see what I just made last night with my new window sheets!  Guess you're just gonna have to stay tuned…….. or sign up for my Stamp-a-Stacks this weekend and see it in person…….

Happy Spring

Mar-16-2009-004Well you'd never know it by the looks of the weather outside as I write this, but the calendar claims it IS officially spring now! 

This delicious card was a favorite at my Stamp-a-Stacks earlier this month – all done up in Bashful Blue and Whisper White. Of course we used the Big Shot (to emboss the polka dots of the background and add that soft blue in between), and the flower comes from one of my new favorite stamp sets – Fifth Avenue Floral. "HAPPY" is from Fundamental Phrases, and "Spring", well, that's one of those all-time winning word sets that I refused to part with when it retired!

Wouldn't you like to join us at my monthly Stamp-a-Stacks and make some of these cards yourself?  You can register right online for any one of my 3 sessions each month; just click the keyboard graphic in the left-hand column, or the class registration link at the top of the page!

Lynda

Sweet Basket for Easter, Party Centerpiece, or ?

Mar-22-2009-003This sweet basket was a Make & Take project my March Clubs made last week.  (Eggs weren't included, although they, too, feature rub-ons from last year.)  Can't you just imagine how this basket could be used in so many fun, creative ways?!?  Not only can it serve as an Easter basket as shown here, but how about a wedding or shower centerpiece, or for any other type of party or celebration, as well….. just by changing out the embellishments and modifying the colors!  And how fun would it be to see it adorned in one of our bright Designer Series Papers?!? 

And while it's not absolutely necessary that this basket be lined, doing so not only presents a more finished look on the inside, but also provides added strength, so it can actually hold up those pretty eggs!

A few other highlights of this one include the Eyelet Border (punch) used to make the "lace" at the top edge, and the flowers (one on each basket end) were made with the Flower Daisies #2 Sizzix die.  We used a white brad from the Neutrals Jumbo Brads  (5/16") assortment for the centers.  And can you figure out how the basket ends were created?  They're a slightly-modified shape from the Stampin' Up!® Baskets and Blooms die.  (Yes, apparently I can no longer live without my Big Shot, lol!) 

As always, if you'd like to order any of these items to make your own basket, you may either email me or click here for easy online ordering.  And if you order at least 3 of the 4 items highlighted in the previous paragraph through me before the end of March 2009 I'll send you the instructions for making this basket yourself!