I’ve just been dying to dig into this Christmas Barn Bundle that I purchased a few months ago, but hadn’t yet had the opportunity to use. Thankfully, I finally found the time recently!
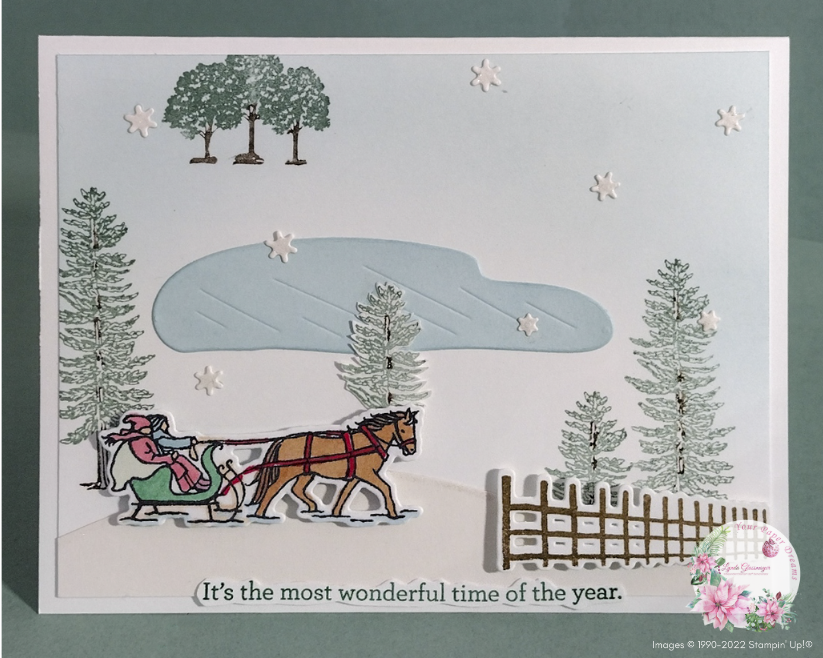
This bundle (stamps + dies) has so many appealing images it took me a bit longer than usual to figure out an arrangement that reflected what I had in my head. I loved the barn, but pretty quickly realized that if I wanted to use the horse & sleigh, the pond, AND several trees… that there just wasn’t going to be room for it all on a standard-sized card. So the barn will have to wait its turn.
This is a standard 5-1/2″ x 4-1/4″ card. Its base features the thick basic white cardstock, which is my standard go-to for most of my card bases. I cut the snow hill at the bottom freehand from a scrap of Shimmery White cardstock, and the snowflakes were then die-cut from the remnants of that same scrap.
To get the dual-color look for the trees, I began by inking the stamp with Soft Succulent Classic Pad, but then immediately added the brown color to the trunk & branches with my Early Espresso Stampin’ Write marker, applied directly onto the stamp. (Note: this is ok to do with our Stampin’ Write markers because they are water-based and will easily wash off the stamp; but do NOT try this with the Blends, however, as they are alcohol-based and not intended to be used directly on stamps.) Anyway, once the Stampin’ Write marker color was applied to the stamp, I breathed some warm, moist air onto the stamp and immediately stamped it onto the card.
Balmy Blue Classic Pad provided the 2 blue areas on this card: the sky and the pond. I used a Blending Brush to apply ink to each area, varying the intensity of the ink accordingly.
The sleigh & horse were stamped with the black Momento pad, and then colored with several Stampin’ Blends colors before die-cutting. And that image, along with the fence, was then mounted with Stampin’ Dimensionals.
For final touches, I stamped the sentiment that appears at the bottom onto scrap cardstock, and cut it out freehand. And then added a bit of twinkle to the top edge of the snow hill, as well as to the snowflakes with my Wink of Stella Glitter Brush.
And just like that, my Christmas Barn Bundle has now been broken in!

")