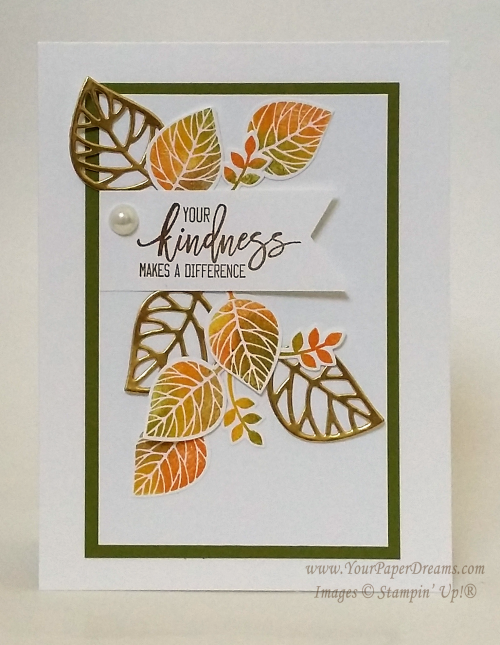
Yep, this time it's a fall card! Again, a "Lynda version" of a card that's been all over the 'net, and I loved the contrast between the die-cut lacy leaves and the solid, multi-color ones. Some versions of this card "out there" use a fun, but rather messy inking technique. But since I had designed my version for class, "messy" wasn't something I particularly wanted to tackle.
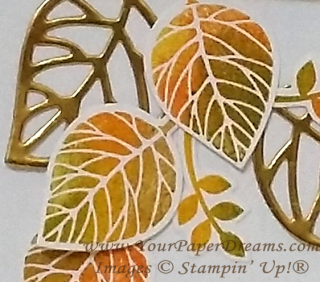
So here's how WE got a similar multi-color, autumn effect. It's a pattern that you repeat for each individual image:
- Start with a clean stamp. (Good idea to keep a damp paper towel handy.)
- Ink up the stamp with Daffodil Delight, but do not stamp with it yet.
- Lay out all your remaining leaf color inks in order from light to dark, left to right, and have a sponge dauber at hand for each one. (At my class we laid out Pumpkin Pie, Old Olive & Soft Suede.)
- Onto your yellow-inked stamp, "daub" (is that a real word?!?) a couple of other colors directly onto small areas of the stamp….. one at a time, and always working from lightest to darkest. So because of the order we'd laid out the inks, that would mean Pumpkin Pie followed by Old Olive, OR Old Olive and then Soft Suede. Pay attention to where you daub each color on the stamp so you don't overlap sections entirely.
- Once that was done, there would be 3 colors on the stamp (Daffodil Delight + 2 others), and after "huffing" on it, it was time to stamp the image (onto a scrap of Whisper White cardstock).
- Clean the stamp and get ready to repeat the process for the next leaf.
We stamped (and then die-cut) enough of these colored leaves for not only the front of the card, but also one or more for the inside, too.
And we followed the same process for those little "flowery-leafy-thingies", too.
After layering up the main pieces on the card front, we made the banner with the sentiment and anchored that in place…..
And then the lacy-leaves (cut with the corresponding stem-and-leaves die from this bundle – from Gold Foil paper) were laid in place to give a general shape to the layout. And finally, all pieces were tacked down with either strategically-placed dots of glue from the Fine Tip glue pen or the Tombow Multipurpose glue. (Repeat after me, Lynda's cardinal rule of glue-use: "Less is more. Less is more. Less is more!")
A large (retired) pearl finished it off (and ensured it would cost an additional 21-cents to mail)!


