 In my last post I shared about our recent team swap challenge and featured a card sample that was very similar to the one I submitted for our swap. Today I've got another one using that very same stamp set (Painted Petals – from the Occasions Catalog), but highlighting different stamps and colors. AND it's ALSO under 80-bucks ($74.65) and makes 20 cards with envelopes, too….. making a great choice for a new stamper.
But the combination of flowers and leaves I've used on this card can prove a little bit tricky to get aligned until you're familiar with how they fit together. So I do recommend either choosing the totally clear photopolymer option – or plan to get the Stamp-a-ma-jig involved if you've got clear-mount or wood-mount. Either way will work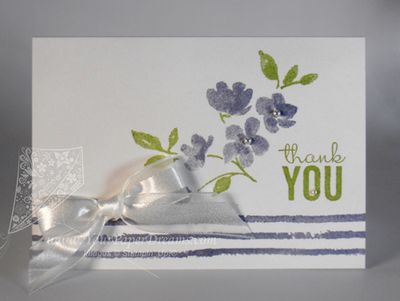 .
.
For this card, which is stamped on one of our notecards that come 20 to a package and include coordinating envelopes, I stamped the 3-line image twice across the lower part of the card, and then stamped the "thank you" words before tackling the flowers. (This helped me decide where to put the flowers, and at what angle.)
As to the flowers, here are some tips for getting them in place – and aligned.
First, if you've chosen the photopolymer version of this stamp set, make sure you've not got a "boo-boo" set. The first few sets to roll out the warehouse door when this set was first brand-new were cut incorrectly, and each flower was cut apart from its neighbors. But there are *supposed* to be only 13 individual stamps in this set; if you've got more than that, you'll want to contact the demonstrator through whom you purchased your stamps and arrange for an exchange.
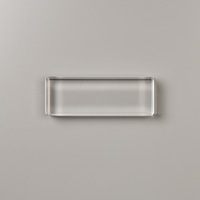
Once you've determined your stamp set is ok, select and mount these 2 stamps – a set of flowers and a set of stems and leaves. I used a "D" block for the leaves and an "H" for the flowers. (Included in the price mentioned above.)
I like to begin by orienting my leaves as shown above. Working with this orientation seems to be the key to the whole thing, for me. Note the single stem is at the left; shown with the pink circle. Go ahead and stamp your leaves.
Now the flowers get placed in that very same orientation; the single bud goes at the end of the single stem. Here's what it looks like when they're matched up. See how the other flowers fit in around the other stems and leaves? You may have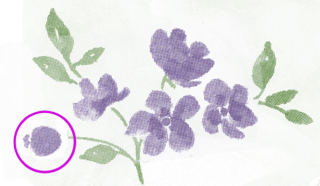 to move or rotate your flowers slightly to get it just right. If your hands are unsteady or it seems particularly awkward, it's probably time to pull out the Stamp-a-ma-jig.
Once everything was stamped, I simply finished off the card with a bow. Pretty quick and easy – once you figure out how the flowers and leaves work together!
Have fun!
Product List
