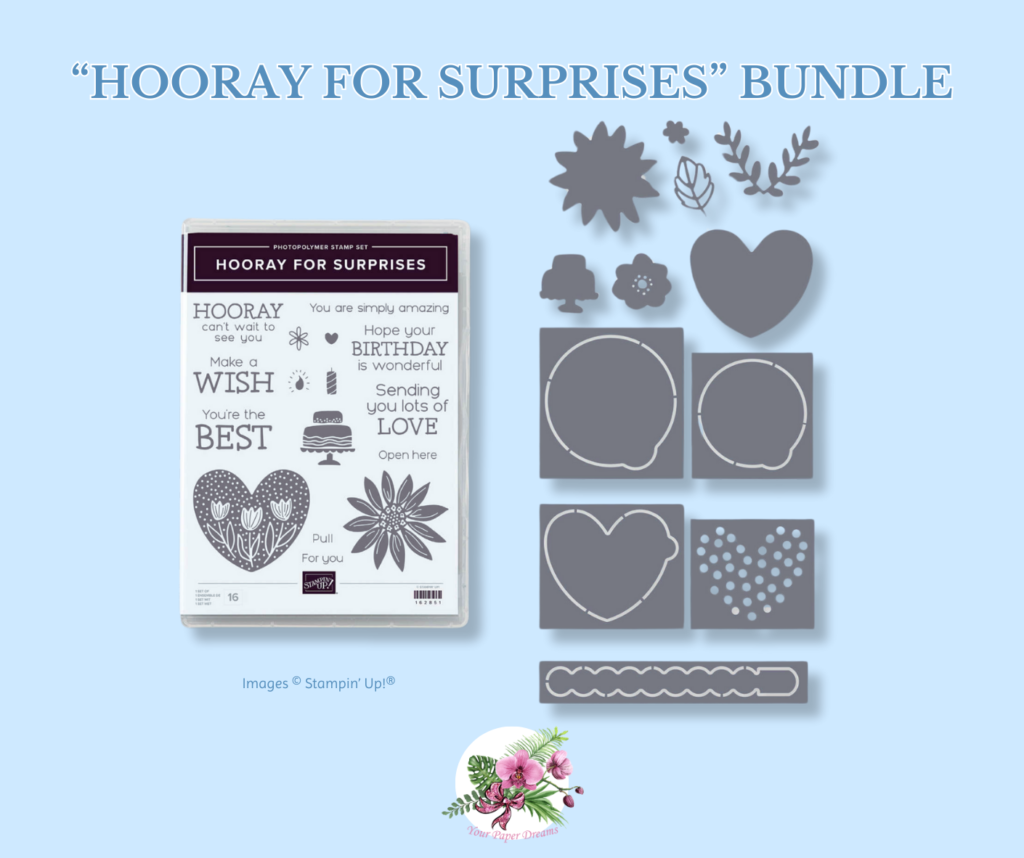
Hooray for Surprises


Hey! Grab my handy, free app to direct you to all my links & things. Test it out!

Now, before we get to the specific “how to” of making your own metallic-looking accessories, I need to share a bit of background information. You see, the Designer Series Paper shown on this card came from the 12″ x 12″ collection called “Dainty Flowers”. It’s really lovely paper, front AND back, and it’s even been available for nearly 2 months for free with a $50 Sale-a-Bration order. But just as I got this card put together, inventories of that DSP ran out. And sadly, it’s no longer available.  But of course you can use any cardstock or DSP of your choice, should you want to make a card similar to this one.
The layout template, including all cutting sizes, was included in my online card classes of last week. And it will eventually reappear in an upcoming compilation of such templates, so hang tight & keep checking back if you’re interested in that.


November's exclusive "Snowflake Showcase" has certainly been an amazing collection, hasn't it? So many beautiful snowflakes and versatile images – in both stamp sets and dies; I'm super-sad to see it coming to an end. But yep, today's its last day of availability; the curtain falls in just a few more hours.
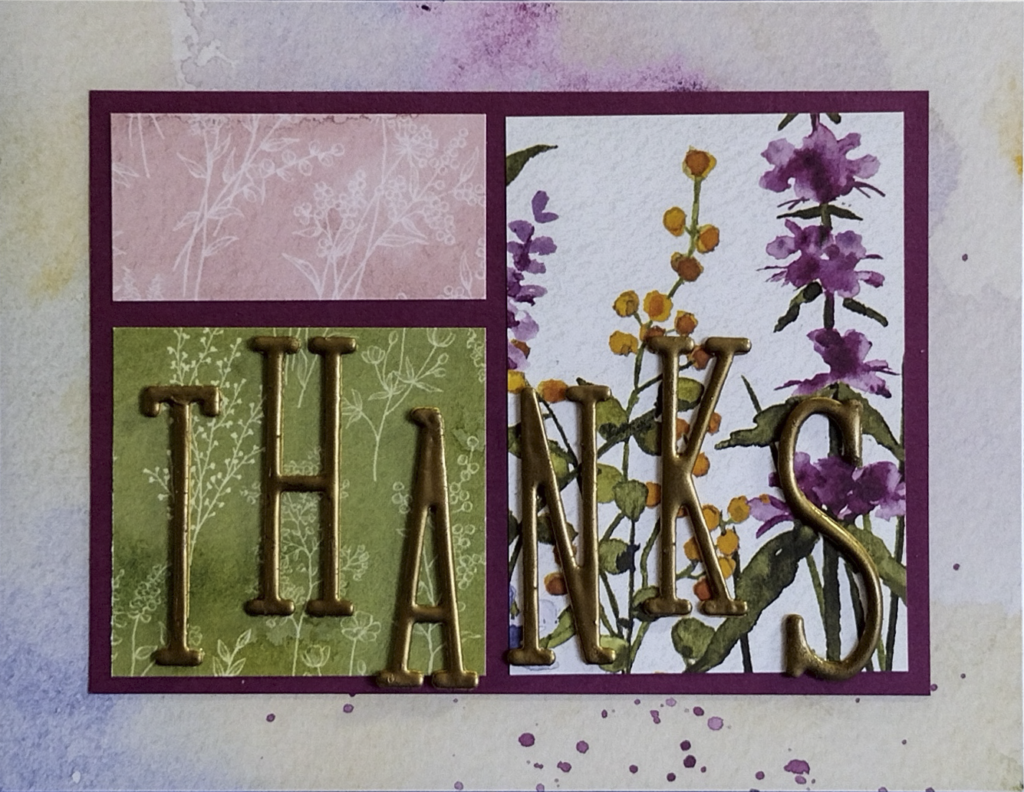
In the meantime however, I thought I'd share some of the thank you cards I've been sending out recently. Featuring… well, what else, lol?!? Not only some of my favorite winter-time images, but some of my very favorite winter colors, too!

Besides the "Snow is Glistening" and "Kindness & Compassion" stamp sets, these cards feature "Layering Ovals" dies; Highland Heather, Gorgeous Grape and Coastal Cabana inks; Frost White Shimmer Paint; Clear Rhinestone Jewels; and Highland Heather, Gorgeous Grape, and Whisper White cardstocks (WW in both regular and thick). And of course, the Stamparatus helped place that "Thank you" image exactly where I wanted it… nice and bright!

There are still a few remaining hours to claim all or part of this collection for yourself. If you're still debating, let me help. The answer is "Yes!" – because snowflakes of this classic art style will never look dated, they can be used solo or in conjunction with other images on almost any winter project, and look fabulous in pretty much any color. (Well, maybe not so much Real Red or Cajun Craze, come to think of it….. but YOU know what I mean, lol!)
See what's still available from the Snowflake Showcase here!
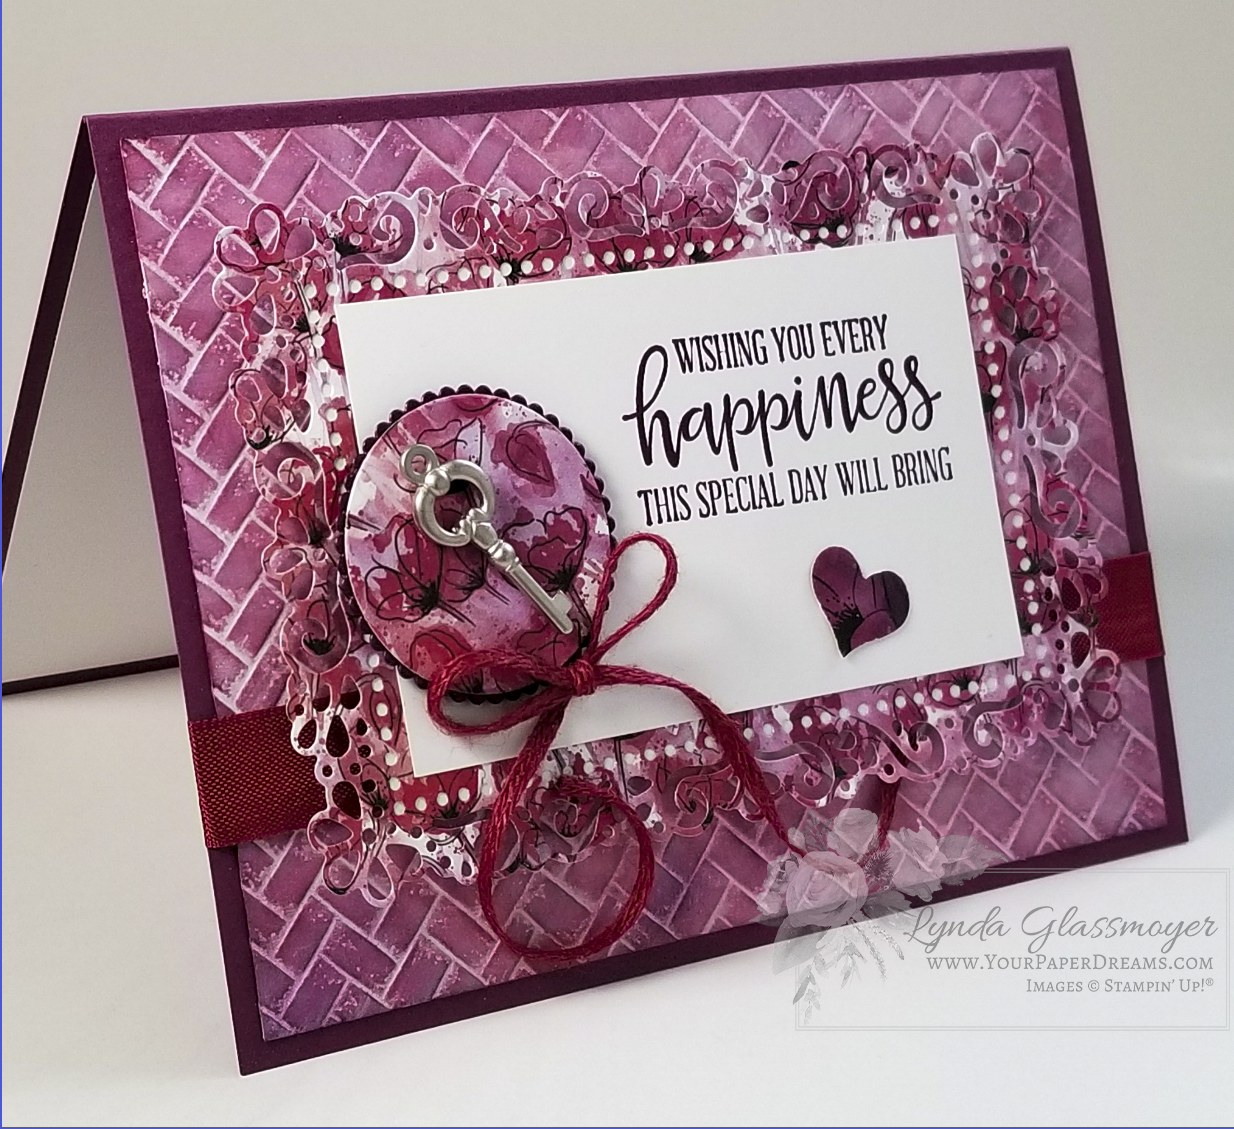
I've been having a lot of fun recently with various forms of paper inlays. That is, embedding one paper image (usually cut with a die) into another piece of paper or cardstock so that the two (or more) elements work together as a unit. There are a number of forms of this technique, but today I'd like to share where multiple colors can be used within a single die-cut image to offer up variations of color.

The card just above was my first attempt at this, and yes, if you're thinking these dies were recently retired, you would be correct. But these images are a perfect size to practice inlay if you're new to this technique because they're mostly large enough to handle reasonably easily. And I do recommend that if this is your first attempt, try to find an image with pieces large enough to handle. Don't make this harder on yourself than it needs to be, 'cuz it's supposed to be fun!
On this next card, I used this inlay technique on the lower left leaf to get the two shades of green…

And on this next example, I'll walk though the steps and tips for doing the two-toned inlay on the square element at the top…

The colors of cardstock I have used on this square section are Pool Party and Tranquil Tide, and the dies are from the "Tropical Chic" bundle. I started by cutting out the same die shape from a scrap of each of those colors, and basically followed the same procedure with each one.
First, I set up my usual die-cutting sandwich stack and ran the stack through the Big Shot. But then when it came out of the machine, I didn't rip into the stack in my normal way; instead, I removed the entire stack from the machine and flipped the whole thing upside-down. Now I carefully removed layer by layer until I revealed the underside of the newly die-cut cardstock.

Next, I laid a sheet of contrasting paper (white, in this case) over what remained of the stack and held it in place tightly while I flipped the remainder of the stack back over, and laid it onto my table. So now I could carefully remove the cutting pad (which was once again on top), and ended up with this:

(Note that going forward I'll be illustrating the process with the contrasting color of cardstock. But I did exactly the same process to each of the two colors I worked with, which ultimately gave me two completed squares – to make two cards.)
Next, using my die brush along with a wooden skewer VERY carefully, I poked out the cut pieces and let them fall into place onto the white paper. Yeah, I did have to make a few adjustments because this step never works exactly perfectly, but the point of this was to try to keep all the little pieces in relative order so I could work with them easily later. These will eventually become pieces in a miniature jig-saw puzzle!


Each time I have made one of these embedded examples I have found it helpful to adhere a "base" layer of cardstock underneath the main layer. This ensures the die cut images with all the holes in it doesn't stretch out of shape, and it also prevents drawing attention to any imperfections where one piece might not match up perfectly with another. For this latter reason, I usually make the base layer from the same color of cardstock as the pieces which will eventually be inlaid.
For the 2 examples shown at the top of this article, I die-cut just the outer shape of the image when a die was available, and traced and cut out a base when there was no die of that shape. (That rose does not have a solid shape, so it required tracing and cutting by hand.) Then I carefully glued the detailed shape onto its base. For my third card, I used a couple of square dies to trim up the final image, as well as to create a base layer for underneath. Here's the bottom view of the base layer…. just a little smaller than the finished piece, as you can see:

Now with all the preliminary steps complete, it's time for the fun part….. to start adhering and embedding all the little pieces into their proper spaces. Begin with the piece right-side-up, and insert a teeny-weeny bit of glue onto the base layer in a few open spaces. (Tip: I like to use a half-and-half mixture of Fine Tip Glue and Multipurpose Liquid Glue, dispensed from a Fine-Tip Glue Pen. I shake this up before using it, but then tap the bottom of the bottle on the table to reduce numbers of potential bubbles. This mixture maintains a little more "body" as it's dispensed, and doesn't take as long to dry as pure Fine Tip Glue does because it's not as liquid.)
Don't put glue in too many places at once; you don't want it drying up on you as you're still inserting pieces into place. A little experience will tell you how far ahead you can work with the glue. And don't forget that when I refer to a "teeny-weeny bit of glue", that's EXACTLY what I mean. ONLY enough glue to anchor the punched-out piece, and NO MORE!
This next picture shows pieces that have already been adhered in place along the left and lower areas. Can you see why it's important to keep the unplaced pieces in relative order for purposes of preserving one's sanity?

Most of the time I find I can pick up these pieces with my fingers (and fingernails), but ultimately there are will be a few pieces that are just too small for that. So I have found that if I quickly lick the tip of my pinky finger, touch it lightly to my other hand, and then touch it to the itsy-bitsy little piece, that little challenge piece will usually adhere to my pinky just long enough to set it right down in its appropriate place. Whew!
And don't forget that if you need reading glasses for close-up work, WEAR THEM! And have adequate working light, and go stare across the street when you're done. It doesn't take my eyes very long to remind me that this kind of minute task isn't very friendly to the eyes. Ah, but the finished result is certainly worth it!
If you're like me, you probably love the added dimension and interest that Stampin' Up!®'s dies add to your papercrafting. But you may also wish to skip some of the potential headaches that can arise when trying to keep all those frustrating little bits of metal under control! Today I'll be sharing some of my tips for handling and storing dies with minimal frustration.
LOL!
OK, who are we kidding here!?! WHAT serious papercrafter actually takes the time in the middle of his/her creative "zone" to put away every single tool one-by-one?!? Pretty inefficient, if you ask me…. 'cuz not only are you risking losing your creative mojo, but you just might need to use that exact same tool again only 14 seconds from now, right?!?
Ok. So let's start over, but this time we'll add in a dose of reality. Here's my approach:
I recognize that while I'm creating, things WILL be out of place. So I try to be ok with that. But that doesn't mean my workspace has to devolve into total chaos; my goal is to keep things at least moderately corraled so they don't get lost or damaged, and they can be returned to their rightful places with minimal effort and headache later. So while I'm working… 

This awesome tray was given to me by a friend. But it's easily found at Harbor Freight, and it's easy on the budget. Designed for mechanics to hold onto screws and bolts and the like, it's got a heavy magnet at the base. So it can be attached to a metal tool chest or workbench – or not. I've found that without even attaching the tray to a magnetic surface, its weight alone tends to keep it upright and unlikely to tip over with normal use. And of course, the magnet at its base keeps the dies in place inside the tray regardless.
I LOVE this tray! But there *is* one lesson I've learned while working with it. Occasionally I've found that a smallish die just disappears. Totally vanishes from my work area! One moment it's there, and a second later it's not. But I've had this happen enough times now, that before I set off on an extensive exploration of my clothing, the carpet, the wastebasket, etc., I usually just need to pick up the tray and look underneath it…

Now, has this ever happened to you? You're straightening up your workspace and come across an itty-bitty die that looks something like this.

Quick now, what die set does it belong to? (Yeah, right!) Well, here's the shortcut way to find out.
Flip it over, and …..

Read the 6-digit number engraved on it. That will be the Stampin' Up! product code! If you have absolutely no idea what set it belongs to, click here (store.YourPaperDreams.com), and type that product code into the search bar. If it's still currently available, the picture and name of its die set will come up so you can reunite it with its family!

But if it's not currently available, you'll have to search through your collection of die sets, looking at the product code of each set, in order to find the rest of its tribe. Tedious, yes. But at least doable!
Which brings me to the topic of how I *store* my thin dies… and why. Check out more tips in my next post!
Stamparatus: A *must-have* positioning tool that will change the life of any stamper. Similar to the "other brands", except this one's on steroids!
If you don't already have your Stamparatus, you'll be able to order it beginning this Friday, June 1, at store.YourPaperDreams.com (Product #146276)
Recently I've been working on another one of my "making multiples" projects and have discovered several tips that have helped me fall even deeper in love with this gizmo (didn't know that was even possible!), and I'm sure it will do the same for you, too.
My project uses a long piece of cardstock, and images are ultimately stamped over much of its surface. Because the end has to extend beyond the surface of the platform I was finding that while I was initially using the Stamparatus in my usual orientation (clear "wings" either folding in from top or a side) I was frequently either getting unwelcome creases or ink on the extended end, just from handling the whole set-up. Given that I'm aiming to make somewhere around 100 of these eventually, that was definitely proving awkward.
So I flipped it all around…. extending the excess cardstock up at the top, facing away from me – and positioning my clear "wing" pointing towards me. And that change alone reduced the amount of stray inky fingerprints and creases I ended up with. I found that I got more ink on the stamp (and less ink on the surrounding clear plate) by placing one hand underneath the "wing" while inking the stamp with my other hand. And best of all I could actually see what I was doing because it was directly in front of me!
![20180530_080847[1]](http://box5250.temp.domains/~paperdr6/wp-content/uploads/2018/05/6a00d83494abd653ef0223c84f24f1200c-320wi.png "20180530_080847[1]") One of the tips I'd already discovered in the past was to match the size of the ink pad to the size of the stamp. (Full-size ink pads for larger stamps and Stampin' Spots for the smaller ones.) I already have a decent supply of Stampin' Spots from having been a Paper Pumpkin subscriber for so long, but I've also recently been filling in color gaps by making up my own Stampin' Spots in colors I've been missing. (BTW, you can order a set of empty spots here and ink them up with the refill colors of your choice. You DO already have the ink refills that match your ink pads, don't you?!?)
One of the tips I'd already discovered in the past was to match the size of the ink pad to the size of the stamp. (Full-size ink pads for larger stamps and Stampin' Spots for the smaller ones.) I already have a decent supply of Stampin' Spots from having been a Paper Pumpkin subscriber for so long, but I've also recently been filling in color gaps by making up my own Stampin' Spots in colors I've been missing. (BTW, you can order a set of empty spots here and ink them up with the refill colors of your choice. You DO already have the ink refills that match your ink pads, don't you?!?)
Since I'm doing so many of these I needed a quick and efficient way to get my cardstock lined up each time I needed to work on its other end. And 1" wide blue painter's tape proved the answer to that. I just plopped a piece of my cut-to-size cardstock down on the platform, temporarily held it in place with magnets, and laid the painter's tape around 3 of its edges. So going forward I could just insert each piece of cardstock right into that template and anchor it with magnets. So far, the tape has held up like a charm, and it doesn't seem to leave any residue either!
And finally, just a reminder to conserve your precious cardstock while you're still designing your layout, and substitute printer paper or something else fairly cheap whenever possible instead. Personally, I use grid paper and/or printer paper for stamping on while I'm developing my layout, and modest-sized scraps of colored cardstock when pulling together colors and layers. I'll only cut a piece of colored CS to actual size once I've got the fussing-around steps mostly behind me and am pretty confident the project seems to be headed in a direction that's gonna work.
So if you don't already have your Stamparatus, mark your calendar for Friday, June 1, jump into my online store, and get one headed your way!

STAM•PA•RAT•US: Noun. 2017-2018 (and beyond); < rubber-stamper lingo; Latin stamp + apparatus> 1. a feature-packed device to assist rubber stampers with placing stamped images exactly where desired 2. a gizmo used to perfectly align up to 4 stamped images 3. a doo-dad which allows another attempt at stamping a fully-inked image if the first was unsuccessful 4. an amazing tool that all rubber stampers will want to own in order to make their stamping adventures more fun, easy, and oops-free. Synonym: "the most advanced stamp-positioner on the market"
Well, we've waited a whole lotta years, but it's finally (almost) here! Stampin' Up!'s feature-packed stamp positioner that blows all other similar devices currently on the market right out of the water! Why? Because once again, Stampin' Up! has created a tool designed FOR stampers BY stampers (LOTS of 'em, actually!)
So what's up with this gizmo with the funky name?
Well, I recommend downloading this PDF flyer for a quick overview…….

and then checking out this video to see the Stamparatus in action:
Soooooo…… now that you have an idea what this little gem can do, we'll assume that by now you know you need one of these puppies for your very own self. (I mean, who wouldn't? Right?) So listen-up while I share how to be among the very first to get your mitts on one of these coveted treasures….. (Yeah, yeah, it's a little bit complex, but I think we can all catch on eventually…)
Stampin' Up! recognizes that this is expected to be a hot, hot item, but wants at the same time to avoid the disappointment of a potentially protracted back-order situation, as these Stamparatuses [Stamparati?] can only be manufactured and stocked at a finite pace. Therefore, Stampin' Up! has designed a clever "reservation" system that will allow you to (sort of) preorder yours before it is even manufactured. There will be 3 limited preorder/reservation periods between now and when this tool appears in next summer's Annual Catalog, and you may order up to one device during each of the 3 periods – while supplies last. The limited preorder periods will run during the following dates, but only until the maximum number of available reservations has been reached. (In other words, those who preorder early in the period stand a better chance of successfully reserving a unit than those who wait until later).

As you see, the first reservation window opens this coming Thursday, Nov. 16th. At 2:00 pm, Mountain Time, to be exact. (Barring any hiccups like crashed websites and other technicalities, of course.)
To place your reservation you'll go to my online store and look for the "Reserve" link on the Stamparatus page. (You must already have an online customer account set up in order to proceed; if you don't already have an online account, I urge you to go ahead and set one up now to be ready.) Then follow the simple instructions shown in this tutorial. Note that you must have a credit card available in order to place your reservation, but you won't actually be charged until your Stamparatus comes in.
Then when the approximate shipping date nears (better put it on your 2018 calendar right away so you don't forget), be sure to keep an eagle-eye on your email inbox (including your junk box, too), as Stampin' Up! will notify you when your Stamparatus has been placed into your shopping cart. And at that point you'll go into your order, add more items to your cart if you wish, and then submit your order. Be very careful not to accidentally delete your Stamparatus from your cart because there will be NO way to add it back again!
So be ready to act quickly on Thursday to be among the very first lucky owners of a Stamparatus! I'd be VERY surprised if available reservations last until November 30th…. or even anywhere close to it!
Please note that the "sale" of this item will not actually take place until you close out and submit your order next February (or March or April, depending on which reservation period you used). Your "reservation" will NOT count as a sale, and as I understand things currently, I won't even be able to see that you've reserved one. (But you might wanna tell me anyway…..)
* * * * * * * * * * * * * * *
Ok, so yeah, that was a whole lotta words, so here's the Cliff Notes version:

Yep, this time it's a fall card! Again, a "Lynda version" of a card that's been all over the 'net, and I loved the contrast between the die-cut lacy leaves and the solid, multi-color ones. Some versions of this card "out there" use a fun, but rather messy inking technique. But since I had designed my version for class, "messy" wasn't something I particularly wanted to tackle.

So here's how WE got a similar multi-color, autumn effect. It's a pattern that you repeat for each individual image:
We stamped (and then die-cut) enough of these colored leaves for not only the front of the card, but also one or more for the inside, too.
And we followed the same process for those little "flowery-leafy-thingies", too.
After layering up the main pieces on the card front, we made the banner with the sentiment and anchored that in place…..
And then the lacy-leaves (cut with the corresponding stem-and-leaves die from this bundle – from Gold Foil paper) were laid in place to give a general shape to the layout. And finally, all pieces were tacked down with either strategically-placed dots of glue from the Fine Tip glue pen or the Tombow Multipurpose glue. (Repeat after me, Lynda's cardinal rule of glue-use: "Less is more. Less is more. Less is more!")
A large (retired) pearl finished it off (and ensured it would cost an additional 21-cents to mail)!


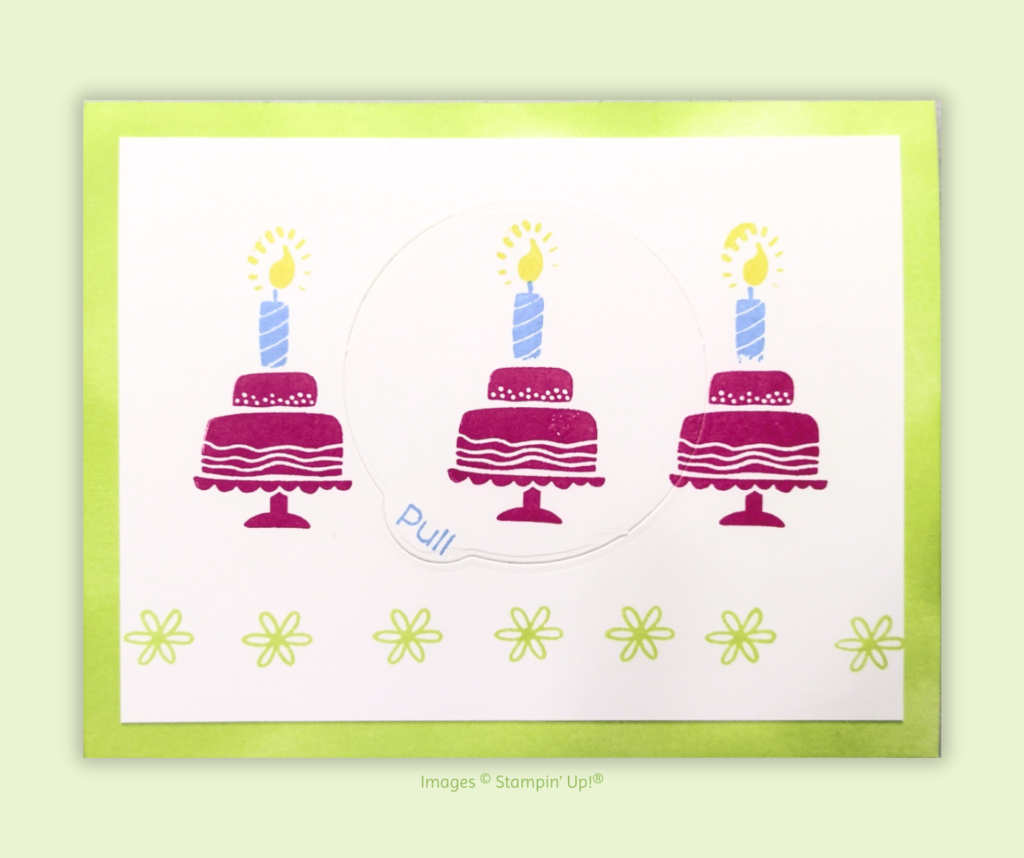
At my card classes earlier this month we capitalized on the versatility of the Thoughtful Branches Photopolymer Bundle and stamped up cards representing spring/summer, fall and winter. (See an additional fall card here.) Today I'd like to share our spring/summer card. Isn't it fascinating how the same stamp/die combo turned one way and stamped in orange can be a pumpkin….

yet flipped over and stamped in a different color becomes a hydrangea?!? Yes, I do believe this bundle from Stampin' Up!® is truly one of the top most creative and versatile they've produced. And I'm so sad that in only 3 more days it will go away.

The color palette for this card is simple and fresh - generally monochromatic with its Whisper White, Basic Black, Pool Party & Bermuda Bay. The basic idea was something I'd seen online, but then I added my own tweaks, including the jaunty angles of the layers for an extra punch of fun.
For the hydrangea, we first tinted a piece of Whisper White cardstock a light shade of Pool Party with one of our new sponge brayers. Then stamped over that with Bermuda Bay before die-cutting that wonderful lacy shape. Then layered that piece over an oval (of Pool Party cardstock) to provide the sense of dimension…. just as I'd done with the pumpkin.

The stem & leaf were die-cut as well (Basic Black), and the stem adhered to the underneath oval with tiny spots from the Fine-tip glue pen. To back the leaves, we traced the shape of the die itself onto scraps of Pool Party and cut them out by hand before adhering behind the detailed black layer. The black polka-dotted layer comes from Pop of Pink Specialty Designer Series Paper, a HOT DSP package found in the still-newish annual catalog. (You can never have too many polka dots, can you? And when they're black they go with EVERYTHING!)
And here's a fuss-free tip for cutting a banner exactly the right length for your sentiment:
Stay tuned for the "fall" and "winter" examples - from our card classes earlier this month!
Product List

|

|
||||

|

|

|

|

|

|

The main Annual Catalog & Idea Book. Click to view online.

Spring Mini Catalog & Idea Book. Latest releases. Click to view online!


")

 Designer Series Paper")


