Musings on a Sunday morning

  20181103_135405

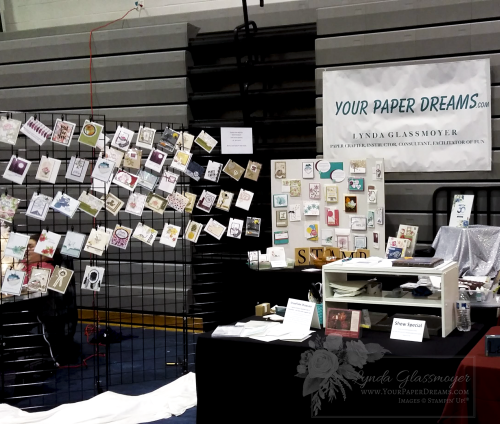
Yesterday was my 5th consecutive year hosting a booth at the Post Falls High School Craft Fair. And the first year that I really began to feel like a veteran there. You see, it's a little bit of a challenge to break into a new event such as this. I still remember breaking in to local booth events back on Whidbey Island (WA): at first a series of several single-day, small holiday-focused fairs, then the weekend-long Uniquely Whidbey Business Expo (before the event was sadly discontinued), and eventually the 4-day Island County Fair. Always feeling like the "new kid on the block" for the first several years… until eventually, you come to understand the "vibe", develop a following, and feel at ease. I guess this was that year for me. And it feels pretty cool.

While I've done several other holiday-ish events since moving here to North Idaho several years ago, this has turned out to be the only one I've participated in for these 5 consecutive years. Why? Well first off, it's technically within walking distance of my home. (Not while hauling 3 carloads of "stuff", but you know what I mean by "walking distance", lol.) And I think given it's practically in my backyard, it would feel pretty odd NOT to be represented there as a local crafter! So there's that little thing… 

But beyond that, this event is established and well-organized, with a good following and reputation. And believe me, I've been doing these gigs for enough decades to understand the critical importance of THOSE elements, too. 

As usual for this event, yesterday was SLAMMED first thing in the morning. Doors often open a few minutes ahead of schedule (which, granted, creates a bit of a challenge for those of us still tending to the final fussy details of set-up), but within only moments of the doors opening, the aisles are filled nearly to capacity and buzzing with excitement. This first wave of shoppers are serious. Almost all my financial transactions for the day occur during this first hour. It's exhilarating, and the time FLIES by! But I always feel a little bit wistful by the end of that hour that there's just not been quite enough of me to go around during the frenzy. Questions have come from all directions, and there's hardly been time to share the focus points I'd prepared, nor (especially) to actually relate to people on a human level as I'd like to. It's like "all hands on deck"… except I've only got two hands! And for that first hour, two are hardly enough.

And then the next couple of hours are a bit more relaxed and fun. There's still fairly strong interest from the crowd, and I get a chance to chat a bit more with guests, and showcase my planned featured products. Thankfully, the past couple of years I've had several people from the initial crowd drop back by during this timeframe, so I get a chance to reconnect a little more personally with them before the crowd thins to a trickle of casual strollers just past noon. (This is the point in an event of this type where we start chatting with our neighboring vendors, discovering their crafty talents and products, and sharing ideas to consider implementing in future years.)

This year I had chosen the magical Stamparatus for my demonstration product, and as I'd expected, it did indeed charm a whole LOTTA folk…. including those who at first weren't all that interested because they already owned a "M****" (which is a competing brand of stamp positioner, although retailing at a higher price for a more limited range of features). So it was really fun to show what THIS positioner could do… even though I kept it pretty basic and never even ventured into some of its fancier tricks.

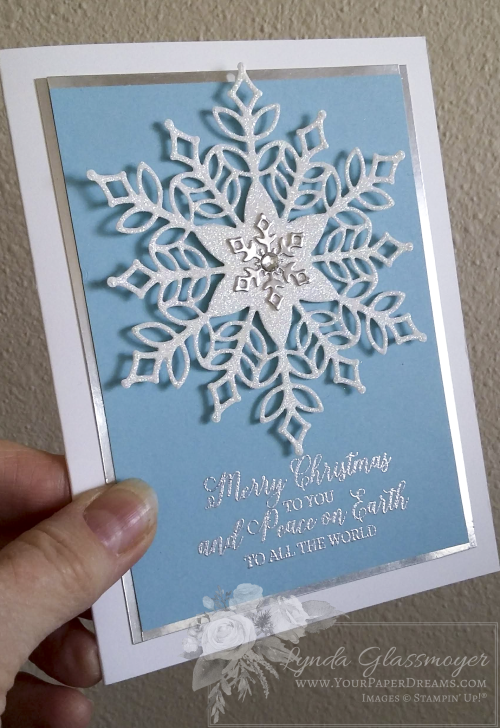
But the #1 attention-getter out of the entire day was far and away this card…

20181104_125100

…featuring elements of the Snowflake Showcase, of course. Photography doesn't do it justice, but it features such a beautiful die, simply partnered with classic blue and silver, and the pop and sparkle of glimmer paper. (BTW, this is one of the tutorials I'll send you by email around mid-November when you purchase *any* of the Snowflake Showcase products through me by then.)

Finally, I was blessed to have had my brother and my son (and even grandson) help with the muscle power of setup and take-down this year, so that went amazingly smoothly and left me far less physically exhausted than I usually am. I am SO grateful to all 3 of my guys for that!

Uh-Oh. Warning: approaching personal side jaunt for a couple of paragraphs…

Some of you may know that several months ago I decided it was high time to put some serious attention towards my health – which, due to other obligations in life, had kinda been relegated to the back burner in recent years. So the time had come that I was ready to not only shed some of the heft that had accumulated in places that I realized were particularly unhealthy, but to also make the types of changes that could address other facets of health as I plow into my "more senior" years as well. So after much studying, I headed towards low-carb, and specifically the ketogenic way of eating. Almost 3 months later, in spite of some minor bumps along the way, it's proven to be exactly what I needed. And the more I learn and observe how my body has responded, the more I grow convinced of that… and the more I yearn to learn even more. So I read, and listen to podcasts and YouTube interviews with amazing experts in the field – as often as I possibly can.   

This morning I was watching a recent video interview with Dr. Dominic D'Agostino, and as the interview was coming to a close, he was asked for his "#1 thing" that would make the biggest positive change on someone's health, and his answer evolved around relationships. "Get your relationships right", he advised. And schedule in "creative downtime" with people who matter to you. Further, he advised being passionate about something that can help or serve others.

BINGO!

That comment reminded me instantly about why I've been with Stampin' Up! for this many years! I, like so many other long-time demonstrators, came into Stampin' Up! because of the products. Because of the fun, creative outlet. But we've stayed because of the people. The tribes we've built while we've been doing this. And I *particularly* count among my "peeps" – my team members and customers. People I interact with on a daily, weekly or monthly basis. People who sit around the stamp table with me, or those who WOULD still be sitting around the stamp table with me if I hadn't moved away from them – or they away from me. People who show up to class in a rotten mood and leave with a smile on their faces. People who follow me on the web, and comment or "like" whatever I share, even when their own lives are busy and they don't need to. And those team members from across the country who participate in our online events and activities – and generously share ideas with the rest of us. These are people I've come to know personally at least at some level, and they've woven themselves into the fabric of my life… and I'd like to think it's mutual.

So back to my craft fair booth of yesterday…

Yesterday I heard several stories that, interestingly, I hadn't heard before. Stories told in different words, but with the same basic theme. From ladies who lamented that they'd sold or given away the stamp supplies they'd collected and used sometime in the past. Because NOW they were recognizing that that part of their lives had really been about more than stamps, ink and paper – it was about friendships they'd developed along the way. And now that they'd separated themselves from that activity (and those people), they realized they were seriously missing that part of their lives.

And I totally understand that.

So while I can't help them regain those exact same connections, I'd love to help them create new ones. So of course I invited them to join us at OUR monthly classes, and I hope they will.

If you're reading this and you were one who shared a similar story with me yesterday, please DO come hang with us on the 4th Tuesday of most every month (except December, which will be on the 11th). We'd love to welcome you back. Come sit around the stampin' table again and become part of our stampin' tribe!

22 years as a Stampin’ Up!® Demonstrator!

My stampiversary
Today I admit to feeling a little old. Not necessarily "old" in a bad way, but rather, "old" in an "I've sure been fortunate to have been a part of a whole lot of something special" kinda way.

You see, 22 years ago today Stampin' Up! accepted my application to become a demonstrator with their almost 8-year-old rubber stamp company. Little did I know at the time what a profound effect my decision would have on the course of the next 1/3 of my life!
Deciding to join Stampin' Up! didn't really take me very long, actually. I'd only been introduced to rubber stamp art fewer than 4 months earlier (yes, not surprisingly at a Stampin' Up! home workshop I'd been invited to), and I joined for the exact same reason most demonstrators still join today:  to get a discount on my own future orders. Back in 1996 "joining" amounted to signing an application (yes, a paper application that you had to send through the mail because there was no such thing as a Stampin' Up! website yet), and enclosing a check for $350 or so for one's "Starter Kit"…… which consisted of a pre-determined collection of stamps (some wood mount, and some "foam"; the latter of which I hated and eventually threw out without even opening or using, lol), along with a few accessories, some business supplies and a printed copy of the "Demonstrator Manual".) Contrast that to today's starter kit, where each new demonstrator gets to select up to $125-worth of current product of her own choosing, and only pays $99 plus tax!
  2018_05_09_15_13_520001

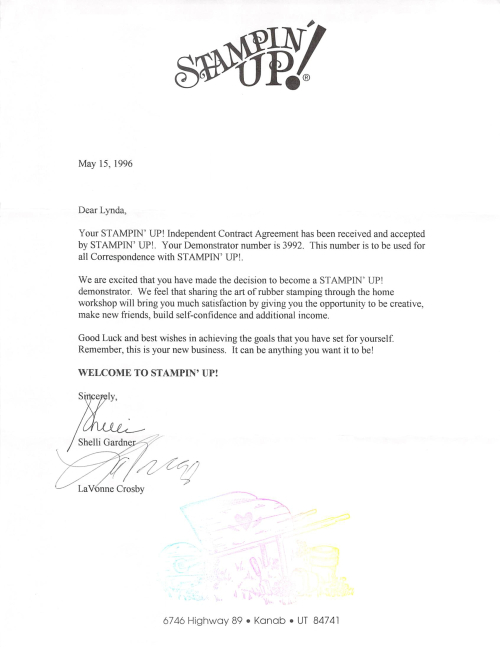
I was assigned demonstrator number 3992, meaning at the time that I was the 3,992nd demonstrator to join the company. By contrast, today's demonstrator numbering system does not have a similar meaning; the numbering system was changed up entirely quite some time ago to include many more digits in the more "modern" numbers, but I'm super thankful they allowed us "oldies" to retain our original numbers. Four digits are so much easier to remember and faster to type!

I'm also immensely grateful for how long we "oldies" have stayed with the company. While my 2nd-level upline eventually moved on, my immediate and 3rd level uplines are still active, and I think my 4th level is, as well. Lots of significant life changes among us, but we're still here!

Notice how "back in the day" my acceptance letter bore the signatures of Stampin' Up!'s co-founders: Shelli Gardner and her sister LaVonne Crosby, and it also featured an image hand-stamped with what was commonly known as a "Rainbow Pad". (When you get a chance to look at your new 2018-2019 Annual Catalog, you'll understand why I'm smiling as I mention that "Rainbow Pad".) 

Fast-forwarding through the years, those of us who've been with Stampin' Up! for most of their 30 years (come this October) have really seen a lot of changes! The first major whopper was when it was announced at our 1997 Convention that we would be going "exclusive" with our stamps and colors. You see, prior to that point Stampin' Up! carried stamp designs and supplies from a number of other rubber stamp companies; quite a different focus from the company most know today!

Since that time, Stampin' Up! has continued to be both a pioneer and leader in the rubber stamp art industry, introducing the concept of coordinating colors across inks, cardstocks, markers and other accessories, as well as multi-step stamping (we call it "2-step Stampin' ", even though there are often more than 2 images used nowadays), and ultimately coordinating stamp images and dies. There are a lot more choices in the rubber stamping market place now than there used to be, and a lot of today's companies have benefited from Stampin' Up! demonstrators having introduced the hobby to the masses, thereby paving the way for the options and tools that today's stampers appreciate.

Remember how I mentioned I joined for the discount? Well, I'll let you in on a little secret; I also joined with my quitting date already on the calendar. My brilliantly thought-out plan was to purchase $100 in product each month for 6 consecutive months and then quit because I would obviously have all the stamping supplies I would ever need. But I often admit that I made a serious mistake on the way to my quitting date; I signed up for and attended Convention within 2 months of joining. And while there, I came to understand and fall in love with Stampin' Up!'s philosophy, vision and ethics. And instead of coming home and quitting, I came home and hosted an open house that qualified me for my first promotion! Suddenly I was "in business", and here I am 22 years later….. still doing what I love, and loving what I do.

Will I be able to continue teaching stamping for another 22 years? Only time will tell, but I sure intend to hang with it as long as I'm physically able. When I think of all the people who've come into my life and blessed me with their friendship over these past 2+ decades, nearly all of them have been because of my association with Stampin' Up! in one way or another. I can't imagine ever giving that up willingly!

Carols of Christmas – Early Release

Carols of Christmas

I'm so excited about the Carols of Christmas stamp set and coordinating dies! It's an "early-release" opportunity – available a whole month before the upcoming Holiday Catalog goes live! So even though everyone other than demonstrators will have to wait until September to get their hands on most of the Holiday Catalog yumminess, THIS set of stamps and/or coordinating dies is available to purchase and work with right NOW!

And what a fabulous choice this is for an early release! Whether your design needs lean towards quick and easy, or more towards elegant and classy, "Carols of Christmas" can fill the bill. My favorite features include the fact that the stamp set has not one, but TWO large word images (if you haven't yet discovered the awesomeness of making lovely quick cards with these big words that are so popular now, you really should!), and I simply adore the die that creates an elegant border for the perfect finish on your card front!

And speaking of versatility, that same border would be perfect on a wedding card or invitation, or featured on a scrapbook page….. and of course the tree dies can serve long after the holiday season is but a memory, too.

You can choose either the "Carols of Christmas" stamp set alone (in either wood-mount or clear-mount), or the "Card Front Builder Thinlits Dies" set alone. But of course the absolute best option is to get them both as a bundle and save 10% in the process. 

 Here's a quick video peek at the stamp set and its dies:

 But wait! Would you like to save $5, $10, $15 or even more on this bundle? Then be sure to redeem the Bonus Days coupon(s) you earned in July! Simply enter the code(s) that were emailed to you after you placed your "$50-or-more" order(s) last month, and you'll get $5 off for each code! Click the image below to download instructions for redeeming at my online store, or contact me to submit your order for ya.
 
1 

Prefer to purchase stamp sets & dies individually? Here ya go! 


BTW, did you know that Stampin' Up!® demonstrators get to order their products from the upcoming Holiday Catalog a month early? And you could too, if you joined us! Contact me with any questions, or "Just do it", as they say, at: join.YourPaperDreams.com!

Sunday Smorgasbord

Well! What a whirlwind this weekend has become! So many things going on in the Stampin' Up! world that I'm really glad I was already focused in that direction and had prepped the family I'd be pretty well tied up for a couple of days. Here's a sampling of some of what's spinning in my life these days…

World Card-Making Day 2016 - FB promo

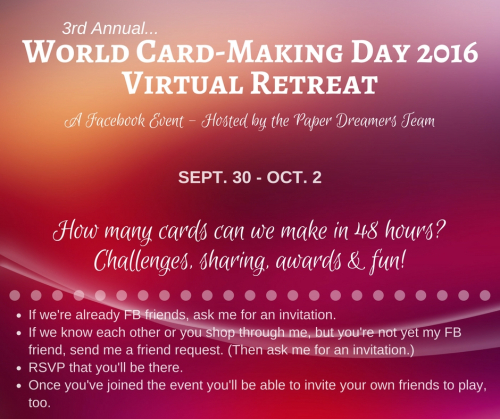
So technically, yesterday was World Card-Making Day. But this is my 3rd year hosting an online retreat in celebration of the occasion, and last year we expanded the opportunity to my entire team and their customers & friends, too.  So that runs from Friday afternoon through Sunday afternoon (the first weekend of October) – as a 48 hour long Facebook event - with the focus of everyone creating cards (between our periodic card challenges, chatter & prize patrols)….. and then we see how many cards we can make as a group during those 48 hours! I never personally get very many cards done at this event because most of my time is spent behind the curtain (that is, on the computer coordinating the technical end of it), but things are a bit quiet right now, so I'm stealing away for a few minutes to write THIS, lol.  

Actually, knowing that I wouldn't get much stamping done this particular weekend (so far I've completed a whopping 4 cards, lol) , I held my own personal card-making marathon LAST weekend instead. So although I can't count those in our weekend total, at least I can "feel" like I participated in the push. If you'd like to follow along with parts of our event, check out the Facebook hashtag #YPD-WCMD2016 , and if you attend my classes, purchase through me, or are a FB friend, there's still time to get in on the final few hours of the afternoon (Oct. 2nd)!

And to add further to the plate-juggling of this weekend, our opening day was on the final day of the Stampin' Up! year, and yesterday was the first day of the NEW Stampin' Up! year. And there's a special project some of us demonstrators are working on for tomorrow (Monday), too….. so stay tuned for that. 

But I DID get this "first of the month" task done:

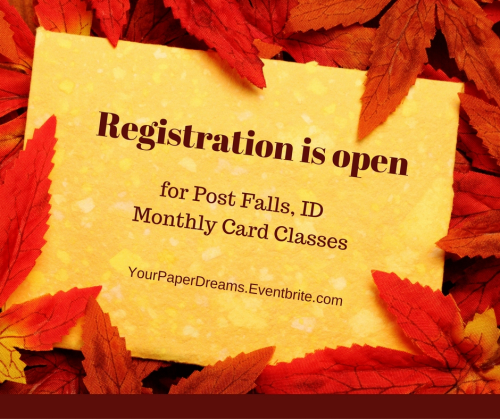
Registration is open - fall


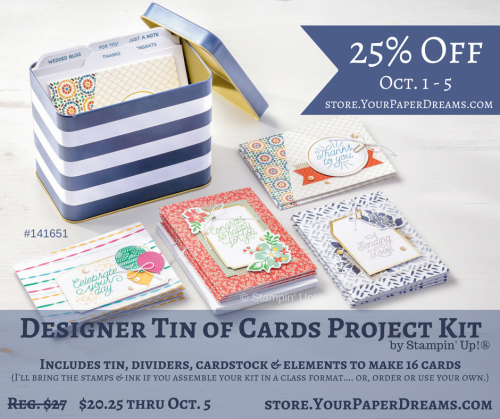
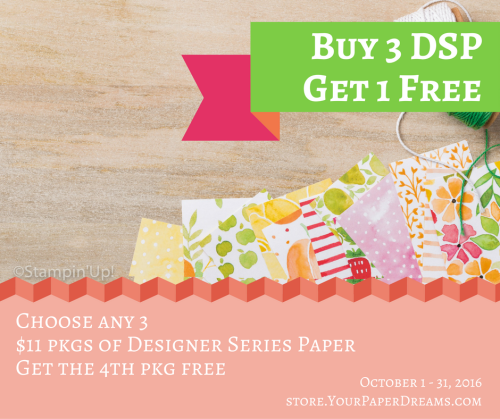
And Stampin' Up! is running a couple of specials I urge you to check out.

(The first one is only available for a few short days, so be quick!)

Designer Tin of Cards Sale

Click here to view at my online store.


Buy 3, Get 1 free

Click here to see the specific paper sets included in this offer.


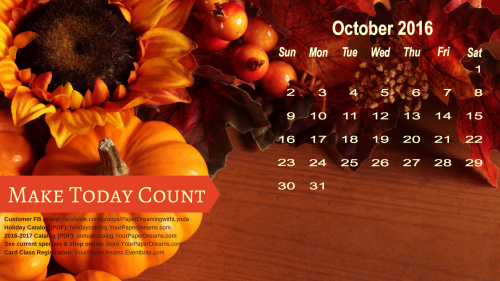
And if you use my desktop wallpaper calendars on your computer, here's the October one:


image from stamptherock.typepad.com
Here are general instructions for setting this up as your desktop wallpaper – on a Windows 10 computer. (You can probably use it on an older or different system, too, but you'll have to figure that one out yourself. Or ask a kid to help, lol.)  

INSTALLATION

This quick and simple installation process works for *my* computer and dual-monitor set-up (Windows 10), but it may or may not work for yours:

  1. Click here (or click the image) to access the high-resolution image. (Please do NOT attempt to install the low-resolution image shown above.)
  2. Download/Save the image to your computer.
  3. Follow your usual process for selecting & setting up an image for your desktop background/wallpaper. (On my computer I only have to right-click the saved image and select "Set as desktop background".)

And now I'm headed back to our #YPD-WCMD2016 Virtual Retreat for the final hours of fun! Make today a great one!


A big ol’ pile of notecards

Just finished making a big pile of these notecards, and I simply can't get enough of this Butterfly Basics! I am going to be SOOOOO sad if that stamp set doesn't make it into the upcoming catalog! Thankfully, we demonstrators will get to see the new catalog early tomorrow morning, so I don't have too many more hours to speculate and worry, lol.

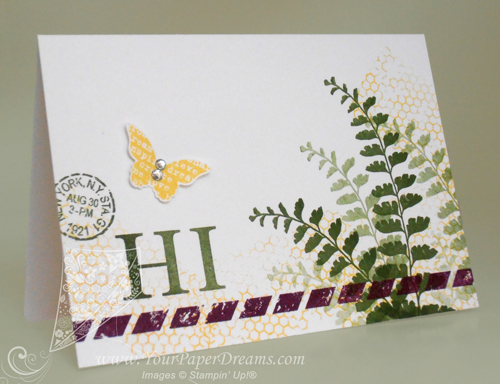
Butterfly-Basics-notecard----web

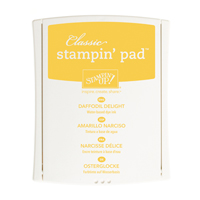
As I was selecting colors for this design I knew I would use a green, of course, and I wanted 2 other bright colors as well. So I started by pulling out Mossy Meadow for my green, and then grabbed that super-yummy Blackberry Bliss as long as I was in the 2014-2016 In Colors section anyway. Daffodil Delight, which was already on my work table, seemed handy for the remaining 3rd color.

When I work with 3 different colors I usually think in terms of "large", "medium" and "small" volumes of the colors. So I decided for this card my "large" volume would be  Mossy Meadow, "medium" would be Daffodil Delight, and the splash of "small" would be done in Blackberry Bliss.

I started by playing around a bit with 1st, 2nd, 3rd and 4th generation stamping for the fern images….. working to get the angles (and rhythm) arranged in a way that would be quick and effective for the couple dozen I was just about to crank out. So that part went down first – on the entire pile of notecards. (Actually, when I'm cranking out a big bunch of cards just alike, I prefer to work assembly-line style, doing the same step on each card. That gets me in a rhythm and eliminates putting tools down and picking them back up again. Because every time you open or close an ink pad, or pick up or put down a stamp, time is ticking by.)

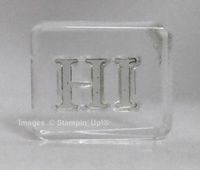
P4290196---webNext came that whimsical and unexpected stripe of Blackberry Bliss parallel to the bottom edge, and then a grouping of 3 images to help balance the weight of the dark ferns. The first part of that grouping, the word "HI", is from Sophisticated Serifs, another Occasions Catalog stamp set I surely hope also transitions into the upcoming catalog because I've found a lot of uses for THAT, too!

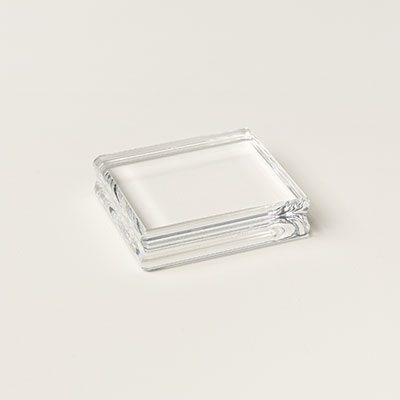
To get the letters even with one other I started by laying them down on the grid surface of my paper trimmer, the same way I demonstrated here. Once they seemed properly aligned, I just set my acrylic block straight down on top of them (with its lower edge also aligned with the grid) to pick them up as a unit. Of course I tested them on my grid paper before proceeding, and ended up adjusting the "I" slightly before calling it perfect. But from there on I was able to stamp the two letters together as one image. For placement, I just eye-balled it and aimed for about 1/3 of the way up, and 1/3 of the way in from the left. (Rule of thirds.) Figured that was generally close enough to be acceptable.

The remaining two images of the grouping of 3 also came from Butterfly Basics, with the butterfly being stamped onto scrap Whisper White cardstock and punched out with the Bitty Butterfly punch. A few random thumps of Daffodil Delight applied with that fascinating background stamp from the same set pulled the images together, and a couple of rhinestones on the butterfly finished it all off.

NOW to get these addressed and into the mail!

Product List

April’s swap challenge – under 80-bucks

$80 products logo - tipped leftOne of perks I love about being a demonstrator is participating in the fun events that both Stampin' Up! (the company) and our various teams sponsor. One of the events my team (Paper Dreamers) holds is a monthly card swap – usually centered around a specific theme. For this month's Card Swap I challenged everyone to create a card that could be made with $80 or less in product (not counting s/h & tax). Something a total novice stamper could make from start to finish.

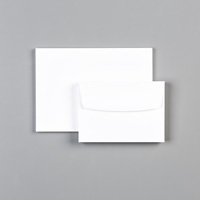
Ok, so I'll bet you're already thinking, "So that's not too tough", right? You just throw in a small set of stamps, some cardstock and ink, and you could whip something up for half of that, huh? Well, noooo, not exactly….. because not only did we have to choose a versatile stamp set, but also had to consider that a new stamper would have to purchase any required tools and accessories, too. (Um, and oh yeah, don't forget that one-time purchase of acrylic blocks, if necessary – and gotta include envelopes!) Ok, so because of those restrictions we WERE permitted to assume use of ordinary household supplies such as basic scissors, pencils and rulers. But all "craft" type stuff had to come from Stampin' Up! and be included in the $80 budget.

As I expected, this turned out to be quite the challenge for those of us accustomed to just pulling out whatever we have in our craft rooms. In fact, it may have been the toughest swap challenge I've ever proposed. (Based on the numbers of questions that arose while everyone was working on their designs.) But in the end, our swappers came through with flying colors and turned in amazing results! I'm super, duper proud of those who accepted this challenge!

Now personally, I got kind of excited about the whole concept and didn't stop at just 1 design; in fact, as long as I was in that $80 mode, I made 3. (But then if you know me at all, you already assumed that, huh?) And then once the swap cards arrived I put together a display of several of them so you'll be able to see that at my next gig.

P4200153---500---copyright


Here's one similar to what I included in the swap; it squeaks in at just under the limit – at $79.60 in product – and yields 20 cards with envelopes.

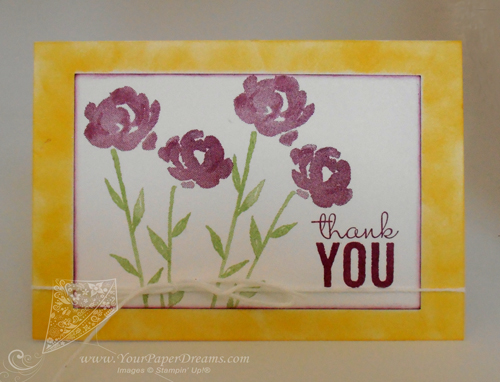
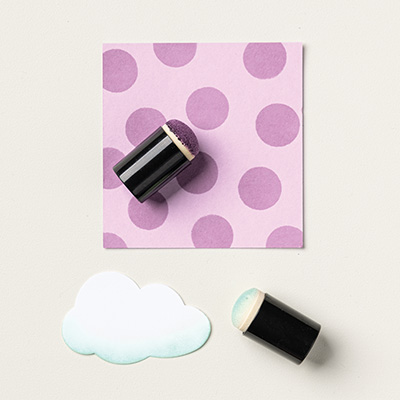
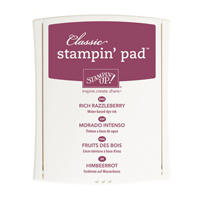
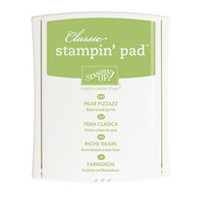
For my design I knew I really wanted to simulate the effect of layers of cardstock, but the budget wasn't up for allowing multiple colors of real cardstock. So I called on one of my "go to" techniques: adding color to white cardstock with a dauber or sponge. (In this case, I used 2 of the 5 daubers in a package: one for Daffodil Delight and the other for Rich Razzleberry.)

And I do love the versatility of that Painted Petals stamp set, so naturally the next card in this $80 series featured that, too.

And hey! Before I close out today, just wanted to remind y'all that the list of retiring products is due out tomorrow (Tuesday, April 21). So that means that TODAY is the best day to grab those "gotta have" items that may still be on your wish list, because once they get published to "THE LIST", the most popular ones are prone to selling out in a flash! So take a few moments today to review your wish list (especially regarding ribbons & trims, punches, Project Life by Stampin' Up!® and anything in the 2013 – 2015 In-Colors) and seriously consider ordering them today!

Product List